Have a good time everyone. Today I will show you how to put a password on a flash drive using the built-in capabilities of Windows. If you have Seven Ultimate or Eight PRO installed, then this function called BitLocker, you have.
I do not guarantee the presence of this program on other versions of Windows. It’s definitely not on Windows Starter!
Get straight to the point!
Insert the USB flash drive and immediately open the Computer section.
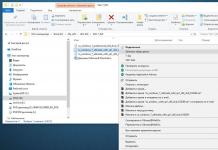
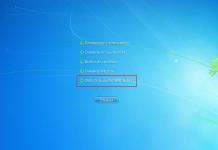
We find where our USB device will be displayed and right-click on it. In the context menu, select Enable BitLocker.

Check the box Use password and enter it twice. The password must contain both letters and numbers. After installation, click Next.

In the next window we are asked Save recovery key to file. You will need it just in case you forget your password. I recommend choosing the second option Save to file.

Then you need to specify a location on your computer where you can save this key. In the future, the recovery key needs to be hidden in a safe place (if you don’t want someone to hack the password for your flash drive).

When the key is saved, we will be transferred back, where the Next button will already be active.

At the next step, you need to indicate which part of the disk you want to encrypt; I recommend choosing the first option. In general, everything there is in Russian, so you can read it.

Now you can start encryption. To put a password on the flash drive all you have to do is press the button Start encryption.

How long will it take? Depends on the size of the flash drive and the amount of occupied space. My 16 GB USB drive was encrypted for about half an hour.


In the same way, you can put a password on the disk, but as you probably already understood, setting the password will take many hours. If I waited a long time with a 16 GB flash drive, I can imagine what will happen with a 500 GB hard drive. Well, you understand :)

Although I have a small plan for how you can put a password on a disk with important data and at the same time reduce the encryption time.
1. You need to create a separate partition on your hard drive with a capacity of about 15-30 gigabytes. I described how this is done in the lesson: .
2. Move all important files that need to be password protected to a new partition.
3. Put a password on the disk using the method described in this lesson.
We created a small disk, right? This means that encryption will not take many hours. If your partition is 30 gigabytes, then accordingly password protect the disk you can do it in 2-3 hours.
I wish you luck with setting passwords on flash drives and disks.
The use of flash media for storing information is becoming increasingly popular, because they have a number of undeniable advantages over outdated CD and DVD drives. The flash drive does not take up much space, is easy to use and has a fairly large amount of memory. That is why the question: how to put a password on a flash drive is relevant these days. After all, it can store personal data, important documents and, in general, any other information that you would not want to show to other people.
In this article I will tell you how to set a password on a flash drive using the built-in BitLocker program, or using the free USB Safeguard program.
BitLocker
You can set a password on a flash drive using built-in Windows tools. The BitLocker program is used for this. Go to the “My Computer” folder and right-click on the flash drive on which we will set a password. Now in the context menu select the item "Enable BitLocker".
If you didn’t find this item in the context menu, it doesn’t matter. Go to “Start” - "Control Panel".

In the upper right corner, select “View” - “Category”. Then follow the link "System and safety".

In the next list, select the item "BitLocker Drive Encryption".

Select the disk partition that corresponds to the flash drive, I have it (G:), and click on the button opposite it "Enable BitLocker".

In the window that opens, put a tick next to the item "Use a password to unlock the drive". Next, enter the created password, the length of which must be at least 8 characters, otherwise the program will not allow you to continue, and click “Next”.

In the next window, the program offers to save the disk recovery key, this is in case you forget the password. Select an item "Save the recovery key to a file" and select a location on the computer where it will be stored. It’s better if this is the folder where people go least often. Click "Next".


Do not remove the flash drive during encryption. My 1GB flash drive was half full and took 3 minutes to encrypt. Therefore, if your flash drive is larger, be prepared that the process will take a little time.

Now, the flash drive is password protected. Every time you plug it into your computer, a golden padlock will appear next to the disk. We open the flash drive and see that the BitLocker program asks for a password. Enter it and click "Unblock". When the flash drive is unlocked, a silver padlock will appear in the My Computer folder next to it.

If you want to delete or change the password on a flash drive, right-click on it and select from the context menu "BitLocker Management". The following window appears in which you can perform several necessary actions.

USB Safeguard
The USB Safeguard program allows you to set a password on a flash drive. Its clear functionality is suitable for both advanced and novice users. You can download USB Safeguard from the official website: http://www.usbsafeguard.com/download.html. You will be offered two versions to download. The first one is free, suitable for those who have a flash drive up to 2 GB. The second one is paid and allows you to set a password on a flash drive whose volume does not exceed 16 terabytes.
I will install the first - free - version. I click on the “Download now” button and save the installation file.

Now copy the downloaded installation file to the root of the flash drive and run it from the flash drive. The installation of the program is carried out as usual: constantly click “Next”, then “Finish”. Considering that most flash drives are in FAT format, during the installation process the program will offer to format it in NTFS - we agree. Please note that formatting will delete all files from the flash drive, so it is better to copy everything to your computer in advance.


In the next window you need to enter the password for the flash drive. We come up with it, enter it, confirm, in the last field you can enter a hint, you will see it if you forget the password. Click "OK".

Now remove the flash drive and insert it back into the computer. Open it and run the file “USBSafeguard”.


That is, the program creates another protected virtual disk Z: on the flash drive. The capacity of this disk is the same as the capacity of a flash drive. When writing a file to the Z: drive, the space on the flash drive will also decrease.
Files that you do not want to protect access to, simply copy directly to the flash drive: in my case it is the G: drive. If you want the file to be protected, copy it to the Z: drive.

Thus, when you connect the flash drive to your computer, you will have access to open files on it. But to open password-protected files, you will need to launch the USBSafeguard program and enter the password. Only after this you will have access to the protected Z: drive.
Now you can put a password on the flash drive. Just choose one of the described methods and I’m sure everything will work out and your personal files and documents will be protected.
Flash drives are convenient, small, portable and can be read on any device with a USB port. These features make them an ideal means of transferring information from one computer to another.
However, due to their portability, they can be easily lost. Therefore, confidential files recorded on a USB drive must be password protected.
Unfortunately, you don’t have the option to simply password-protect the entire flash drive, like you do on your Facebook account, protecting it with a password.
Special encryption programs are what will protect your information from prying eyes.
If you don't want to spend money on a dedicated secure flash drive with hardware data encryption, you can use free apps to achieve the same level of protection.
In this article, we will talk about some of the simplest ways to protect files and folders on your removable media.
Easily save files with a password
As mentioned above, you can't just go ahead and protect your flash drive with a password without using encryption. However, if you don’t have time or you simply don’t want to deal with the long process of encrypting folders, and you need a quick result to protect just a few files, then you can secure these files by setting passwords on them and then writing them to a flash drive.
Many programs, including Word and Excel, allow you to protect files with a password. For example, in Word, this can be done by going to the “ ” tab in the open document, which is located at Tools > Options. After this, you can enter the password and finally save the document. Just don't forget the password for it.
Create encrypted and password-protected partitions using Rohos Mini Drive
Many programs can encrypt and password protect your data. However, most of them require administrator rights to function fully on any computer. Unfortunately, this also applies to some of the best encryption programs (example: TrueCrypt). Such tools cannot be used if you need to transfer data to another computer on which you do not have administrator rights.
Rohos Mini Drive is exactly the tool that will work if you do not have administrator rights. The free version of the program can create a hidden, encrypted or password-protected partition of up to 2 GB on a USB drive. The tool uses automatic encryption based on the AES algorithm with a 256-bit key. Thanks to the portable Rohos Mini Drive, which installs directly onto a portable flash drive, unencrypted data will be available on the local system. All encrypted data can be accessed from any other computer.

Once you have created a password protected and encrypted compartment on your external drive, you can open it by clicking on the Rohos Mini.exe icon from the root folder. After entering the password, your Rohos disk will be mounted and accessible through the computer, that is, you will be able to use all disks and partitions connected to the system. To close all Rohos sections, you need to right-click the Rohos program icon in the notification area and select “Disable”.

Download the program from the official website: Rohos Mini Drive
Protect your flash drive with USB Safeguard
Like Rohos Mini Drive, USB Safeguard is a portable application that works directly with the USB drive and therefore does not require administrator rights on the local computer. Encryption uses the AES algorithm with 256-bit encryption. In the free version, disk size is limited to 2 GB.
Download usbsafeguard.exe and copy it to a USB drive. Run it from your flash drive and enter the password to lock the drive. To lock, run the file again and enter the password. The locking procedure must be repeated every time you want to lock the drive, so try to remember whether the drive is in locked or unlocked status. By the way, this has its own advantage: you have the opportunity to change the password every time you use USB Safeguard.

Need to download music from VK?
The era of laser discs is gradually becoming history, because they have been almost completely replaced by portable storage devices - flash drives and memory cards. Compared to the former, they have many more advantages than disadvantages: firstly, they are much more compact; secondly, they contain much more information, all memory capacity can reach hundreds of gigabytes; thirdly, they are reusable, unlike the same disks on which information can be written only once; and fourthly, they are much more reliable than most storage media. Experiments were conducted during which flash drives were subjected to various tests. The result is impressive - they are almost impossible to spoil.
It is logical that many people use this storage medium as a storage for important documents and files. You can carry a flash drive with you all the time; it does not take up much space. But the most important thing is that the data on it can be reliably protected. How? Different users solve this issue in their own way: they place important documents in an archive and put a password on it, some encrypt a separate folder, and some completely protect the portable drive with a password. One of the simplest options is to set an access password, without knowing which it will be completely impossible to read the information stored on it.
In this material we will look at how to put a password on a flash drive. We will find out all the possible options: built-in Windows capabilities, free special utilities, as well as special drive models.
Windows Standard Tools
If you use Windows 7 or older, you don't have to worry about using third-party programs at all, because you can take advantage of the excellent built-in BitLocker encryption mode. How can he help you?

- Insert the flash drive into the USB connector, then go to Windows Explorer and find your drive in the list of drives and devices.
- Right-click on it and select “Enable BitLocker.”
- The encryption wizard will open and prompt you to enter a security password. Check the appropriate box and then enter the combination. Choose a strong password, at least 10 characters long, containing numbers, letters, spaces, as well as symbols.
- The next step will ask you to create a recovery key. It can be associated with a Microsoft account, saved to a text file, or printed. It is needed so that you can access your files even if you forget your password.
- After this, specify the type of encryption: the entire flash drive or only the part on which the files are located. They differ only in the speed of operation.
- Depending on the size of the flash drive and the power of the computer, after a maximum of a few minutes you will see a system notification about the end of encryption. Click the “Close” button, then remove and then reinsert the drive into the computer connector.
- Pay attention to how the flash drive is displayed in the list of disks - there will be an image of a lock on it. Double-click on the disk and then enter your password. Until you enter it, you will not be able to view any information about the drive at all.
Using special utilities
If you are using an older Windows XP, or you are simply not satisfied with the standard BitLocker encryption program, use one of the free programs presented below. Their essence is simple - encrypt content either an entire flash drive, or a separate file, or folder. Let's take a look at the best encryption utilities.
Rohos Mini Drive
The most popular program for encrypting external drives or any data on a computer's hard drive. The work is based on the creation of a protected partition, encrypted with the incredibly reliable AES algorithm with a 256-bit key. The program is completely free, but will have some limitations. For example, the maximum partition size is 8 GB. In most cases, this is completely enough, but if it’s not enough for you, purchase the paid version. How to use this software product?

- Go to the developer's website using this link http://www.rohos.ru/products/rohos-mini-drive/ to download the installation file. There will be three utilities presented on the page; you need to download the first one from the list.
- Next, you will need to install the utility on your computer’s hard drive, then insert the USB flash drive and run it.
- There are 4 buttons available in the program menu: “Encrypt USB drive”, “Encrypt application”, “Customize options” and “Create a backup copy”. Click "Encrypt USB Drive".
- In the window that opens, you need to enter your password, and you can also change the drive letter, file system, and size of the encrypted partition. Come up with a reliable combination, but one that you won’t quickly forget.
- After some time, the system will display a virtual disk, and in the root of the memory card you will be able to see two files: Rohos Mini.exe and Rohos Mini Drive (Portable).exe. They are necessary in order to be able to access the encrypted partition on any computer.
- Now, to put the information into the encrypted partition, copy the necessary files to a virtual disk that appears in Explorer as "Hidden Disk".
Everything is implemented very conveniently, since the files will be accessible only if the encrypted partition is connected and the access password is entered. From the main menu of the program, you can disable and enable the section as needed, and if you no longer need it, delete it altogether. To quickly access the utility, go to the system tray and click on the icon in the form of a yellow rectangle with a padlock.
USB Safeguard
An easy and very simple program for setting a password on a flash drive or memory card. It is distributed in two versions: free and paid. The free version will work with storage media with a maximum capacity of 4 gigabytes, while the paid version supports any drive with a capacity of up to 16 terabytes. How to put a password on a flash drive using the utility? Follow these steps:

- Go to the official website http://www.usbsafeguard.com/download.html and download the installation file for the free or paid version.
- Copy the installation file to the root of the flash drive or memory card and run it by double clicking the mouse.
- First of all, the program will offer format the drive in NTFS format. Please remember that this will delete all data. If the flash drive is already formatted in NTFS, check the Don’t format box.
- After formatting is completed, click the Finish button, and also agree to the terms of the license agreement by clicking the I agree button.
- In the next step, you need to enter a created password of at least 6 characters and confirm it.
- To access the encrypted drive, run the USBSafeguard.exe file located in the root of the flash drive, enter the password you created earlier, and click the Open button.
In the future, you will only be able to read encrypted files after entering the password. You can burn files by going to virtual disk Z in Explorer.
Hardware protection from the manufacturer
There are drive models with a built-in protection system. Such accessories are not cheap, but if you regularly need to store secret information, you can spend the money once. Their special feature is the presence of a numeric keypad for entering the unlock code, which will need to be set upon the very first use. This option allows you to very reliably protect secret information, because it is encrypted in real time using the built-in processor, and due to the absence of special software, the chance of keyboard interception or hacking is negated.
conclusions
In the modern world, the issue of information security is very important. Therefore, if you need to store encrypted information on a flash drive, use one of the options described above. But which method might be the most suitable?
BitLocker. The simplest one, because it does not require installation or downloading of special utilities. One of the disadvantages is that it only supports Windows, so you are unlikely to be able to view encrypted information on other operating systems. In addition, the function is implemented only on maximum versions of Windows.
Third party programs. A good option in the absence of BitLocker, but you may be faced with the need to purchase a paid version of the program, since free ones may have a number of limitations. As with the previous option, there may be a problem accessing files on computers with an operating system other than Windows.
Hardware protection from the manufacturer. The most expensive, but at the same time the most reliable option, suitable even for employees of large companies with access to secret data. It can only be hacked by physical force on the owner of the device.
Which option did you choose for yourself? Tell us about it in the comments.


