Every home PC user should have a bootable USB flash drive with a Windows installation kit. With its help, you can restore a suddenly broken system or completely reinstall it. You can write to a flash drive not only a bootable image of Windows, but also any other popular OS from the Linux family. Below we will tell you how to burn a bootable USB flash drive using ultraiso and where to download the system images themselves.
Flash drive or CD?
Of course, it is much easier to burn the system onto a laser disk, and such media will work 100% on any PC with a disk drive installed. To record such discs, Windows even has a built-in disc burning function.
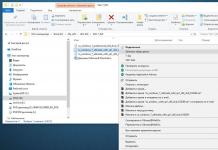
To do this, after inserting the disc into the drive, select the type of use of the disc “With a CD/DVD player.” After that, in Explorer, select the desired ISO image on the HDD and right-click on it. In the context menu you need to select “Burn disk image”.
 If this line is not in the context menu, then you have some kind of utility installed for working with images, for example, Daemon Tool, and it has replaced this entry. To put everything back in place, you will have to remove Daemon Tool from the system. After that everything should be seen. In the window that opens, select the laser disk drive and click OK. The process of mounting the image and burning the DVD will begin. If this was an installation image of the system, then this disk will be recorded as bootable.
But what if your PC does not have a DVD writer or no drive at all? This situation is a common occurrence for modern laptops, which do not install a drive for the sake of a thin case. There is only one way out - use a USB flash drive as bootable media. But, in this case, you will not find utilities built into the system and you will have to use a third-party tool, for example, UltraISO.
The program is paid, but it can be used in test mode for 1 month. This should be enough to record the required number of images. Below we will tell you about ultraiso and how to create a bootable USB flash drive.
Burning a Windows 10 installation image
To be fair, it is worth noting that Microsoft tried to save the Windows 10 user from the problems of writing an image to a flash drive and loading it themselves, leaving all the hassle to a special tool Media Creation Tool, which you can download from the official download page of this OS.
 After launching it, you will be asked to select the desired image and installation type - we need the option “Create installation media (USB ...)”. After this, the image will be automatically downloaded to your PC and deployed to the selected drive. This flash drive contains the latest version of the OS, and it will be bootable.
But if you need to install a specific ISO image of the system, then this option will not work. In this case, it's time to use the UltraISO program. Install it on your PC and select the “Trial period” option.
 How to create a bootable USB flash drive in ultraiso? After that, go to the folder where you have the system image and select it in the program. Its contents will be displayed in the upper right area of the program. You can download the official Windows 7 system image from the Microsoft website, but you will need a license key for this. Or you can use a proven tool Windows ISO Downloader and use it to download any desired official Windows image.
 The program does not require installation and allows you to download images of office packages. After launching, you just need to select the OS number and indicate the latest version in the drop-down list.
 Let's return to the actual question of how to make a bootable USB flash drive using ultraiso. Now that the UltraISO program has already received information about the image being written, you need to indicate on what media it needs to be deployed. This will not just be unpacking, but recording with the creation of a boot area on the flash drive itself.
 Go to “Boot” in the top menu and select “Burn hard disk image.” Let us remind you that a regular system image requires a flash drive of up to 4 GB, and the multiboot version will require more capacious media - up to 8 GB.
Specify the flash drive to burn the image. Note that to create a bootable USB drive, it must be formatted in FAT32. This can be done in advance in Windows, or directly in the program menu by clicking on the “Format” button. After that, click on the “Record” button. The process of creating a bootable USB flash drive will begin, which will last approximately 15 minutes, depending on the speed characteristics of your USB drive.
 Is it possible to use a USB 3.0 flash drive for these purposes? Yes, it is certainly possible and even necessary. This will significantly speed up installation of the system from the media. Above we told you how to make a multiboot ultraiso flash drive.
 But in any case, after creating such media, it is worth checking it for functionality, namely, try to boot from it on a computer or laptop. To do this, when starting the PC, you need to press the F12 key (this menu can be called up by different keys for different manufacturers) to select bootable media.
 As we noted above, this workshop on writing an ISO image to a flash drive can be used for any OS, including Linux. For example, you can download a fresh image of such a system from
The need to install the Windows XP operating system from a flash drive using the UltraISO utility may arise if you are a system administrator and purchase equipment without a pre-installed system. Or you encountered a problem with the software during your work and the system boots with a stop error - the so-called. “blue screen of death”, or the system regularly displays error messages, refuses to work, for no apparent reason, peripheral equipment, decreased performance, etc. reasons. In all these cases, it is very convenient to have an image of the system.
Creating a disk image
Can . It is paid, but if the size of the created image is no more than 300MB, then you can use the trial version. The utility can work with different types of files, with images created in other programs. You can also get bootable external media using UltraISO. Including a USB flash drive. Installing an operating system from a flash drive is often more convenient than from disks, since it is less susceptible to mechanical damage, has a significantly smaller size, and is resistant to repeated use. In addition, not all PCs are equipped with CD or DVD drives.
An ISO image can be created from an existing Windows XP distribution.
The UltraISO program must be run as an administrator.
In the “Tools” menu, select “Create CD image..” in the drop-down window, set the necessary parameters and specify the location to save the image.

Creating a bootable USB flash drive in UltraISO
Now, using this image you can. In the UltraIso program, copy the files of the created image to the folder area of the new project, configure (if necessary) the project properties using the program's File menu and save the project. Then follow the steps to create a bootable drive. In the “Boot” menu, select “Burn hard disk image”:

And in the window that appears, in the “recording method” item - USB-HDD or USB-HDD+v2, USB-HDD+: 
If necessary, format the flash drive and burn the image. Recording time will depend on the speed of your computer.
Installing Windows XP from a bootable USB flash drive
To start the WINDOWS XP installation process, you need to work with the system BIOS - set the Boot section to boot the computer from usb.

In addition, you need to pay attention to the Configure SATA As parameter. If there is no operating mode for the IDE SATA controller, it is necessary to integrate the AHCI SATA controller drivers into the distribution, otherwise we will receive an error during installation. If both modes are present, then these drivers can be integrated after installing the Windows xp operating system. (This work may be necessary because modern computers use Sata hard drive controllers with AHCI technology, which was developed later than the OS Windows xp).
The process of installing Windows xp from a flash drive
The next step is to insert the USB flash drive into the usb 2.0 drive, because Windows xp does not support the usb 3.0 port. Reboot the computer. The window should show Windows XP Setup in 10 seconds. there is an automatic transition to the next window (First part of Windows XP Professional from partition 0), in which you also don’t need to change anything, just wait 10 seconds. and the Windows xp installation process will begin.

The difference between installing from a USB flash drive is the speed of operation. It happens faster from a flash drive. Otherwise, everything is the same as when using the Windows xp installation disk. You must follow the instructions that appear during the installation process. After installation is complete and the computer is restarted, we install device drivers, check for operating system updates, and install the necessary programs for operation.
Configuring system parameters:
- time;
- date;
- regional standards (if you did not install them when installing the system).

We configure network parameters and install peripheral equipment. In BIOS we return booting from the hard drive. The operating system is considered installed. Other procedures are performed as needed.
In today’s article I would like to address the issue of correctly creating a bootable flash drive from which you can install Windows. In general, there are quite a lot of ways to create it, but I will describe the most universal one, thanks to which you can install any OS: Windows XP, 7, 8, 8.1.
And so, perhaps, let's begin...
What do you need to create a bootable USB flash drive?
1) UltraISO program
Of. website: www.ezbsystems.com/ultraiso/
You can download the program from the official website; the unregistered free version is more than enough.
The program allows you to burn discs and flash drives from ISO images, edit these images, in general, a complete set that can come in handy. I recommend that you have it in your set of required programs to install.
2) Installation disk image with the Windows OS you need
You can make this image yourself in the same UltraISO, or download it from some popular torrent tracker.
Important: the image must be created (downloaded) in ISO format. It's easier and faster to work with.
3) Clean flash drive
You will need a flash drive with a capacity of 1-2 GB (for Windows XP), and 4-8 GB (for Windows 7, 8).
When all this is available, you can start creating.
Creating a bootable USB flash drive
1) After launching the UltraISO program, click on “file/open...” and indicate the location of our ISO file (installation disk image with the OS). By the way, to open the image, you can use the hotkeys Cntrl+O.

2) If the image was successfully opened (you will see file folders in the left column), you can start recording. Insert the flash drive into the USB connector (copy all the necessary files from it first) and click the function of recording a hard disk image. See screenshot below.

3) The main window will open in front of us, in which the basic parameters are set. Let's list them in order:
— Disk Drive: in this field, select the desired flash drive on which you will record the image;
— File image: this field indicates the location of the open image for recording (the one we opened in the very first step);
— Hide Boot Partition — select “no” (we won’t hide anything).
After setting the parameters, click on the “record” button.

If the flash drive has not been previously cleaned, the UltraISO program will warn you that all information on the media will be destroyed. We agree if everything was copied in advance.

After some time, the flash drive should be ready. On average, the process takes about 3-5 minutes. Mainly depends on the size of your image being written to the flash drive.
How to boot into Bios from a bootable USB flash drive.
You created a flash drive, inserted it into USB, rebooted your computer in hopes of starting Windows installation, but the same old operating system loaded... What should you do?
You need to go into Bios and configure the settings and boot order. Those. It is possible that the computer does not even look for boot records on your flash drive, but immediately boots from the hard drive. Let's fix this now.
When the computer boots, pay attention to the very first window that appears after turning on. It usually always indicates a button to enter the Bios settings (most often it is the Delete or F2 button).

For example, in the screenshot below, we need to move the last line (where USB-HDD appears) to the first place so that the computer first starts searching for boot data from the flash drive. You can move the hard drive (IDE HDD) to the second place.

Then save the settings (F10 button - Save and Exit (in the screenshot above)) and restart the computer. If the flash drive was inserted into the USB, the OS should start loading and installing from it.
That's all about creating a bootable flash drive. I hope all typical questions were considered when recording it. All the best to everyone.
To install Windows, you need either a bootable disk with a distribution kit or a bootable flash drive. Flash drives have been very popular and convenient lately, so it makes more sense to boot from them.
There are many methods and applications for creating bootable USB flash drives. The easiest way to do this is with the Ultraiso program.
This is a very functional and at the same time easy to use software tool.. For it to function, you must first complete the installation by downloading the program distribution kit, and also prepare an operating system image.
Why make an installation flash drive?
Often, during the operation of the operating system, unforeseen situations occur, as a result of which the operating system either does not load at all or operates with critical failures. It is impossible to completely protect yourself from such situations, so you need to know how to behave.
In the best case, operating system problems can be fixed through the built-in Windows recovery function, which naturally needs to be launched if this option is present.
In a situation where this is not possible, you should try to boot through the installation disk or installation flash drive.
An extreme situation that occurs when there is no backup copy of the operating system and user data involves reinstalling it. Based on this, you always need to have an OS image. It can be used for a new installation, restoring an old OS, or reinstalling it.
In most situations, the Windows distribution is saved on a DVD. But the likelihood of data loss on a DVD disc is significant due to the fact that it is subject to physical impacts. After all, just one small scratch can render the disk inoperative.
A flash drive does not have this drawback, so it is more advisable to save the operating system on it. In this case, the process of installing Windows from a USB drive is similar to the installation process from a DVD. An additional advantage of a flash drive over a DVD is its more compact size.
We will need
To create a bootable USB drive, in addition to the data carrier itself, you will need an operating system image and a specialized program with similar functionality. There are many such programs, but we will look at the UltraISO utility, which must first be downloaded and installed on your hard drive.
It is designed specifically for working with ISO images and recording them on storage media; it allows you to make bootable disks and flash drives.

The undoubted advantage of the utility in question is its friendly Russian-language interface.

In addition to generating and recording image files, it also allows you to make changes to disk images. Its important feature, which is of great value, is the ability to create bootable media - disks and flash drives. In addition to this, the utility is capable of converting image files to ISO format if the existing OS disk image is saved in a different format.
A certain disadvantage of this utility is that it is paid, but there is a trial period for free use. You can use a version of the UltraISO program free of charge with certain restrictions.
It is important to know that all information from the flash drive must be saved to another safe place, since all data will be destroyed when creating the installation flash drive.
Video: bootable USB flash drive using Ultraiso
Situations often occur when the operating system image is missing. The solution to this problem is very trivial. It can be created either using a Windows installation disk, or through specialized programs, of which there are a great many, some of which are completely free.
The sequence of actions is as follows:
- you need to run the UltraISO utility as a user with administrator rights;

- in the utility window, select “Tools - Create OS image”;


- Next, you should confirm your choice by clicking the “Make” button.

As a result, the image recording process starts, where upon completion of recording the program will offer to open the image. It is recommended to refuse this action.
Create a bootable USB flash drive using UltraISO
Let's look at the sequence of steps to create a bootable Windows 8 USB flash drive from an ISO image. Bootable flash drives with previous operating systems are created similarly without any visible differences.
Algorithm:
- you should run the UltraISO utility as a user with workstation administrator rights;
- at the top of the utility window you need to click the “Open” button;

- in the explorer that opens, select the required (previously saved) operating system image (in our case, Windows 8 Pro) and confirm the action by clicking on the “Open” button. In this case, an image of the operating system will be displayed in the right half of the utility window;
- Insert the flash drive into the appropriate slot, which will later become bootable. Its volume should not be less than 4 GB, otherwise the OS image simply will not fit on it. It is also important that it is formatted with the FAT32 file system. It can be formatted immediately before recording the image, either using standard Windows tools or using UltraISO;
- then in the active application window you should select “Boot”, and then in the context menu select the menu item “Burn hard disk image...”;

- After opening the window, you need to check that you have selected the correct disk to create the installation media. It is important to make sure that the flash drive corresponds to the correct letter of the alphabet;
- On the “Recording Method” tab, you must check "USB-HDD+", and then either format the storage medium or record the Windows OS image;
- if the external storage medium has already been pre-formatted, then you should click on the “Burn” button;

- A “Hint” window will open with a warning about the possible loss of all data on the USB drive. In this window you need to click on the “Yes” button;

- Then the stage of forming the OS image on the flash drive begins. An installation flash drive for Windows is being created. The length of time it takes to create installation media depends on the performance of your workstation. After some time, the OS image will be written to the flash drive. A message will appear in the window that opens, informing you that the installation media generation process has been successfully completed;
- When you finish creating the installation drive, it is recommended to close the utility.
At the end of these steps, it is recommended to make sure that the Windows OS image is correctly formed on the USB drive.
When you open it, the saved Windows 8 image will be displayed. The sequence of actions when creating a Windows 7 OS image is similar and does not contain any significant differences.

It is important to know that to install Windows in the BIOS, you need to set the boot order of various devices. You need to start attempting to boot from a flash drive.
The need for a bootable USB flash drive arises periodically. The reason for this need may be failures in the operating system itself and interruptions in the operation of the hardware. No one can protect themselves one hundred percent from such problems, but having a pre-created bootable flash drive will help solve the problems that arise without time loss and significant labor costs.
There are several basic ways to make a bootable disk or flash drive.
- The main ones:
- using specialized programs such as UltraISO;
using standard Windows tools via the command line console.
Even the most untrained user can easily create a bootable USB flash drive with Ultraiso, since the program is very clear and convenient.
Sooner or later, every user is faced with the need to reinstall Windows. But what to do if your CD/DVD drive is broken or you don’t have one at all. There is only one option left, but for this you need to create a bootable USB flash drive.
You can burn an image to a disk or flash drive using many different programs, such as Alcohol, Daemon Tools, Nero or UltraISO. Today I want to dwell in detail on the latter. It has a number of advantages, but the main thing is that it is quite simple and intuitive to use.
I will look at the process of recording an image using Windows 7 as an example, but other versions of the OS are recorded in a similar way.
First of all, we launch the program on behalf of the Administrator, otherwise the system will not allow you to perform any actions. To do this, right-click on the program shortcut and in the menu that appears, click Run as administrator.
After launching the program, you need to add a system image, which we will write to a USB flash drive.
To do this, click menu "open", as shown in the first screenshot and proceed to creating a bootable ultraiso flash drive.

An Explorer window will appear in front of us, with the help of which we need to specify the path to the place where our file is located. This image can then be written to a flash drive.
I have already prepared a Windows 7 image in advance, but you can download it from any torrent tracker.
Please note that you need a file with the extension .ISO, not .EXE.

Confirm your image selection by clicking the button "open", after which the program window will display a list of all used OS files.
Under no circumstances should you consider deleting or renaming these files. Otherwise, various errors may occur during the installation process.

Preparing an image for recording
Then we connect the flash drive to the computer and wait until it is detected by the system.
The device must be formatted in the FAT32 file system format. But if you didn’t do this, don’t worry. The program will automatically do all the necessary manipulations. If your device contains files that are valuable to you, copy them to any other media. After formatting, all data will be deleted.
After saving all the important data, the time has come to record the image. To do this, in the program window, click on the item, and in the list that opens, select “Burn a hard disk image...”.

In the next window you need to select the disk where your image will be written. After making sure that your flash drive is selected, proceed to the next steps.
Paragraph "Recording method" must be installed on "USB-HDD+", A "Hide Boot Partition" - "No".
If you have previously formatted the flash drive, then press "Record" and if you forgot to do this earlier, then "Format".

Formatting a flash drive
As previously mentioned, the flash drive must be formatted in FAT32 format. As a rule, this format is offered by default, but it is better to check it yourself.
After these manipulations, click "Begin".

Formatting a USB drive
A window will immediately pop up warning you that all data on the flash drive will be deleted. We agree with this and click on "OK".

When the process completes successfully, a corresponding window will appear.
If the message says that "formatting NOT completed"- this means the flash drive is damaged, so I advise you to take another one, or find out what the problems are with this one, and then start the process again.

Formatting success message
Burning an image
After formatting the flash drive, it's time to burn the image to it. To do this, click "Record".
A window will pop up again warning that all data stored on the media will be destroyed. We agree with this and click "Yes".

The process of creating a multiboot ultraiso flash drive will begin, which will take some time.

Wait for the process to complete, upon completion of which a notification will appear in the logs "Recording complete". This means that our flash drive with the Windows 7 image has been successfully created.

Since we won’t have to use UltraISO in the future, we can close the program.
If you reconnect the flash drive to the computer, you will see something like the one in the screenshot.

This is how the flash drive with the image is displayed
Depending on the image, its name may differ from this. The picture shows just an example of the final version.

Burned Image Files
Windows 8 or Windows 10 are recorded in the same way.
In order to boot from our flash drive, you need to go into the BIOS. In the settings of which you need to set the priority of booting from a USB drive.
To do this, restart your computer and press the key Del. In certain BIOS versions, it is possible to enter by pressing F1 or Tab.
The settings interface of the BIOS itself may differ, so I will not describe this process in detail.
Creating a bootable Windows USB flash drive using UltraISO

