The print head is cleaned when paint and dust clog the nozzles where the ink comes from. As a rule, this happens after the device has been inactive for a long time - the toners become covered with dust and slowly dry out, after which the user receives incorrect prints with various defects. The solution to the problem of dry ink is to manually wash the print head with special liquids. The procedure is not the most difficult, but it will require care and attention. With the right approach and following all the rules, the result will be cleaned elements in the printer and high-quality printing.
When should you clean the print head?
Canon service technicians say flushing is a last resort for printer maintenance.. Incorrect printing may have other reasons: the entry of air bubbles, misadjustment of the print head, excess pressure (when CISS containers are installed above the level of the head) or contamination from adhering dirt and dust. Another reason for a defect in the print is the failure of piezocrystals when the device is overloaded (Epson technology) or burnt-out heating elements (HP technology). If the equipment is used intensively, the print head is cleaned once a quarter or less.
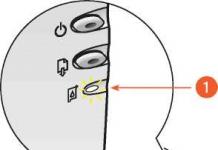
Cleaning does not occur when system errors appear on the printer's LCD indicating that the toner is low or the cartridge icon blinks.

Software print head cleaning
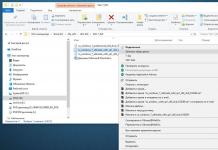
Before you begin mechanical cleaning, you should test the system and run a standard cleaning program. The program start may be located in the PC menu or the printer itself, depending on the model. If you use a computer, you need to go to the control panel, find the active printer and go to the “service” section, where you can check the nozzles and program print head cleaning. Then you need to launch the software.
Upon completion of the program cleaning, you need to repeat test the nozzles. Based on the print, you can draw conclusions whether a mechanical cleaning procedure is required or not. As a rule, this operation solves the problem of slightly dirty nozzles; if the ink is dry, software commands will not help.
Mechanical cleaning of the printer
Printer maintenance begins with preparing and checking all components. Initially carried out visual inspection To evaluate upcoming work, dust, particles of dried ink, and paper particles often accumulate in the printer.
You can manually wash all types of cartridges, except for models with filler. Such elements can only be cleaned using specialized devices - a centrifuge or a vacuum apparatus.
Then check CISS for broken paint supply hoses, tightness of the connections between the airlock and the cartridge. If there are air bubbles in the gateway, first of all the CISS is debugged and balanced. Donor containers or cartridges must be filled; if necessary, refill the printer and print a nozzle check test page.

Checking paint hoses
Not long ago, there was active discussion on the Internet about such a service device as ultrasonic bath. The usefulness of the device has not been proven for certain (and it does not matter whether it is medical equipment or a device for gentle cleaning of small parts). If you consult with specialists, the opinions are not clear, but most often they are negative. Facts of successful use of an ultrasonic bath among craftsmen are difficult to detect, but observations indicate a negative impact on the printer’s print head (failure within 24 hours or upon first use).

Using an ultrasonic bath
Everything you need to know about flushing fluids
Perhaps one of the most useful recommendations is to use a cleaner of the same brand as the ink. No one knows the exact composition of the dye better than the manufacturer, therefore, only the manufacturer himself knows how to remove it effectively and safely. Special cleaning compounds are safe for printers and their components. As a rule, there are several of them: for external cleaning, for removing water-soluble ink, pigment dyes, aggressive liquids for breaking down dried toners and severe blockages.

Universal washing liquid RDM No. 1 for inkjet printers and MFPs
For removing water-soluble ink The following liquids are suitable.
- Desalted water (specialized liquid WWM W01).
- Distilled water.
- A solution of a mixture of distilled water and 5 - 10% ammonia (not to be confused with ammonia) in proportions 1-10:1 (the exact proportions are calculated experimentally). The finished solution based on ammonia must be filtered through a mesh with a size of 0.01 microns.
Pigment dyes dissolve with other compounds:
- isopropyl alcohol;
- various specialized liquids.
In addition to branded cleaners, there are companies that carry various liquids for specific purposes. For example, WWM company boasts a good line of cleaners.

You can also choose an analogue, for example, workshop specialists have been using a conventional one for this operation for many years. glass liquid Mister Muscle. The main thing is to choose the right liquid for the ink: water-soluble dyes are green and pink, based on ammonia (ammonia), pigment dyes remove blue and orange, based on isopropyl alcohol.
To enhance the effectiveness of any solution, heat it to a temperature of 30-60°C.
If you don't know what kind of ink was used, don't rush to wash it. An incorrectly selected composition can quickly and permanently damage the print head. Take some ink and dissolve it in different compounds (or one, of your choice). After a couple of hours, analyze the result. When pigment dyes are exposed to distilled water, a precipitate is released. The transition of the liquid to a jelly-like consistency also indicates that the cleaning liquid was chosen incorrectly; the correct solution dilutes the ink and loosens the clots of dried dye.
Step-by-step washing instructions
After preparation and checks, you can begin the procedure of cleaning the printer’s print head. To do this, you will need technical washing liquid, two syringes (preferably 10 ml), several transparent tubes made of soft plastic or rubber, a container, and a bandage.
Cleaning the mouthguard and knife
Printer service technicians recommend cleaning the mouth guard and rubber blade first. Dust and dirt accumulated here depressurize the system, air enters it, which leads to printing with defects.

Sometimes a rubber knife may be located in the printer, inside the housing. It would be useful to print out the details of the device with a breakdown of the details.

Inkjet printer device
First option for cleaning the head
The printer's print head should only be removed before cleaning. On the lower part, remove accumulated dirt with a bandage soaked in cleaner. If the contamination is severe, use several pieces of bandage and repeat the procedure until the blockage is removed.

Remove the cartridge from the print head, underneath there are ink intake fittings. Gently wipe down all colors of grates. To flush the head, you will need a syringe filled with flushing liquid. The nozzle of the syringe should fit tightly onto the fitting; if the size does not match, increase the diameter of the syringe (for example, with a heated thin screwdriver). As a rule, the difference in diameters does not exceed 1 mm.

After releasing the air from the syringe, pump the wash into the fitting with slow and smooth movements, avoiding getting the cleaner on the head. If, through negligence, liquid does spill, quickly remove it using a second syringe or napkin; do not turn on the device until the moisture has completely evaporated.
Wash all colors in the same way, carefully watching pressure on the syringe rod and the “reaction” of the fittings to flushing. If one or more colors are heavily clogged or have large clumps of dried toner, the cleaner will fill slowly and unstably, or in some cases not flow at all. To eliminate overdried ink elements, more stringent, aggressive cleaning will be required.
Upon completion, remove all moisture by wiping the PG, housing and all accessible elements dry. Place the cartridge in the carriage and take it to a parking space.
Please note: if the cleaner is compatible with water-soluble inks, and the new dyes are pigment inks, you should rinse the system thoroughly with demineralized water (distilled water is not recommended, as sediment may form).
Option two – for “serious” cases
Another method of “reanimating” the PG is not much different from the first, but will help with moderate blockages. In this case, the syringe does not fit into the hole in the ink supply fitting, and the flushing liquid is slowly dig by hand through the grate. A clean bandage folded in several layers should be placed under the head; when it becomes dirty, replace it with a new one.

The procedure will take longer, about 1 - 2 hours, but the methodical action of the cleaner will effectively remove accumulated ink. If there is no result, you can strengthen the process.
- Cut several transparent tubes that match the diameter of the holes and put them on the head fittings.
- Pour cleaner into the tubes through a syringe, leave for several hours, or overnight.
- If the technical fluid passes evenly through the steam generator, it means the operation was completed successfully.

When cleaner does not flow into one or more tubes at all or flows, but more slowly than into others, this indicates severe contamination.
This cleaning procedure can be called gentle; it is allowed to repeat it several times (a week or two).
The third option is forced traction of the cleaner
This method is only suitable for very difficult situations when no method helps. The hard washing algorithm is as follows.

If forced flushing does not help, the next step for “advanced users” is a complete disassembly of the head.
As practice shows, it is better to entrust this to a specialist. The reason is that due to inexperience, it is easy to damage the nozzles or the print head board, after which it can no longer be restored. Cleaning the print head can be a long and tedious process, but the procedure itself is quite simple. It is important to observe caution and safety rules: disconnect the printer from the network and PC
, protect the printer’s print head and electronics from moisture.
To begin with, it should be noted that a special washing liquid is used to independently clean the cartridge and print head of printers and inkjet MFPs. Using a solution like this may be necessary to clean a cartridge that you plan to refill - in this case, you can avoid some kind of internal conflict of ink purchased from different manufacturers, i.e. A normal chemical reaction can occur between the two types of paint. This, in turn, will lead to sedimentation and blocking of the nozzles located on the nozzle plate.
It should also be added that flushing liquid is used in case of clogged print heads, especially when their regular cleaning is in vain. In addition, the use of such a solution may be a necessary action when restoring a print head covered with dried ink and cleaning printer elements or CISS from ink.
Manufacturers and compositions
If you need a professional cleaning liquid for washing cartridges, then pay attention to an option such as inktec washing liquid. This tool can help you get your inkjet printer back to normal working condition. It is usually used when a Canon or Epson printing device has been idle for a long time, in the case when one of the colors begins to print poorly. It should be added that the shelf life of flushing fluid for an inktek printer is up to two years. Cleaning agents from companies such as Contour and OCP are also somewhat popular and are recommended for cleaning the print heads of inkjet office equipment. The shelf life of their products is about two years, and they are usually produced in 100 ml containers.
In general, the easiest way to clean cartridges is ordinary distilled water. But depending on the composition of the print head cleaning liquid, it can be:
- neutral
- alkaline
- acidic
The first option is universal, i.e. suitable for all models of printing office equipment and it consists of 80% distilled water, 10% alcohol and 10% glycerin.
The second option, i.e. alkaline is suitable for printers from Canon and Epson - in addition to the three components described in the previous version, it also contains ammonia.
As for the acid solution, it is the optimal choice for HP color devices. It contains distilled water, alcohol and essence of acetic acid.
You can find out whether it is a result of prolonged inactivity or the time has come in these articles.
How to make your own flushing fluid?
If you are not interested in professional cleaning fluid for inkjet printers offered by various manufacturers, then you can try making it yourself. It should be noted that this does not require any special skills or abilities - the main thing is to follow the entire sequence of actions.
In addition, if a dried cartridge has been idle for about 2-3 months, then first try restoring it using ordinary distilled water. Perhaps it will help, after which you can put the cleaned consumable back into use or, if necessary, replace the ink in it. But if distilled water did not help you because the printer has been idle without printing for quite a long time or it is located in a room with high temperatures, then use the following instructions, which will help you make washing liquid for printers with your own hands.
- To make this liquid, you will need water and any simple but high-quality product that is used for washing glass, for example, it could be Mister Muscle, HELP, Mister Proper, etc.
- Now read the composition on the label of the glass cleaner you choose. Immediately pay attention to the presence of sodium sulfoethosylate and isopropylene alcohol. The fact is that these two components can speed up the process aimed at softening paint pigments that have dried on the print head.
- To obtain a special liquid for printers from ordinary distilled water and a glass cleaner, mix both components in a ratio of 9 to 1 in any suitable container. Use a syringe to collect them.
- Try cleaning the print head with the resulting product. If this does not give any effect, then increase the percentage of glass washing liquid in the general solution. But keep in mind that this value should not exceed 50 percent!
It should be said that using almost 100 percent glass cleaner can lead to the dissolution of the “mastic” contained in the print head. As a result of this, paint can flow from one part of it to another, which, in turn, will result in a mixture of colors. In addition, this can negatively affect the nozzles, which will hit the paper surface with some deflection during printing. For this reason, to begin with, use exclusively distilled water, which cannot negatively affect the integrity and performance of the print head. If a self-prepared product does not help, then buy a professional liquid from any well-known manufacturer of similar products.
Hello, dear friends.
Data-medium-file="https://refitrf.ru/wp-content/uploads/cl-178x300.jpg" data-large-file="https://refitrf.ru/wp-content/uploads/cl. .jpg" alt="How to flush an inkjet printer" width="127" height="214" srcset="https://refitrf.ru/wp-content/uploads/cl..jpg 89w, https://refitrf.ru/wp-content/uploads/cl-178x300.jpg 178w" sizes="(max-width: 127px) 100vw, 127px">О том как промыть СНПЧ, ПЗК, ПГ (печатающую головку) принтера я уже рассказывал и отснял не одно видео. В этот раз пойдет речь о том, как самостоятельно изготовить промывочную жидкость и как ее применять в различных вариантах, т.е. для промывки ПГ, системы СНПЧ и так далее. Прежде чем посмотреть видео, обязательно дочитайте до конца текст, так как в нем не все рассказано. Жидкость, которую я изготавливаю ни в коем случае не является панацеей от всех бед. К сожалению, таковой я еще не встречал, даже самые мощные из представленных на рынке не гарантируют хороший результат!!!!}
What would you like to add? Over the many years of work, I have not been able to try anything as a cleaner for the PG (I mainly work with Epson) and I have never been able to discover something truly ideal and, moreover, safe for the PG printer. Powerful liquids, as a rule, can damage the steam generator without completely flushing everything out, and ordinary liquids often cannot cope with light blockages. The video shows the liquid that I make from a glass and mirror cleaner, which is the well-known Mister Muscle, who is also not ideal, although it cleans simple blockages remarkably well. Now it is disappearing from sale and I had to look for a replacement. A couple of years ago I found it and slightly modified it, preparing a quite passable solution. It is not suitable for serious blockages. In such cases, I prepare another, more serious option, but more on that later.
What was missing in the video (I just forgot to tell you)?
- All operations involving the extraction of PG, and especially its washing, must be done extremely carefully. A microdrop of liquid or water on the contacts or board of the PG itself (or on the cable) is enough to destroy the result of very painstaking work in flushing! Both the PG itself and the printer formatter can burn out.
- If during the washing process you see that when you press liquid under pressure in one color, it flows out of the intake holes of another (see video), stop working, this is irreparable. Very often this can be understood by the nozzle test, when you have a neighboring color in the image. But he cannot say unambiguously about the “breakdown” of the PG; perhaps you just have dirty parking in the printer. Therefore, it is necessary to remove the PG and perform diagnostics using the method described above, and only then carry out or refuse washing.
- For pigment and water-based inks, it is most likely better to use different liquids, but there is still no recipe that would give 100% results.
- Don’t be lazy and replace the liquid in the PG every hour, driving it with a syringe under pressure, this will give a good result!
- If you find a good remedy, write, I’ll try to make it, possibly modify it, and this will ultimately lead to the production of a liquid that will help in much greater cases.
And now the video itself.
In what cases are flushing fluids needed?
- When the print head (PG) becomes clogged and regular cleaning of the PG does not help
- When cleaning CISS or printer elements from ink
- When restoring a print head from dried ink
- When changing the ink type
In all these cases, flushing fluid can be used. The flushing liquid can be used as a preservative liquid. Does not cause damage to head materials. The composition of the composition is close to the ink base and does not cause rapid pigment deposition.
It should be noted that sediment in pigment ink is formed in any case (the period of use of pigment ink is 1 year). When diluted, this process accelerates.
Special experiments and long-term practice of use have shown the absence of damage to the print heads even with prolonged soaking in the most severe cases. The composition showed excellent comparative results when washing print heads after using non-original pigment and dye-based ink (water-soluble), after pigment ink (mixing different types of ink).
Before refilling ink from another manufacturer, you should wash off any remaining ink using a cleaning fluid. Otherwise, a normal chemical reaction between the two types of ink may occur, which may cause sediment to form and block the nozzle plate nozzles.
If there is no ultrasonic bath
- Immerse the cartridge head about 1 cm in warm water (40-50°C) for about 10 minutes;
- Pour the washing liquid into a suitable container;
- Immerse the cartridge head approximately 1 cm in warm washing liquid for approximately 7-10 minutes;
- Take out the cartridge;
Using an ultrasonic bath
- Pour the washing liquid into a small container;
- Immerse the cartridge head 1 cm in the flushing liquid for 2-3 minutes;
- Clean in an ultrasonic bath filled with water for 5 seconds (note: cleaning for more than 5 seconds may damage the working parts of the cartridge);
- Take out the cartridge;
- Using a refill station and a syringe, remove 1 ml of ink from the cartridge;
- Wipe off any excess ink or dirt from the head;
- Install the cartridge into the printer and start cleaning the head;
- If the printer still does not print normally, repeat steps two to six 2-3 times.
To add this page to your "Favorites" click
Other articles in this section:
Flushing fluids are an indispensable tool when it comes to cleaning cartridges and print heads (PG) of printers. You can find them on store shelves with consumables or try to make them yourself. The article will talk about the composition of the wash, how to prepare it yourself and use it correctly.
Custom composition of professional printer flushing fluids
A special feature of the composition of the purchased washing liquid is that it is almost identical to the composition of the ink itself used for printing.
Thanks to this, it is possible to avoid the rapid loss of pigment sediment. Such a deposit forms in any case, since the paint has a very limited shelf life, usually 12 months. The option of diluting it will not be the best - sediment will still form.

The following brands are most popular among users: Reference!
Liquids purchased in a store or made by yourself are also suitable for preserving printing equipment.
How to make your own flushing fluid A simple way to clean the printer is to use distilled water heated to 50–60°C. 
It will be possible to cope with the task only if the equipment has been idle for no longer than 2–3 months.
- In case of longer interruptions in operation, the flushing liquid will have to be improved with additional components.
- There are several options here:
- Neutral washing. It can be used to tidy up the printing elements of devices of any brand. The solution contains distilled water (80% of the total volume), ethyl alcohol (10%) and glycerin (10%).
Alkaline washing. It is often used by owners of Epson and Canon brand devices. For preparation, the same components are used as for neutral washing, but an ammonia aqueous solution is also added (10% of the total volume). Accordingly, the amount of water is reduced (70% is taken). 
These components can soften dried drops of ink on the printer head. To prepare, you will need distilled water and cleaning agent in a ratio of 9:1. The accuracy of the proportions can be maintained when using a large-volume medical syringe. If you are unable to clean the head, you can increase the amount of cleaning agent in the mixture and try again.
Attention! The maximum permissible amount of glass and mirror cleaner in the cleaning composition is 50%. Excess may lead to the dissolution of the special sealant and print nozzle elements present in the printer head, and, as a result, to equipment failure.
You can avoid the unpleasant consequences of using homemade liquids by doing a little checking. A couple of drops of printer ink are mixed with the prepared composition and left for several hours. If, as a result, the ink goes from a liquid to a viscous state, then it is better to abandon the use of washing and look for an alternative option.
What is flushing fluid needed for and how to use it
Liquid for cleaning printing elements of home and office equipment is useful in a number of cases:
- If you need to rid the cartridge of remnants of previously used ink. This step should be performed before refilling new ink, especially those made by another manufacturer.
- When you need to solve a problem with clogged print head nozzles. Homemade or purchased products are used after the standard cleaning method has not brought the desired result. Dried paint is dissolved by washing and the function of the head is restored.
- If other parts of the equipment are contaminated by ink splashes and should be cleaned.
There are two options for using washing – with and without a special ultrasonic bath. The first option involves the following sequence of actions:
- the print head is removed and placed in 1 cm of cleaning liquid (for 2–3 minutes);
- the element is transferred to an ultrasonic bath pre-filled with distilled water and left there for 5 seconds;
- Using a filling station and a syringe, about 1 ml of ink is drawn out of the PG;
- dirt and ink are removed with a napkin;
- the printing element is returned to its place, routine cleaning is done and a test pattern is printed.
If necessary, repeat the procedure. 
The second option looks like this:
- the removed head is placed in a container with warm water (approximately 50°C) and kept there for about 5 minutes;
- the element is placed for 10 minutes in another container (with washing liquid) so that it is immersed in the composition by 1 cm;
- 1 ml of ink is pumped out from the PG;
- ink and dirt are removed from the surface with a napkin;
- The PG is installed back into the printer, routine cleaning is done and a test print is carried out.
If the desired effect was not achieved the first time, the procedure is repeated (sometimes 3 times in a row).
The washing liquid is a solution whose main task is to effectively clean the printing elements of printers and MFPs. Timely cleaning extends the life of any equipment.


