Screenshots are a convenient means of demonstrating what is happening on the screen. They can be used to explain how computer programs work, cut out portions of web pages, save frames from movies, and much more. In the latest versions of Windows, in addition to the PrtScrn key, which allows you to take a screenshot of the entire screen, there is a built-in Snipping tool with a small set of useful functions. For those who want even more functionality when working with screenshots, there is a set of products that not only take a screenshot, but also have extensive post-processing capabilities.
Where to find free Snipping Tools for Windows
We will briefly describe two free tools, the functionality of which is sufficient for office and home needs.
Windows Scissors
They are included in the standard OS distribution, are easy to use, although they provide little functionality - the ability to take a picture of an arbitrary area, window, screen and rectangle, draw/write with several types of pens, erase what has been written, save files to disk in three formats: JPG, PNG and GIF .
You can find Windows Snipping Tool like this: Start -> All Programs -> Accessories -> Snipping Tool.

After launching Scissors, you need to select one of the screenshot types (drop-down menu next to the button "Create"): "Full Screen", "Window", "Rectangle" or "Free form".

To create a free-form screenshot, you need to draw a border with the mouse while pressing the left button, after which a window with a screenshot will appear.

In most cases, you will need to capture either a rectangular area or a window - Scissors do an excellent job of this task.
After creating a photo, the user has several options: save it to disk (1), copy it to the clipboard (2), send it by mail (3), write/draw something with a pen (4) or pencil (5) and erase what was written (6).

Working with all functions is intuitive and does not differ from the standards established in Windows, so taking a screenshot should not raise any questions for an average user. The only difficulty may arise with handwriting or drawing - for this it is better to use a special tablet rather than a mouse.
Screen scissors
Domestic developer program. It can take screenshots of the selected area, provides the ability to draw/write on the screenshot by hand, and erase what is written. Saves the photo to your computer or to the developer’s website (stored for 72 hours). The screenshot is saved only in JPG format.
Screen scissors provide minimal functionality, but do not require installation - the program can be launched from a flash drive. There is no interface as such, since switching between editing and erasing is done from the keyboard.


The program can be recommended, perhaps, only to advanced users, since editing is done using the mouse and keyboard simultaneously, in addition, you may have to change the default settings and read the manual.
WITH download Screen Scissors from the official website
Conclusion
Windows Scissors is a fairly powerful tool for creating screenshots of both an arbitrary area and the entire screen. In addition, Scissors includes basic tools for editing graphic content.
If you're comfortable with a keyboard-mouse combination, value minimalism, and need a quick tool to take screenshots of part of your screen, the third-party Screen Snips program can help.
Many users know how to create a screenshot (if not, then read the article?) and what it is needed for. It can be done using standard tools in the Windows operating system, or using third-party utilities and programs from developers.
But what if you need to take a screenshot of a specific area (for example, a program window or part of a browser tab), without downloading other programs, and using Paint is a little labor-intensive?
After all, if you use the standard, then the entire creation process occurs as follows: we show on the screen what needs to be “screenshotted”, press the Print Screen button, launch Paint, paste, select the desired fragment, create a new document there in Paint, paste what you have selected and save.
Do you agree that there are too many steps to save only a certain part of the screenshot to a file?
That’s why Microsoft created another utility for creating quick screenshots, and it is present in all versions of the operating system.
Tool Scissors can be found either in Start (All Programs - Accessories)
or by pressing Win + R and entering SnippingTool.exe

or in the search for programs (in the same Start of Windows 7 you can do this or on the start screen of all applications in Windows 8/10) type Scissors

How to take a screenshot in Windows using Scissors.
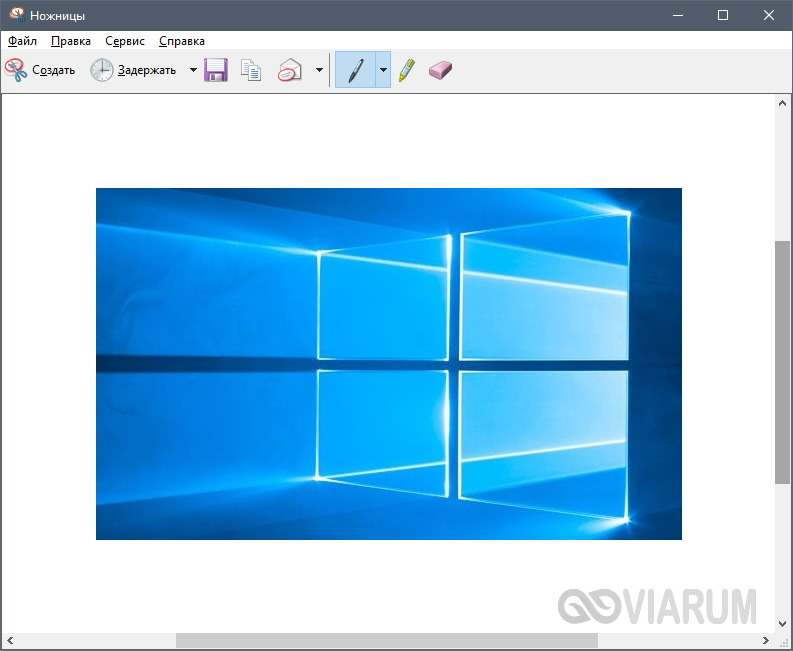
The main window of Scissors looks like this:

Click the Create button and select a rectangular area to create.
If you need to do something else, then to the right of this button there is an arrow in which you can select a snapshot of an arbitrary shape, a window, or the entire screen:

After creation, an editor window will open:

Here you can create a new screenshot, send it, write something with a marker (different colors), highlight it with a marker and clear everything with an eraser.
What is noteworthy is that immediately after creation, the snapshot goes into , which means that it can immediately be inserted into some program (for example, Outlook, Word, Paint, etc. or into services that allow insertion directly, for example VKontakte or text of the letter).
Then you can save it to a file as usual (File - Save As) or edit it.
The parameters window does not need commenting:

Some clarifications:
In the editions of Windows Home Basic (Home Basic) or Starter (Initial) Snipping Tools are not present (although some claim that through Run and through a program search (Snipping Tool.exe) it can be found there too).
You can type in the address bar of Explorer %windir%\system32\SnippingTool.exe and make sure they are there.
Scissors appeared only in the Home Premium version and higher.
Windows 10 also has a “Delay” option, which allows you to give you time in seconds so that you have time to open the desired window to take a screenshot.
Once again I will emphasize the advantages of creating a screenshot using Scissors. You launch the program, select the desired fragment and can immediately insert it wherever you need it. Without even saving to a file. Two steps and the screenshot is ready.
If you still want to download Scissors for Windows, then write in the comments. I will update the article and provide a download link.
Report a bug
Broken download link File does not match description Other
Screen Scissors is a program designed for creating screenshots. Compared to the built-in Screenshotter, the application has expanded functionality. The program can be installed on ten. It should be noted that anyone can download screen scissors for free.

Using screen scissors, it is possible to take a screenshot of the entire screen as well as a selected area. This is very convenient, since you will not need to use additional editors to cut out a specific area from the image.
Key Features
- Capture the area of interest on the screen;
- Possibility of using a “pencil” for drawing;
- Saving screenshots on the Internet;
- Launching the program along with the operating system;
- Ability to save pictures to your computer;
- Working with hot keys;
- Ability to work with 2-3 monitors;
- Work from the tray.
Advantages
Screenshot software has several advantages. It is recommended that you review them. The main advantage is that the program does not require installation. You just need to download it and you can start working right away. If necessary, the application can be saved on a flash drive.
A program such as “Scissors” is perfect for Windows XP, as well as more modern operating systems. At the same time, the application practically does not consume system resources, which means it can be installed on weak computers.
Another advantage is the multilingual nature of the program. Thanks to this, you don't need to use translators to understand how to operate the Scissors. It is enough to install the Russian language and you can start working.
Screen Scissors for Windows saves its settings in an external file that has an "ini" extension. This is very convenient, since you can change the file at any time without going into the program.
Flaws
Snipping Tool for Windows 7 is a popular program, so you should consider all the disadvantages. In fact, there are no significant disadvantages to the program.
Some users consider the disadvantage that the program is suitable for Windows 8, but cannot be installed on other operating systems (Linux, Mac OS). Perhaps in the future the developers will correct this defect.
Another minor drawback is the inability to save the file in the “gif” format. Otherwise, no cons were found, so you can safely download Screenshoter for Windows Seven.
Download the program
First you need to download scissors to your computer. This can be done from the website located at: “www.userprograms.com”. When the main page of the resource is loaded, you need to hover your mouse over the “Programs” item, and then select “Scissors” from the drop-down menu.

In a moment, a new page will open with a description of the product. To download the application, you must click on the appropriate hyperlink. It should be noted that the site has a version for 32-bit and 64-bit systems.

Principle of operation
Once the application is downloaded, you can start taking pictures. To do this, you need to perform the following sequence of actions:
- Press the “PrtSc” button. If you wish, you can simply click on the program icon;
- Using the mouse, select the area of interest in the window;
- If you need to make notes (add text, highlight a fragment);
- Click on the “floppy disk” icon or press “Enter” on the keyboard.

It is important to note that the file will be saved to the drive specified in the settings. This can be a cloud service on the Internet or a disk on a computer.
Conclusion
Windows 10 and earlier versions have a built-in “screenshot”, but it does not have additional features. Therefore, it is recommended to install Screen Snippers. The tool will be of interest to those who take screenshots daily. The program does not need to be installed, which means that if you don’t like how it works, you can remove it. Thanks to the ability to save a photo on the Internet, it is possible to quickly share screenshots with friends and colleagues.
Video review “Screen scissors”
Very often, a user of a computer with Windows 7/10 preinstalled is faced with the task of taking a screenshot of the screen. On a desktop PC and laptop, this issue can be resolved very simply, just press the Print Screen key ( Prt Scr or Print Screen on the keyboard) or a keyboard shortcut Alt+Prt Scr(takes a snapshot of the active window only) and then using the combination Ctrl+V paste the image saved on the clipboard into any graphic editor, for example, Paint. But what should you do if you need to take a screenshot on a tablet, or on a computer on which for some reason. The answer is obvious - use specialized programs for creating screenshots.
One such program is the Snipping tool built into Windows. In this article we will look at the main nuances associated with launching an application and subsequent work with it.
How to download Scissors
Since the program is included in the list of standard Windows applications, it should be present on the computer by default, i.e. no additional download or installation required. If you cannot find Snipping Tool on the Desktop or in the Start menu, then most likely the shortcut was simply deleted, but the executable file of the program itself is still there. To make sure of this, let's go to Explorer at C:/Windows/System32 and find the file in the folder SnippingTool.exe. These are our Scissors.
Right-click on the desired icon and select “Pin to Start Menu” or “Send to – Desktop (create shortcut).” That's it, now you can easily launch the application using the created shortcuts.
If the required exe file is not in the System32 folder, this means that someone inadvertently deleted it. There are two options for further action - copy the file from any other computer running Windows, or try searching for it on the Internet.
Ways to launch the Snipping tool
There are several ways to open the application.
Windows search bar
In the search bar, enter “Scissors” and click on the result found.

Start Menu
Open the “Start” menu and in the “All Programs – Accessories” section, click on the search line “Snipping Tool”.

"Run" line
Select “Run” from the Start menu, and then in the window that opens, enter “SnippingTool”, then click “OK”.

Conductor
This is a method we already know. Let's move along the path C:/Windows/System32 and double click on the file SnippingTool.exe.
You can also create a shortcut on the Desktop and launch Snips from there.
Application functionality
The program has a simple interface with a basic set of functions.

Before you take a photo, you need to determine the capture area. To do this, click the down arrow next to the “Create” button. The drop-down list offers the options "Freeform", "Rectangle", "Window" and "Full Screen".

In some versions of Scissors, the initial window also allows you to set a delay of up to 5 seconds - a very useful option in certain cases.

After setting the preliminary settings, you can proceed directly to creating screenshots. Click the “Create” button and perform the necessary manipulations with the mouse - either select the desired area, or simply click on the space outlined by the thin red frame. A snapshot will immediately appear in the window, which can be saved in any of the popular formats.
The simplest editing using the pen, marker and eraser tools is preliminarily allowed.

That's all. We hope that the information provided on the Scissors application will be useful to you.
is one of the simplest tools for taking screenshots. Allows you to take a screenshot of the entire screen or a selected area. The new version makes it possible to set a screen capture delay from 1 to 5 seconds in order to have time to make the necessary changes. Can highlight the border of a photo with a pre-selected color.
The simplest tools for drawing on a screenshot are built in: a pen, a marker and an eraser. It can save a screenshot to the clipboard, an HTML document (you can add a URL under the picture), a graphic file in jpg, gif or png format, or send it by mail.
Advantages and Disadvantages of Screen Scissors
A very simple program, familiar from other versions of Windows;
+ delay tool allows you to quickly make changes;
+ you can draw an inscription or mark an important fragment;
+ everything is in Russian, although it’s understandable;
+ you can immediately send the result by mail;
– minimal functionality for drawing (they could add a rectangle and a circle).
Key Features
- take a screenshot of the entire screen;
- take a rectangular or free-form screenshot;
- delay screen capture for 1-5 seconds;
- highlight the border of the screenshot with color;
- choose colors to paint;
- draw using a pen, marker and eraser;
- copy the image to the clipboard;
- save the image as a graphic file;
- save the image in an html document;
- send a screenshot by mail.


