If you do not have a wireless network connection Wi-Fi on a laptop when the Windows operating system is installed - this instruction for you.
Technology
A traditional way to configure from the point of view of a regular user looks very difficult: you need to make difficult steps to connect to the access point for the first setup, you need to create a manually name of the wireless network, specify a complex and hard-proof security key. And this setting requires that the user has basic WiFi knowledge. It will be much easier for him to just click on the button or enter a pin so that everything itself is configured and connected.
Wireless Protected Setup. (WiFi Protected Setup - WPS) It is just invented to quickly, as simple as possible and safely configure network devices and computers. For example, one of the methods for connecting the game console with WiFi to a wireless network: just click on the WPS buttons on the wireless router and on the game console.
Regardless of the specific requirements of your location, we hope that the information in this manual has shown you how to work with them. If you have any questions with information here, or you need help in this, please feel free to ask us. Manual connection to the wireless network is when you install a new connection or network.
To get instructions, select your computer's operating system. Now you can connect to the wireless network. Make sure the checkbox "Start this connection is automatically". Now you must connect to the wireless network. Perform the following steps to update the connection settings.
WiFi Protected Setupnow is the standard for simple and secure wireless network. In Microsoft Terminology, this Windows Connect Now. (WCN.).

If you do not have a wireless network connection Wi-Fi on a laptop when the Windows operating system is installed - this instruction for you. Many users of Windows 7 have difficulty with ...
Use the Internet on a laptop is more convenient through a wireless access point. Before connecting, you must learn how to configure the Wi-Fi adapter on a laptop. We will talk about the methods of inclusion and configure the device in the most popular versions of Windows. Ways to update drivers will be considered.
How to find out if a Wi-Fi module is installed on a laptop
Almost every mobile gadget is equipped with a Wi-Fi module, but you should definitely check its presence. First, at first, look at the technical guide to your laptop. In the characteristics opposite the column "Wireless Communication" should be Wi-Fi or IEEE 802.11 strings. Their presence says that the required component in the laptop is set.
Alternative - View the presence of a component in the list of devices. To do this, go to the computer properties and click the "Task Manager" link. In the window that opens, go to the "Iron" tab, and then find the line with the previously described words or the inscription Wireless (WiFay).
If it is not
The optimal option is to update the laptop. Most likely, you have a very "ancient" model with low performance and the missing wireless communication module. When the funds do not allow you to buy a new technique, order a USB module. It has the form of a flash drive, while serves as an external Wi-Fi module. There are hundreds of models with different characteristics on the market. To work, the driver is required.

Wi-Fi Adapter Inclusion Procedure
To use on laptops and separate computers Wireless Internet , you should activate the WiFay module, and then connect to the required network. There are several hardware and software on Wi-Fi, which will be described in detail below.
Switch on the housing
For the convenience of users, many manufacturers made a switch with a separate button on the gadget housing. It can be located on the front panel (from the ESC side or near the NUM digital keys).

We also recommend to inspect the side panels on both sides for the presence of a switch. It has an antenna icon with diverging waves. Often, light indicators that inform about the performance of specific components are located on the housing.

In the presence of a similar switch and the correct operation of the component itself, of course, all inclusion is reduced to one simple action.
Keyboard shortcuts
Another way is to activate the key combination module. On the laptops, additional settings are made on the F1-F12 function buttons. Also on the keyboard, you can encounter a key with the letters Fn. With it, there is an inclusion of additional functions (including Wi-Fi). You need to hold the Fn, to clap the button with the image of the corporate icon (on different models they will be F2, F3 or F12). The action will activate the indicator (if available) and the appearance of the connection icon in the Start panel on the right side.

Alternative options
If previous manipulations do not give results, the problem is in drivers or operating system settings. A rare exception is marriage. In extreme cases, after all resuscitation attempts, contact the service center, especially if the laptop is on warranty service. Also make sure that the Wi-Fi access point is all right. The problem may wage in the incorrect work of the Wi-Fi router (you need to repeat or update the firmware). Try connecting a mobile phone or tablet to it.
Installing or updating drivers
Inoperability Waifa is often associated with the driver. The latter represents a specialized software that ensures the correct operation of the physical device in the shell of the operating system. There are three basic ways to install a new driver:
- alone through the downloaded installer;
- through standard Windows functions;
- through specialized software.
The first method is the most reliable option, as eliminating the intervention "from the side". The owner of the laptop should go to the manufacturer's website, and then find the category of loading software. Next, in the search, write the full name of your model and version of the OS. Be sure to learn the bit rate (32 or 64 bits). Under your request will be published a list of all drivers. Download the file for the Wireless network adapter.

The second method implies downloading the desired driver through the Microsoft base. It follows in the device manager to clap the right mouse button on the WiFay adapter and select "Update Drivers". Note that the update tool does not always find a topical version.

The last way is extremely convenient, since the entire "dirty work" on the search and installation takes the program. Effective tool is Driver Genius. To update the driver, follow these items:

"Driver Jenius" has a huge database, while regularly replenishes it, so the software can be used to update on any "iron" laptop.
Necessary actions and settings in the operating system
The activation of the wireless adapter can be carried out by the OS. The user follows the network settings separately turn it on. Next, we will tell you how to set up Wi-Fi on a laptop for the most common Windows "WINDOVS".
Windows XP.
Full setup to WINTOVS XP consists of the following steps:

Wi-Fi configuration within Windows XP will be completed after executing the described actions.
Windows 7.
You should perform similar settings in the "seven". The difference from the previously given instructions is minimal:

Often the provider gives static IP. In such situations, it is necessary to set parameters according to the requirements of the service provider. In other cases, the automatic receipt of parameters allows you to use Wi-Fi without any problems.
Windows 8/10.
These version of the OS have similar interfaces, so the procedure for them will be almost identical. You need to perform actions similar to those previously shown for other Windows systems:

Additionally, when problems with access, run the diagnostic center. The system can identify errors due to which you cannot connect to the Wi-Fi point.
This article will help answer the following questions: how to set up access point, how to set up router And makes clarity. If you believe Wi-Fi equipment manufacturers, a wireless network configuration (WLAN - Wireless Local Area Network) is a minute case. Pressed the button and the device performs a connection. In reality, Wi-Fi-routers are introduced into confusion even experienced PC users. Most are pleased with the fact that the signal at all occurs - the reliability as usual is forgotten. In this article, you will learn how to configure a Wi-Fi access point, how to set up a Wi-Fi router and how to make a wireless connection reliable to protect the network from unwanted guests.
I immediately want to say that a new detailed material appeared on setting up the router :. I recommend using it primarily to configure the Wi-Fi router.
What to choose a wi fi router or access point
Select Wi-Fi Router. A stumbling block for multimedia transmission is always a Wi-Fi standard. Quickly transfer large files or watch HD video over a wireless network, only in the case when it meets the 802.11n standard, which supports speed up to 300 Mbps. I also advise you to read about the new wireless network standard - to buy a device with a back for the future. If this is not necessary, then choose any router of the well-known manufacturer ( D-Link, TP-LINK, ASUSor NetGear.), which corresponds to the 802.11n standard - this is more than enough for any speed Internet connection.
Wi-Fi adapters. Users that use modern laptops or a PC with an integrated wireless network adapter, do not need additional equipment, and the owners of old laptops need to take care of Wi-Fi modules on the USB bus, or Wi-Fi Card-Bus adapters.
How to locate a Wi-Fi access point or Wi Fi router
All three Wi-Fi network standards typically operate at 2.4 GHz. In this regard, several problems arise. One of them comes down to the fact that in this frequency range not only Wi-Fi equipment works. For example, microwave ovens, radiotelephones and wireless interface extensions also use this frequency, which increases the level of interference. Another problem is related to the signal passage: human body, reinforced concrete structures worsen the signal quality if they are located on the path of its following. In order for the signal to be available on the square of the entire room, it is important to choose the right place. The connection functions best if the router is fixed on the wall as high as possible. In addition, the router should not be straight at a computer or another device that has a strong radiation or prevents radio waves due to the metal case. The correct arrangement of the router antennas is also crucial. In most cases, you can get more coverage, if you direct them vertically.
Connecting and configuring Wi-Fi router (access points) for local (internal) network
Connect a computer and router with a network cable (use the sockets for the external network of them as a rule 3-5 pcs. Make sure that you have a computer connection with your Wi-Fi router (the connection icon in the taskbar tagged) .
- IP address: 192.168.0.2
- Subnet mask: 255.255.255.0
- Main Gateway: 192.168.0.1
- DNS: 192.168.0.1
If in the manual you found other parameters - install them. Open the command prompt ( Start - execute - In the window that opens, write "CMD" for Windows XP or click Start and enter "CMD" in the search bar). Next, in the command line that is written, write: ping 192.168.0.1 . If packets come from 192.168.0.1, then you did everything right. If there is no answer and we see messages about the exceeding the wait limit, you should try to change the IP 192.168.0.1 and 192.168.0.2 at 192.168.1.1 and 192.168.1.2, respectively, and after trying to "propagate" the address - 192.168.1.1 if you are Former fail, refer to the manual to understand which IP address receives a router on the internal interface.
I also recommend checking out whether the network cable on the router is turned on in whether the network cable is turned on, the cable is not used. IN wi-Fi Routher Connection Manual It should be written how to get into the web interface to control the router, if you find this section is not possible or the manual itself is missing - it is worth checking the addresses http://192.168.1.1 or 192.168.0.1 Depending on what address we managed to proper. In your computer browser. If you have already tried to connect the router, you need to pre-reset the settings with the button "RESET" on the rear panel. It is also worth checking the same addresses but with a protected protocol https: //, instead http: //
On the page that opens, you will be asked to enter a login and password if nothing is specified in the Wi-Fi connection instructions, it is worth trying a pair of Admin / Admin or Admin / Password - these are the most common couples and they are found in almost all popular router models. After entering the administration mode, select the Russian language in the interface settings, so that everything becomes intuitive if it is present.
Most often in Wi Fi routers, sending packages in the intranet interface is allowed, so you can already include additional PCs and connect them through other sockets for the internal network, and start using the internal network.
How to set up a wi-fi router
How to enter data to access the Internet connection. We will consider below, on the example of one of the Wi-Fi routers, but for now, let's go to the "Wireless Settings" settings section ( setting up a wireless network) or in the "Wi Fi" section, "Wireless", etc.
Now give the name of your home Wi-Fi network in Name (SSID). Under this name, the wireless network will be displayed in the list of available networks on another device. Choose your region (Europe - American installation has a greater range, which, however, is prohibited from us). In the CHANNEL column, set the value "AUTO" - then the Wi-Fi router will analyze the air and will use the channel with the least interference. Confirm the settings by clicking on "Apply".
Protection of wireless network
The network is installed, now it's about the choice of protection. Without a reliable password, anyone can go online through your connection. In the protection of Wi-Fi network there are three basic encryption methods: WEP, WPA and WPA2. All of them are vulnerable to one way or another, but with my help your network will be quite reliably protected from hackers. Encryption with WEP extremely unreliable - we recommend not to use it. WPA encryption (Wi-Fi Protected Access - Protected Access), which is based on the AES encoding method, is quite reliably and hacking it problematic. To select keys, the hacker will need a lot of years or a computer, on orders of superior to the speed of the current PC.
Better protection offers WPA2. True, hackers and here were able to find a loophole, but costs when hacking too high. However, all these protection methods require a dedicated authorization server (RADIUS), which in the conditions of a home network or a small office network not applicable. For them, there is encryption using WPA and WPA2 with predefined keys. To use them on the Wireless Settings tab, activate WPA-PSK (TKIP) or "WPA2-PSK (AES)". When requesting "Security Encryption", set the password - it is not recommended to use less than 15 characters for it. Confirm the input by clicking on "Apply".
Optional Wi-Fi Routher Setup
Each network device is equipped with its own MAC (Media Access Control) network address. In the router, you should register the addresses only known to you devices - other access to the router should not be. To do this, press the "Advanced" menu item to the "Wireless Settings" tab and select "Setup Access List". After that, you will receive a list of connected devices. Find out the MAC address of the WiFi module on a laptop or WiFi network card on a PC is simple - in the command prompt type " iPConfig / All."Select the computers for which you want to open free access, and click on" Add ". Now check the box next to "Turn Access Control ON", click NO "Apply" - and the network protected from hackers is ready. Do not forget that it is all better to do after you set up a wireless connection on client computers.
Restart the Wi-Fi router via the web interface and try to configure the network on your device using the following settings:
IP. - from the range of free addresses
Mask. – 255.255.255.0
GetWay. – 192.168.(0-1).1
Configuring the Internet on a Wi-Fi router or setting up an external network

In the event that we need to dilute on the internet Internet - you need to connect a network cable with "Internet" to the external interface on a Wi-Fi router (the external interface is usually slightly away from the rest and signed by WAN)
After that, in the router settings, you need to specify the settings of the external interface of your provider: usually they are in the contract, or call technical support. Also worth not to forget about the DNS - on the router, you probably have a caching DNS server or in the extreme case DNS tunnel, adjust it. It is also worth checking whether the exchange of packets between interfaces is allowed if yes then the Internet is most likely already there in your internal network.
By the way, I want to note that the latest Wi-Fi models routers and some of the previous ones (asus, for example) have the ability to work with the PPPoE protocol - which recently meets more and more often from providers, so at the end of the article you will find step-by-step instructions for setting up a Wi-Fi router with a PPPoE connected . If the Internet you have exactly like that, then make sure you have a router with PPPoE support. I described the basic types of Internet connection so that you can determine your.
GH34WF-MB4.
P.S. Once again I remind you about the "cherished button", answering the question " How to reset the password on the router,if I forgot old. " On each router there is the "Reset" button - after pressing it during the running of the router, it restarts and all settings are set in the original.
Setting up a Wi-Fi router. Detection of Wi-Fi Network Faults
Why Wi-Fi does not want to transmit data? You are connected to Wi-Fi, but the browser cannot display the site. We find ways to solve this WLAN problem:
Low signal Wi-Fi connection.Sometimes WLAN transmits data to one and a half, two times slower and the signal is always bad, regardless of the antenna location. Cause: Your network overlaps another WLAN, which works at the same frequency. In order for several radio networks to exist near without overlaying each other, in the 802.11b / g standard, there are 13 channels at a frequency of 2.4 GHz. Many routers are configured to the eleventh or sixth channels. With free app Netstumbler. You can find and recognize the neighboring WLAN and find out what channels they work on. Download the application from the official site and start searching. After that you will see channels around you networks. Now, through the web configuration of the router, install your WLAN on one of the channels that is not used in this network, and check whether the signal has improved.
How to increase the radius of the Wi-Fi network.If the range of Wi-Fi router is insufficient, WDS technology is usually applied (Wireless Distribution System - Distributed Wireless System). It allows Wi Fi access points to establish a connection not only with customers, but also among themselves. Each of them receives another signal and transmits it further. However, this increase in range is due to another set of equipment for the access point. Next drawback: Access point should provide simultaneous connection with the network, and with a client - this is twice reduces efficiency. The other, less expensive, but often a fairly effective way to cope with the problem - replace a complete router antenna on having a greater gain or at all on Directed.
Wi-Fi Router or Wi-Fi Access Point Loses Connection.The network functions normally, but the connection is constantly torn. The problem is most likely in low capacity of the power grid. Even a small voltage difference is enough for the router to lose connection. Solution: Get a small uninterrupted power source and connect the router through it. If this happens rarely, most users turn off / turn on the device, but this is not an output.
Communication breaks Wi-Fi connection.When a Wi-Fi router and a computer adapter are made by different manufacturers, it can cause some problems. As a rule, software update helps here. Find the latest version on the Supplier website and set it through the configuration menu. This problem is especially solved by updating the firmware at access points and D-Link routers.
Common Errors and Setup Wi-Fi Router

Incorrect IP configuration. In order for two components of the network connection to exchange files, each you need your own IP address. These network data distributes the DHCP server (Dynamic Host Configuration Protocol) in the router (do not forget to check the router web interface so that the DHCP server is turned on). Open the control panel and select "Connect to the Internet". Select "Settings" in the WLAN connections menu. Next double click on the "Internet protocol" (TCP / IP) and activate the "Get IP Address automatically" option. Confirm by double clicking on "OK". If you have several devices that can be DHCP servers, there may be a conflict between them. This leads to this chaos. To track exactly what device disrupts work, use the DHCP Find application. It reports the MAC addresses of the DHCP server. MAC addresses are typically written on the bottom of the devices. Thus, you can quickly identify the perturbator of calm and disable the DHCP server in it. If the connection is still not functioning, it is possible to blame the proxy server settings in the browser. Configure your browser: in Internet Explorer Click on "Service | Properties of the browser "and go to" Connections ". In the "LAN Settings" section, remove the checkboxes opposite all items, including the "automatic definition of parameters". In other browsers, such as Firefox, Shrome or Opera, these functions are similar names.
Programs for configuring and optimizing Wi-Fi network (WLAN)
DHCP.Find. — looking for violators of calm WLAN
Putty. — configures WLAN routers
Easy.Wi— FiRadar — displays all WLAN connections in the district
Wire.shark. — finds unprotected data
Network.Share.Browser. — shows all free networks
Wlandscape. — creates a WLAN coverage card
Wi Fi Router Netgear WNR3500L. Simple setup

On the example of the chehov.net provider
- The cable from the provider is connected to the router (in WAN port - yellow).
- We take another cable (hanging from 2 sides vitua couple). Connect to the router (LAN port - orange) one end of the cable, and the other to the computer.
- Connect the router to the outlet. Turn it on.
- Insert the disc from the kit to the drive (Russian interface). Customize step by step. Everything is very clear.
- Further watch the video (below) and configure the PPPoe Connection: We go to the web interface - www.routerlogin.net with a pair of Admin | Password, select the connection type - PPPoE, set the login and password from the contract, IP automatically, change the password to access the router. Apply settings, reboot - ready!
9hqhe6h92iu.
How to configure Wi Fi Router Netgear JWNR2000 with PPPoe Type Connection
Go to the Internet Explorer, Mozilla, Opera, Safari browser and in the address string to dial 192.168.0.1. In the window that appears in the "Username" field, enter Admin, in the "Password" field, enter Password and press the "OK" button.
After this procedure, the router menu will appear:

Configuring PPPOE connections
Press the "OK" button in Fig. above. "Basic Settings" will appear (in the left menu it is: Installation - Basic Settings).
To the question "Does you need to connect information about connecting when connected to the Internet?" We answer "yes":

In the "Internet service provider", select "Other" (which corresponds to the type of PPPoE connection):
Connection Mode - Connection Mode. "Always inclusive" for a permanent connection. "Connection on demand" - installation of the connection if necessary - that is, when the traffic directed to the Internet appears, the device will establish a compound, and in the absence of activity more than the time specified in the "idle time before disconnection (in minutes)" is disconnected. In the case of "Connecting manually" - the connection is installed and completed manually

"IP address on the Internet" We leave "get dynamically from the Internet service provider" , if the IP is not issued by the provider (static) , like the remaining parameters (everything should be in the contract):
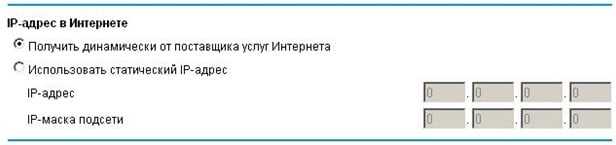
You can specify the DNS servers addresses manually if there are such from the provider or leave the receipt automatically:
Chief DNS: xxx.xxx.xx.x
Additional DNS: xxx.xxx.xx.x

"MAC address of the router" leave the default:

Setting Wi-Fi and Safety with Encryption Key

Setting the Wi-Fi security network using the filtering on the MAC address

Setting up Netgear WG602 Access Point

Setting up Wi-Fi access point NETGEAR WG602 is quite simple . Before connecting to connect, clamp the "Reset" button, which is located on the rear wall of the access point for 20 seconds to reset all settings to the standard. Remember that if you use an Internet connection through a pair of login password, then you need an access point with support for the PPPoE protocol, the connection of which is described above, the NetGear WG602 access point cannot be used with this type of connection to the Internet.
We connect the NetGear WG602 access point to the computer's network card with twisted pair. In the configuration settings of the network adapter (Maps) of the computer, we prescribe an IP 192.168.0.2, a mask 255.255.255.0, removing the previous settings if they have occurred there, but you can also use the second network card on the motherboard to set the access point.
Open the browser to connect to the Internet Access Point Interface, we write in the address bar 192.168.0.227, the dialog box should appear where you must enter Login: Admin. password: Password (these settings are spelled out on the bottom cover of your access point)
We go to the Wireless Settings menu, type an arbitrary network name - Wireless Network Name (SSID) and region (Country / Region), click "Apply".


Now we need to go to IP settings and "knock" the settings of the provider from the contract by removing a tick with DHCP. This tick is not required to remove only those that the provider assigns IP automatically or you use a wired router (switch) with an IP assigned to it. Such routers are required to connect several devices in the apartment. All other settings leave the default.

Reboot the access point (go to the Reboot AP menu section), remove the cable from the computer's network card:
1) If your Internet cable is connected to the aforementioned switch with an assigned IP provider, then the end of the cable that you pulled out of the computer insert into the switch and connect to the new Wi-Fi network using any device supporting this wireless technology, entering Only password (for example, smartphone). Skip this paragraph if you do not use such a router.
2) If you have in the apartment (in the house, office), only the cable from the provider, the end of the cable, pulled out of the computer, also take out the access point and connect the Internet provider cable to it. Check the network performance.
In Windows 7 there are many ways to create and configure a wireless network connection, which are called wireless network profiles:
- Network Connection Icon In the Notification Area - ########## is the main way to connect users to available wireless networks.
- SET UP A Connection or Network (Set Up A Connection OR Network) is a way to manually create a wireless network profile users.
- MANAGE Wireless Networks (Manage Wireless Networks) dialog box is another way to manually configure wireless networks and indicating their exact parameters.
- Group Policies - Network Administrators can use Group Policy Settings in Active Directory Domain Services (AD DS) for centralized configuration and automatic deployment of wireless network settings on computers, domain members. (See the Wireless Group Policy Parameters in Windows Vista, in the heading "Cabler" for April 2007)
- Command Line - Network administrators can use the netsh.exe netsh.exe utility context for manual configuration of wireless networks and their parameters. There are Netsh commands to export existing wireless network profiles to an XML file with the subsequent import of the wireless network profile from this file to another computer.
The following sections describe in detail how to connect to a wireless network using the Network Connection icon in the notification area and the Connection or Network Setup dialog box in Windows 7, how to manage wireless networks, and how to connect to non-wistrish wireless networks.
Using network connections icon in the notification area
To connect to an available wireless network, click the Network Connection icon in the desktop notification area. The opened panel will feature a list of detected wireless networks, and on computers, domain members, - names of wireless networks configured by the Group Policy Means (Fig. 1)
Fig. 1 list of available networks
From this panel, you can connect to a wireless network from the Double-click list, or by selecting the network, and then clicking the Connect icon (Connect), or by right-clicking the Network Name and selecting the Connect (Connect) in the context menu.
To view information about wireless networks in the list, hover the mouse in the network name. You will see the name of the wireless network, signal power, security type, communication type (802.11b / g / n) and network identifier (SSID). The state of the connected network and its properties or network configured using group policy can be seen by selecting the command to display the properties of the wireless network in the context menu (Fig. 2).
To update the list of wireless networks, click the up or down arrow in the upper right corner of the panel. To turn off from a wireless network, right-click the network icon and select "Disconnect".

Fig. 2 Dialog box of the state of the wireless network connection.
You can open this dialog box in Windows 7 (Fig. 3) by selecting the New Connection or Network link (Set Up A New Connection or Network) link in the Network and Sharing Center (NETWORK AND SHARING CENTER).

Fig. 3 Connection or network settings dialog box.
To manually create a wireless network profile, select Manually "Connect to A Wireless Network), and then click" Next ". You should see what is shown in Figure 4.

Fig. 4 Page entry information about the added wireless network.
Enter the information about the added wireless network:
Network Name - Enter the name of the wireless network;
Security Type - Select the method used to authenticate the connection to the wireless network from the following options:
- No authentication (OPEN) - an open authentication system without encryption;
- WEP - Open authentication system on the Wired Equivalent Privacy protocol (WEP);
- WPA2 - Personal access via Wi-Fi Protected ACCESS 2 (WPA2) with a shared key (also known as a key phrase);
- WPA - personal access via Wi-Fi Protected Access (WPA) with a shared key;
- WPA2 - Enterprise access via WPA2 protocol with authentication according to IEEE 802.1x;
- WPA - Enterprise access by WPA protocol with authentication according to IEEE 802.1x;
- 802.1X - authentication according to IEEE 802.1x standard with WEP (also known as dynamic WEP).
The selection depends on the capabilities of the wireless network adapter, known Windows. If any type of authentication type is not displayed in the list, you need to check whether the wireless adapter supports this type and whether the latest driver version is compatible with Windows 7.
Authentication using the shared key in the list is missing. Microsoft strongly recommends it to apply because it provides a low security level of the wireless network. To configure authentication using the shared key, select in this panel "without authentication" (Open), and then select "Shared" on the Security tab in the Wireless Properties (as described later in this article).
Encryption Type type - select the method used to encrypt data when transmitting wireless network. The selection depends on the selected security type.
- When choosing the type of security "without authentication" (OPEN), nothing will be selected;
- when the WEP security type is selected, WEP encryption type will be selected;
- when you select the security type of 802.1x, the WEP encryption type will be selected;
- if you select the type of security "WPA2-personal", "WPA2-Enterprise", "WPA-personal" or "WPA-Enterprise" You can choose the type of encryption - AES or TKIP.
As before, a list of encryption options depends on the capabilities of the used wireless network adapter registered in Windows.
- SECURITY KEY - Enter the WEP key (if the WEP security type is selected), the shared WPA key (if the security type "WPA-personal") is selected) or the WPA2 key is shared (if the security type "WPA2-personal" is selected). For the security types "WPA2-enterprise", "WPA-Enterprise" and "802.1x" Windows 7 automatically defines the security key when authentication is carried out according to 802.1x.
- Hide Characters - Specify whether you want to view the values \u200b\u200bof the entered security key.
- Start this connection automatically (Start Connection Automatically) - specify whether Windows 7 will automatically connect to this wireless network. If you remove this check box, you must manually connect to the wireless network from the list of available networks displayed by clicking the Netificant Netification Area.
- Connect, even if the network does not broadcast (Connect Even If The Network Is Not Broadcasting) - Define whether Windows should try to connect, even if the wireless network does not report its name. It will force Windows to send a trial request frame to detect a wireless network. These trial requests can be used by attackers to determine the name of the unwarked network.

Fig. 5 Successfully added page.
You can select "Change Connection Settings" to access the properties page of the wireless network, as described later in this article, or click the Close button (Close).
Installing the router (router) - the first step to creating a home network, but how to choose it correctly? How to configure the router after purchase? Follow this instruction to pick a router and customize your home secure wireless network (Wi-Fi).
Steps
Installing router
- Make sure the router is connected to the power and enabled.
-
Connect it to the computer via an Ethernet cable. It is not always necessary, but it may be useful if you want to configure a wireless router before connecting any wireless devices to it. Connecting a computer through the physical cable will allow you to mess with the wireless network settings without losing connections with the router.
- For the most efficient router setting, connect it next to the computer. At the end of the setup, you can move the router to its permanent place.
-
Enter your data to connect to the Internet. This includes the IP address and DNS from your Internet provider. Most routers fill these fields automatically. Otherwise, contact your internet provider and find out the data you need to enter.
Set up a wireless network. Most routers from the Wireless Settings section are in the main menu. There you can enable or disable the wireless network, change its name and select the type of encryption.
- In the SSID field, enter the network name. This name will be displayed on any device that has discovered your network. If you live in a densely populated area, do not use your personal data as a network name, as any person with a wireless communication device recognizes them.
- Make sure you have chosen the newest encryption type available for your router. In most cases, it is WPA2. WPA2 uses only a password. You can choose any you like. Sophisticated passwords consist of uppercase and lowercase letters, numbers and symbols.
-
Save the settings. After executing the settings on the router configuration page, click "Apply" or "Save Settings". After a few seconds, your settings will take effect. In some cases, it may be necessary to restart the router.
Place the router. To get a better signal, try placing the router in the center. Remember, any obstacles - walls or doors - worsen the signal. If your home consists of several floors, you may need several routers to organize a stable wireless network.
- The only thing that can limit you in choosing a location for your router is a physical connection to the modem.
Purchase a wireless router. To determine which best of all it is suitable, take into account a number of factors. It is necessary to take into account the distance, the number of interference, the transfer rate and the security level of the wireless network.
Connect the router to the modem. After buying a router, you need to connect it to the modem. On the rear panel of the router there is a port marked as WAN / WLAN / Internet. Using the standard Ethernet cable, connect this port to the modem.
Connect to router
-
Connect the wireless device to the network. Once the router began to transmit a wireless signal, you can check the connection by scanning the available wireless networks using another computer, smartphone or tablet.
- Scan for new networks. In Windows, click on the network icon in the system tray in the lower right corner of the screen. Select "Connect to the network" and find the name of your network in the list. On Mac, click on the AirPort icon in the menu bar, which looks like 3 curved lines. Select your name in the list available networks.
-
Enter password. If you selected WPA2 encryption method, then you need to enter a password for connecting. If you use a personal computer, you can disable hidden characters, which will simplify the password entry.
Check the connection. Once you have connected to the network, wait a little receipt of the IP address. Open a web browser and try to go to the site that you usually do not come to (this ensures that you do not download the site from memory).


 in Photoshop How to make a grid in photoshop CS6")


