Today, before any of us, the doors are open in Magic world computer technology, now you do not need to bother with development and printing, as before - and then be upset for a long time that the photo turned out to be a little unsuccessful.
Now, from a good moment to being captured in a photograph, one second is enough, and it can be a quick shot for a family album, and a highly professional shooting, where work after the transfer of the "caught" moment is just beginning.
However, the processing of any graphic file today is available to anyone, and you can learn how to make the most beautiful frames very quickly. One of the most popular programs that help you polish any photo is, of course, Adobe Photoshop.
In this tutorial I will show you how easy and simple it is to make blurred edges in Photoshop. I think it will be both interesting and useful!
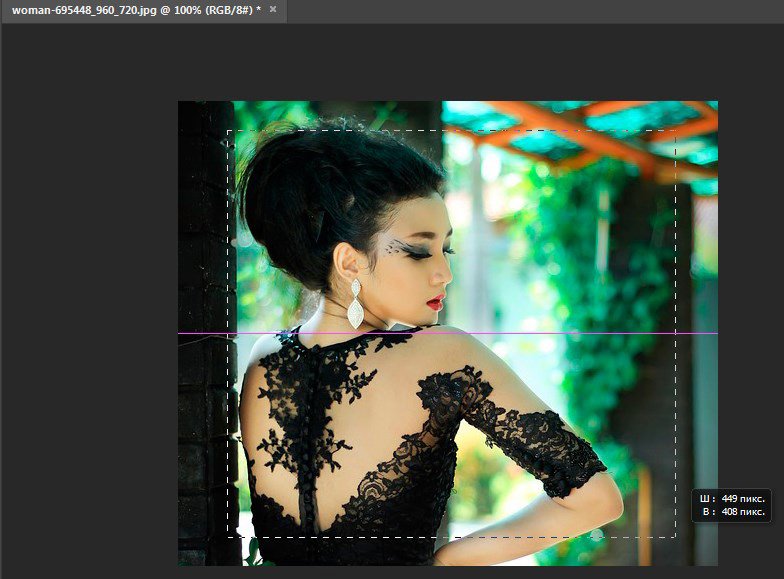
The easiest way. To blur the edges, open the desired image, in fact, in Photoshop, and then determine the area that we want to see blurred as a result of our efforts.
Do not forget that we are not working in Photoshop with the original! We always create an additional layer, even if you already know how to work well with photos - accidental failures should not spoil the source in any way.

On the left small vertical panel in Photoshop, right-click on the tool called "Selection" and then choose "Oval region"... Using it, we define the area in the picture that does NOT need to be blurred, for example, the face.


We open then "Selection", choose "Modification" and "Feathering".

A small new window should appear with one and only, but necessary, parameter - in fact, the choice of the radius of our future blur. Here we try over and over again and see what comes out. First, let's say select 50 pixels. The required result is selected by the method of tests.

Then invert the selection with the keyboard shortcut CTRL + SHIFT + I and press the key DEL to remove excess. In order to see the result, you need to remove the visibility from the layer with the original image.

Method number two
There is another option, how to blur the edges in Photoshop, and it is used much more often. Here we will work with handy tool by the name "Quick mask"- it is easy to find it almost at the very bottom of the vertical program panel on the left. You can, by the way, just press Q.


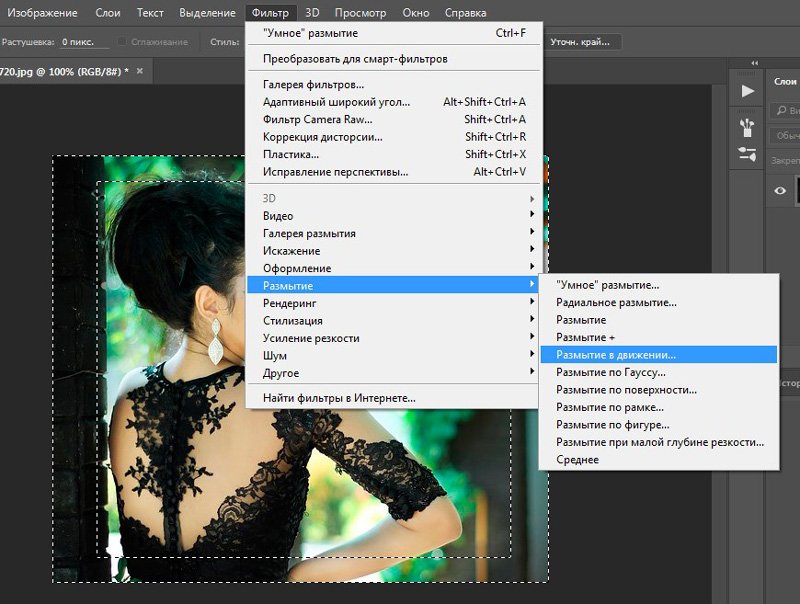
Then we open "Filter" on the toolbar, select the line there "Blur", and then "Gaussian blur".

The program opens a window in which we can easily and easily adjust the very degree of blur. Actually, here the advantage is noticeable to the naked eye: you work here not by some intuition, sorting through the options, but clearly and clearly defining the radius. Then just click "OK".

To see what happened in the end, we exit the quick mask mode (by pressing the same button, or Q), then press simultaneously CTRL + SHIFT + I on the keyboard, and simply delete the selected area with the button DEL... The final step - remove the unnecessary selection line by clicking CTRL + D.

As you can see, both options are quite simple, but with them you can easily blur the edges of an image in Photoshop.
Good luck with your photos! And never be afraid to experiment, this is where the magic of inspiration lies: sometimes a real masterpiece is created from the most seemingly unsuccessful photos.
1 voteGood day, dear readers of my blog site... Today we are talking about Photoshop and I will tell you about a few more "tricks" of working with the edges of pictures in general and layers in particular. Competent work in this direction is the best indicator of professionalism, and therefore I pay great attention to this issue.

In this article, you will learn how to blur the edges in Photoshop to create a cool image for your blog post and, since this is the topic, I will teach you how to handle layer boundaries in a few new professional ways that I haven’t mentioned yet.
Working with a picture for a website
Quite frankly, blurring the edges for the picture you are about to insert into the text of an article is an outdated way of styling. Now almost no one uses it, but interest in this issue is very significant, judging by the requests in search engine and the number of articles on this topic.
Therefore, I cannot help showing you how to achieve the desired effect, but at the same time I want to offer a better alternative in two variations. Suddenly someone can be persuaded to abandon the use of the outdated method in favor of a less hackneyed one.
So, first about the main thing. We open the image.

Now select the Rectangular Selection Tool. If you cannot find it, then hold down the mouse button held down for a couple of seconds on the second button of the panel on the left. There might be an oval region tool here.
By the way, if you use an oval, the photo will become more effective. Rectangular frames have already outlived their usefulness, but ovals are still in the top. Judging by social networks... Well, I'll show you an example later.
So, back to the main topic. For now, select the rectangle.

Draw an area in the picture that will not be blurred. If you want the square to remain clear, hold Shift while drawing. Hold down the button and drag the mouse over the picture. I need a rectangle, and therefore I will not do this, and you experiment.

After you have done this, the effects will be applied not to the inner part of the selected object, but to the outer frame. Go to filters, section "Blur". There are many different possibilities, you can try each one and see how this or that function works. More often than others, experts use "Gaussian Blur ...". Let's try it first?

Pull the slider and see what changes take place in the photo. Don't forget to check the box to enable Preview.

I love Motion Blur just as much.
The scheme of actions is the same, but the effect is slightly different.

Ready. But, as promised, I'll show you two more interesting effects.
Well, firstly, now it is very popular to write quotes in pictures and you already know how to do it. It's just enough not to use Inversion. Take the Rectangular Selection Tool. Choose an area.

Don't use inversion, but go straight to Filters and Gaussian Blur. Use the Text tool to blur the focus a little too. It is very important that the image is not very blurry and slightly guessed. Experiment.

Now, as promised, I will show you how to make the blur around the edges more effective. Select the picture and under the rectangular selection button select the ellipse. Again, to keep the shape straight, hold down the Shift key and then select Inversion in the "Selection" section in the top menu.

Apply a Gaussian blur filter.

In principle, this is already not bad. Can be used. To shoot crawling ants, hold down Ctrl + D at the same time or click anywhere in the photo.

You can crop to make the picture square.

That's it, now you know how to blur the edges of a photo beautifully and professionally. Now let's move on to a more interesting and difficult question, namely, blurring the boundaries of the layer. Don't worry, everyone will succeed!
Professional layering for beginners
You will have to try to correctly expose the edges of the cut layer. I can only show the tools, but I will have to configure it myself. If you want a really cool effect, then at first it may take more than one hour. But let's get started.
We open the image.
Selecting the magnetic lasso. Its peculiarity lies in the fact that the lasso line seems to stick to the boundaries of the object that needs to be cut. If for some reason the line moves out, it is enough to put an extra point by clicking in the place where the bevel occurs. This will secure the line. And it will move on wherever you need it.

My line moved out in the white areas, and therefore I had to put dots in the area of the face before the magnetic lasso selects the area I did not need. Over time, you will get faster, and you will know where the lasso defines the object differently.
Here is the result I got.

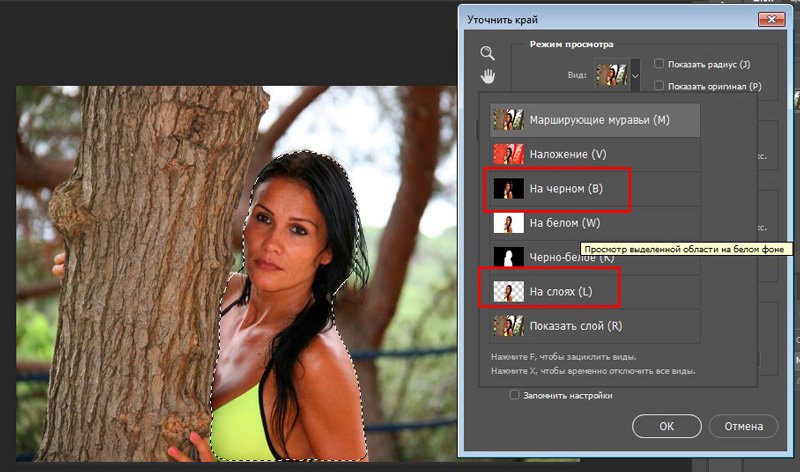
In the center of the selected object, click on the right mouse button. Next, select the "Refine edge" option to perform additional settings.

First of all, decide on the type so that it is more convenient to adjust. I prefer to work in black, white or layers.
Now you can adjust 4 main parameters: anti-aliasing, feathering, contrast and edge offset. Unfortunately, there is no single rule of how indicators should look. Much depends on the background, and therefore, if possible, try to immediately work with the image inserted into the desired photo.

After setting the settings, save the changes and hold down on the keyboard Ctrl + C (copy) and paste (Ctrl + V) so that a new layer appears. Remove the "eye" icon from the background menu.


Again, you will have to experiment and remove halos and fringes until you achieve the desired effect that you are completely satisfied with.

Ready. There are many ways to work with the background of a picture. Watch the video, there are many more interesting ways... The only thing I would like to note. The author of the video makes it difficult to work with the size of the brush. Use brackets (“(”, ”)”) to increase or decrease the diameter.
Well, in order to roll back actions one step back, it is better not to go to the top panel, but to use the Ctrl + Z keyboard shortcut or history. Learn combinations and work will go faster.
Now you know all about the edges of the object and the picture. If you are interested in photoshop, then. The program has a bunch of hidden features and capabilities. The more you open up, the cooler your photos are.
To speed up the learning process, I can recommend the course of Zinaida Lukyanova - " Photoshop from scratch in video format 3.0 ". You will learn a bunch of tricks and learn all about tools and functions. This is what distinguishes a professional from a person who just loves to work in Photoshop.

If you are interested in website design, then a two-month school of web designers will soon open on Netology, where professionals from largest corporations in Russia they train specialists who are completely ready for work - "Web Designer" ... At the end of your studies, you will even have to do and defend your thesis, which will become part of your future portfolio.
And for starters, while the recording is in progress, you can look at the courses and school of Alexei Zakharenko "School of Web Design" ... For the first three days, you get full access to the service for free.

So that is all. If you liked this article - subscribe to the mailing list and receive more interesting publications about making money on the Internet directly to your mail. Perhaps very soon you will start from your projects. It's as simple as that.
Good luck in your endeavors and see you soon.
To blur the edge of an image in the Russian version of the Photoshop program, use a simple instruction.
Step-by-step instruction
It is necessary to use the Rectangular Marquee Tool and draw, for example, a rectangle of arbitrary size on the picture.
Place the cursor inside the selected rectangle and right-click to call context menu in which to select "Refine Edge". 
Set the sliders in the window according to your idea. Let's look at some of the functions in the Refine Edge action:

Also here you can see what we get in five different modes:
- View our selection with a standard selection border.
- View our selection as a quick mask.
- View on a black background.
- View on a white background.
- And view the mask that defines the selected area.
If we are going to leave the picture on a white background, then we will focus on the fourth option. Click OK. 
Now press the combination CTRL + J. And click on the eye on the Background layer. 
So we save in JPEG format or PNG. 
This is not all. Almost the same blurring of the edge of the picture can be done with one automatic function called Feathering. After you select the rectangular area and right-click to bring up the menu, select Feather in it. Then put a suitable radius in the window. 
Further - proceed according to the text that was above: CTRL + J. And again click on the eye on the background layer. 
Save the result. Here's how easy it is to blur the edge!

Good day to you, my Dear friends... Christ is risen! How are you doing? How is your mood? I have excellent! Feels like May. But let's move on to the article. Previously, from time to time I saw a very interesting effect in photographs, when the edges are slightly blurred, but the photo itself remains intact. This is why I also decided to do the same effect on some images.
And today I will show you how to make blurry edges in Photoshop. And I will experiment on the old Spider-Man from the movie of the same name. You can, of course, select the Blur tool and simply paint over the edges of the image. But as for me, this method is not very good, so I will use others.


This is how we blurred the edges of the image. And it took us less than a minute. But as you can see, the blur has clear boundaries. Some like to leave it like this, and some prefer smooth transition.
Advice: In fact, you don't have to make two selections with the held Alt. You can make one selection only in the place where the blur will go. And after that you need to invert the selection. To do this, press the key combination SHIFT + CTRL + I or choose the menu "Selection" - "Inversion". Then you will automatically have a selected frame.
Smooth blur
In order for us to have a not abrupt transition, we need to do the first two points from previous way, but then the course will change a little.


note ! The size of the Gaussian Blur and Feather Radius depends on the size of the image itself. Here I was guided by this particular size. Experiment.
Other ways to blur
You don't need to use a Gaussian filter, as there are many other blur filters. Let me show you one more example, and then you will try everything yourself.

In my opinion, it turned out great. The picture has become more interesting. You can see for yourself other filters from the same group, and see how they work and what effects they give.
Well, that seems to be all that I wanted to tell you about it. Yes. Such is a small and uncomplicated lesson). But if you want to master Photoshop completely, then I strongly recommend that you fully study one cool video course... Thanks to him, you can learn Photoshop as soon as possible, unless of course you are lazy.
Well, I'm finishing it for today. I look forward to your comments on the topic. And by the way, be sure to subscribe to blog updates, then you will always know about the release of new articles on the topic you need. I also advise you to take a walk around the blog, as there are many articles and for sure you will find something interesting for yourself. Good luck to you. Bye Bye!
Best regards, Dmitry Kostin.
An image in Photoshop can be shaded in several ways. This article will help explain what exactly feathering is, where it is located, and will show by example how it can be done in a graphics editor.
Feathering or Feather is a gradual fading of the edges in the image. This softens the edges and creates a gradual and even transition to the bottom layer. It can only be available when working with a selection and a marked area.
Basic principles when working: first, mark the feathering parameters, then create a selection. In this case, no obvious changes are visible, since in this way we indicated to the program that the two sides to be selected need to be dissolved. Then we get rid of a certain part of the picture in the direction where the dissolution is supposed to be. The result of such actions will be selective removal of certain pixels, while others will become transparent. We will talk about this in more detail in the practical part of the lesson.
Feather settings for tools
Group "Selection":
- Area in the form of a rectangle;
- oval-shaped area;
- zone in a horizontal line;
- zone in a vertical line.

Other selection tools:
- "Lasso";
- "Magnetic lasso";
- "Straight lasso".

Take one tool from the list as an example - Lasso... We look at the panel with characteristics. We select the setting for top panel tools, which will give the opportunity to set parameters for feathering, and then select the area. For other instruments, the parameter is in the same location.

Selection menu
If you make a selection of a certain area, on the control panel we will get access to the actions - Selection - Modification, and further - "Feathering".

What is the purpose this action, if the panel with parameters is already enough different settings? The answer is in the correct course of action. You need to think carefully before highlighting a specific part. It is necessary to determine the need to use shading and the parameters of its application. If you don’t think about these steps and then change your preferences after the selection is created, you will not be able to apply the desired settings to it using the options panel.
There will also be difficulties if you want to see the results, which will use a different number of pixels, since for this you will have to open a new selection each time, especially this process will become more complicated when working with complex objects. When dealing with such cases, using the command - Select - Modify - Feather... A dialog box will pop up - where you can enter a value, and the result will be obtained immediately upon application of the function.

It is with the help of the actions located in the menu, and not the settings that are on the panel for the parameters, that the keyboard shortcuts are indicated for the implementation of the fastest access. In this case, you can see that the command will be available using the keys - SHIFT + F6.
Now let's move on to the practical side of using feathering. Begin to create the edges of the dissolve image.
Practice

Feather to smooth out sharp edges
Feathering will also help to smooth out the sharp edges of the picture, which is very effective when working with collages. The effect of an unnatural drop in the edges of different objects becomes noticeable when adding new effects to the collage. As an example, consider the process of creating a small collage.
- On the computer, create a folder into which we download the sources - a texture, as well as clipart with animals. We create new document, for example, with a size of 655 by 410.
- Add the clipart to a new layer, for which you need to go to the folder you created earlier. Press the right mouse button on the image with animals and select from the pop-up - To open with, then AdobeP hotoshop.

- Animals will be opened in a new tab in Photoshop. Move them to the previous tab - select the component "Move", drag the animals into the document that was previously created. After the required document opens in the workspace, without releasing the mouse button, drag the picture onto the canvas.

You should get the following:

- The image will be large and will not fit entirely on the canvas. We take the command - "Free transformation" using CTRL + T... A frame will appear around the layer with animals, the required size for which can be selected thanks to its movement around the corners. This will allow you to find the correct size. Only at the same time keep SHIFT so as not to disturb the proportions in the image.

- The next stage involves adding texture to the background, for which we repeat steps 2, 3. A huge texture will appear on top of the animal layer. Leave it as it is, don't try to make it smaller, as we'll just move it later. Move the animal layer above the texture on the layers palette.

- Noteworthy is the process of contrasting the edges of a picture with animals on a green background. The defect of separation from the background of white will be visible immediately, as you will notice a thin strip of white. If you do not observe this defect, it means that the transition turned out to be completely unnatural from the fur of the animal to the environment. In this case, we need feathering to make adjustments to the edges of the animal picture. We make a slight blur, and then a smooth transition to the background. Keep on the keyboard CTRL and click on the thumbnail, where the layer appears on the palette - this will help to make a selection of the area along the very outline of the layer.

- CTRL + SHIFT + I will help to invert the selection.

SHIFT + F6 enters the feather size, for which we take 3 pixels.

Delete will help remove excess after applying shading. For better effect we pressed three times.
CTRL + D will contribute to the removal of excess selection now.
Now we will see a significant difference. This is how we have softened the edges in our collage.

Important: Large dimensions may not allow the frame to fit in the visible space in Photoshop. It is necessary to reduce the scale for the document - CTRL + -.
Feathering techniques can help you make your compositions look more professional.


