If you are not satisfied with the standard icon size, then the recommendations will show you how to change the size of the icons on the Windows 7 and 8 desktop. Icons get an uncomfortable visual perception, so they should generally be reduced or enlarged.
The advantage of small icons is that a lot of them can fit in the workspace. Large icons are convenient because they are more readable. Everyone chooses for himself the size of the labels that he needs.
In the article, we will consider ways to select preset sizes for desktop icons, set custom sizes, with a smooth increase or decrease in shortcuts at once.
Methods for changing desktop icon sizes
1. Is the easiest way to increase or decrease the shortcuts of the Windows 7 and 8 desktop. To do this, and refer to the desktop, select one icon with a left mouse button click. Then, on the keyboard, hold down the left CTRL and rotate the mouse wheel away from you (up) to increase, and towards you (down) to reduce the icons. Don't forget that the size is resizable up to a certain limit.
2. The method uses 3 standard sizes. Right-click on the desktop space (where there are no shortcuts) and hover over "view" in the menu. An additional list will open, where the currently assigned size will be marked, select one of them:
- Large
- Ordinary
- small

After marking with the left button, you will immediately see how the size of the icons on the Windows 7 and 8 desktop has changed.
Tweaking Windows 7 Shortcuts
If we used the two previous methods to increase or decrease the icons, then this method will show how, in addition to resizing, you can also adjust the visual display and font style of the label names.
To change sizes and fonts, you need to open additional visual window settings. In different editions of Windows 7, it opens in different ways.
1. In Windows 7 editions Starter, Home Basic, click "start" -> "control panel", then find "screen".


2. In Windows 7 Ultimate, right-click on an empty space within the desktop, then click the last item "personalization". In the lower block of the new window, click on the "window color" link.


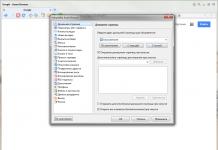
In the window "color and appearance of the window" in the "element" field, select the line "icon" from the drop-down list. To the right of the line in the "size" field, set the size of the labels.
Use the line below to select the font to your taste, and also adjust its dimension, boldness or italics.

Note: when , the font of the entire interface will also change.
Click "apply" and see the result. If everything suits, click "OK".
You can change the size of desktop icons in Windows 7 and 8 in a few seconds by setting a custom or standard size. If you spend more time, you can also fasten elegant fonts to the label names.
How to increase the icons on the desktop or how to reduce the size of shortcuts. Very often, the number of icons on the Desktop reaches the allowable maximum - after all, we want to have most of the frequently used files and programs, as they say, “at hand”. As a result, the desktop becomes overloaded with countless colorful pictures. The way out of the situation can be to reduce the size of icons and labels.
Another situation is also possible, when the small icon size, set by default, becomes uncomfortable for perception, and it becomes necessary to increase it.
Let's look at two ways to resize icons.
1. Hover the mouse cursor over any icon on the desktop or on an empty space. Press the key ctrl and we hold it. At the same time, scroll the mouse wheel forward. All icons located on the Desktop will gradually increase. Choose the size you like and release the key ctrl.
If you don’t have a laptop and a mouse at hand, you also need to hover over any icon, press the key ctrl and swipe the right side of the touchpad away from you.
2. Move the mouse cursor to an empty space on the desktop. We click RMB. In the context menu, select the item View . A menu appears on the right, in which you need to check the box next to the desired item:
- Large icons
- Medium icons
- small icons
Look at all the options and leave the one you want.
How to make icons and shortcuts smaller.
Reducing icons and shortcuts located on the Desktop is done in the same way. The only difference is that to reduce the icons in the first way, you need to scroll the mouse wheel in the direction towards you while pressing the key Ctrl.
And that's all for today.
Waiting for your comments.
In this article, I will guide you on how to increase desktop icons on Windows XP. This instruction will be relevant to those who suffer from visual impairment, the elderly (even grandparents have already learned how to use a computer), and will also be useful to those who need to change something in the interface every time.
Previously, when a monitor with a diagonal of 14 inches was considered the norm, there was no need to increase anything. Even if you try to make something bigger, it takes up half the screen. Now these monitors are not even produced. Computer screens are getting bigger and wider, their useful area is increasing, and some elements can be made larger. This article will discuss two ways that will help increase the icons on the Windows XP desktop.
Method One
To enlarge the Windows XP desktop icons using this method, right-click on an empty spot on the desktop and select "Properties" and then the "Appearance" tab.
Then click the "Advanced" button and in the new settings window that opens, select the "Icon" item from the list. To enlarge the Windows XP desktop icons, you must enter the desired number in the "Size" field, for example, 64. By the way, you can immediately determine the type and size of the font in the fields below, which can also be useful for the visually impaired.
Increasing desktop icons
Enlarged icons
If necessary, you can more accurately adjust the size of the icons by operating the "Size" field. Using this option, you can not only increase, but also reduce shortcuts.
Method two
The second way to increase the size of Windows XP shortcuts is much easier - you do not need to write the numbers yourself - it all comes down to setting one checkmark. This method is simpler and suitable for novice computer users. With it, you can only increase the Windows XP desktop icons, you can not reduce. Moreover, the increase will be only in one size, and it will not be possible to fine-tune it, as in the first method.
To do this, you should again right-click on the consolidated place on the desktop, select "Properties", the tab "Design". Then you need to click on the "Effects" button and check the "Apply large icons" box.

Recently, for some reason, very often they ask me a question in my telegram channel - how to reduce the icons on the desktop in Windows 10? I decided to write an article on this issue, which, in fact, you are reading.
I first encountered this a few years ago. I was a novice user, and once, turning on the laptop, I found that all the icons were enlarged. Was in a light stupor. It is now, knowing how to reduce the icons on the desktop, remembering the past, only a slight smile pops up.
In general, many resort to such a function, someone, due to vision problems, makes not only icons, but also the cursor and windows large. And someone, so that more files fit on the main screen, makes them small. Like me ;)
How to make desktop icons smaller in Windows 10
- Method 1. I'll start with the simplest method that works in all versions of the operating system, starting with XP. At the time it's open Windows desktop, move the mouse cursor to an empty space, hold down the left or right CTRL key + scroll the mouse wheel up or down. Icon views will change their size depending on the degree of scrolling.

- Reception 2. Right-click on an empty space on the desktop, in the context menu that opens, point to "View" with the cursor, and then, with a dot, activate the "Small Icons" option.

- Option 3. To do this, go to "Options" -> "Screen". Then, by moving the slider in different directions, select the desired size for displaying icons.

How to make icons smaller in Windows 7
For Windows 7 users, as I wrote at the beginning, the first method (CTRL + wheel) is also suitable. But there are other methods, of course they are rarely used, but I will tell you about them as useful information.
Setting the correct monitor resolution
Large or small icons on the screen may be due to the fact that the screen extension is poorly configured (possibly lost). If this is the case, then the view of the window, and with it other elements, are reflected incorrectly.
The recovery goes like this:
- Right-click on an empty space on the desktop;
- In the menu, click on "Screen Resolution";
- I would recommend using the "Recommended" function, thereby the system will select the optimal settings for itself, based on the extension (characteristic) of the monitor.

Windows 7 Classic Theme
You can reduce large icons on the screen by using the classic theme. Yes, many activate it to
When working on a computer, many users need to increase or decrease desktop icons. The level of vision of all people is different, so it will be more comfortable for the user to adjust the display of the size of the Desktop icons to suit their needs.
By default, the size of desktop icons is adjusted depending on the screen resolution of the monitor on a particular computer. The dimensions of all elements of the desktop, if necessary, can be changed.
In the Windows operating system, you can change the size of the icons on the Desktop using regular system tools. These methods work on Windows 10, Windows 8, Windows 7 operating systems.
Let's take a look at two options separately: how to reduce the icons on the Desktop, and how to increase the icons on the Windows Desktop. We will consider changing the size of Desktop icons using the Windows 10 operating system as an example.
The easiest way to make desktop icons smaller is to use keyboard shortcuts. This is the simplest and easiest way to change the size of icons on your desktop computer.
How to reduce icons on Windows 10 (1 way)
Open the Desktop, press the "Ctrl" key on the keyboard, and then scroll the mouse wheel down (towards you). You will see the Windows 10 desktop icons shrink in size. Thus, you can choose a more acceptable icon size option for yourself.
How to reduce desktop icons (2 way)
After right-clicking on the Desktop, in the context menu, click on "View", and then select "Small Icons".
All icons on the desktop became small, decreased in size.
How to increase icons on the Windows desktop (1 way)
Using keyboard shortcuts, you can increase the size of desktop icons. With the desktop open, press the Ctrl key and then scroll the mouse wheel up (away from you). After that, the icons will increase in size, depending on the degree of scrolling of the mouse wheel.
Increasing the size of desktop icons (2 way)
On the desktop, click the right mouse button. In the context menu that opens, select "View" and then "Large Icons".

This is not a custom way to enlarge icons.
How to increase desktop icons in Windows 10 (3 way)
In Windows 10, right-click on the Desktop and select Display Settings from the context menu.
In the "Screen" section, under the inscription "Change text, applications and other elements: 100% (recommended)" move the slider on the scale to the desired position.

The size of the desktop elements will change depending on the position of the slider on the scale.
In addition, you can enlarge a separate part of the monitor screen using .
Article Conclusions
The user can easily and simply change the size of the icons on the desktop of his computer. Windows desktop icons can be reduced or enlarged using keyboard shortcuts, or using the display settings settings.


