Usually, users use this feature of the system in order to have access to all video and audio files that are on the computer. In fact, after setting up a DLNA server on the top ten, the user will be able to read all the necessary data from another device connected to the same server. This will allow you to no longer carry movies on a flash drive to your TV, you can watch them immediately after they are downloaded to your computer.
Video playback without settings
In the top ten, you can reproduce information on another device without even setting up a server. For this, it is enough that the device supported this function and also that they are on the same network with the computer. This method will work even if the user did not set up file and folder sharing when configuring the network.
The user only has to select the required data. It can be a folder, one or several files, then you have to right-click on them and select the item "", in some cases it can also be called " Transfer to device". In the pop-up window, select the device to which the transfer will be made. It must be turned on and online, otherwise it will not appear in the list.
After that, the information will be played back in the standard player in streaming mode. 
How to create a DLNA server using standard system tools
However, for frequent and more convenient use of this technology, it is still worth creating a server; moreover, this can be done using the utilities built into the system.
At the beginning, the user will need to type in the search bar " Media streaming options»And open the found item. 
After that, a new window will open in which you will need to enable this very streaming, for which you need have administrator rights.
In the next window, you can set the name of your server. A list of devices will also be presented there, the user can allow or deny access to files, this can be done by simply installing or unchecking the checkbox. It is also possible for each device to individually configure the types of data to which it will have access. 
After completing the configuration, all devices from the list will be able to receive information from standard folders- Pictures, Music and Videos, depending on the set limits. However, this setting will change the network to private and will also enable network discovery, so you should not change settings on an unsecured network.
How to add custom folders to the server
In most cases, all user media files are not in standard folders, but in other places. At the same time, it is not very convenient to constantly drag them into it to watch on the TV, and then back so that it does not take up space on the hard disk. That is why you can add your folders to the dlna server in windows 10. How to do this will be described in this section.
First of all, the user will need start standard player.
Next, you need to right-click on the desired item in the left part of the window. After that, in the pop-up menu, select “ Management ...", The second word will depend on which section the user needs. 
Third party DLNA setup apps
The same capabilities that built-in tools have can be obtained using third-party programs. In most cases, they also have additional options. For example, the application Serviio will allow you to convert to a supported format. It also allows you to create playlists for files, it also supports the transfer of subtitles. 
It must be installed, after which it remains to add the directories in which the necessary data are stored, and then you can use it.
In this article, we will look at how to set up your DLNA server on Windows using the Home Media Server (HMS) program as an example.
Nowadays, it is more and more often required to have a DLNA server on the home network, since most modern TVs do not support data transfer protocols such as SMB or NFS, but only work via DLNA.
What is DLNA?
DLNA (English Digital Living Network Alliance) is a set of standards that allow compatible devices to transmit and receive various media content (images, music, video) over a home network, as well as display it in real time. That is, a technology for connecting home computers, mobile phones, laptops and consumer electronics into a single digital network. Devices that support the DLNA specification can be configured and networked automatically at the user's request. (Source - Wikipedia)
DLNA Home Media Server (HMS) Installation
The installation of HMS is very simple, but we will still tell you in detail how it works.
First you need to download the installer. At the time of this writing, the official site was down. And it did not work a month before, so below I will give a link to download the latest version of HMS from our server:
There are not very many settings here. In this window, you select the directory where the Home Media Server (HMS) program will be installed and the "Program Group" - the name of the folder in the "Start" menu.
After selecting the installation folder and the name of the folder in the "Start" menu, it remains only to tick "create a shortcut to launch the program on the desktop", if necessary, and press the button " Install«.
At the end of the installation, which takes less than a minute ( depends on your equipment), we are offered to immediately launch the Home Media Server (HMS) program.
This completes the installation of the program.
DLNA Home Media Server (HMS) Initial Setup
So, we have a freshly installed DLNA server, let's start it up and see what it offers us to configure first, as well as make a couple of useful settings. Let's get started.
After the first launch of the program, we see the initial settings window.
In this window, we are asked to select a device to which the media content will be broadcast. There are many templates on the list.
If you have not found your own device or a device similar to yours, then you can leave the standard DLNA Device, as practice has shown, this does not greatly affect anything. After choosing, go on.
And then a choice of folders appears before our eyes, from which we will take media content. You can select folders with your media content now, or you can add them further. We'll look at how to do this below. After selecting folders, press the button " Ready«.
After the initial settings, we are offered to make a backup copy of the settings, image cache, database, set up an automatic backup schedule. We will not dwell on this in detail now and will go further. To do this, press the button " Close«.
After that, the main window of the program appears in front of us. Let's move on to several "important" settings at once.
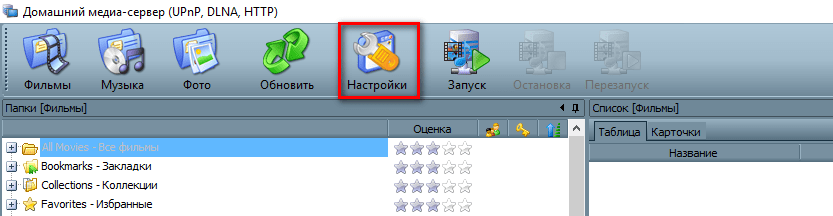
On the left are the types of settings, on the right are specific settings.
Let's go straight to additional settings and set up the DLNA server autoloading with the PC turned on.
To do this, select items 2 and 3.

Now let's go to the " Server"And write down the name of our DLNA server. As we will see it on the net.
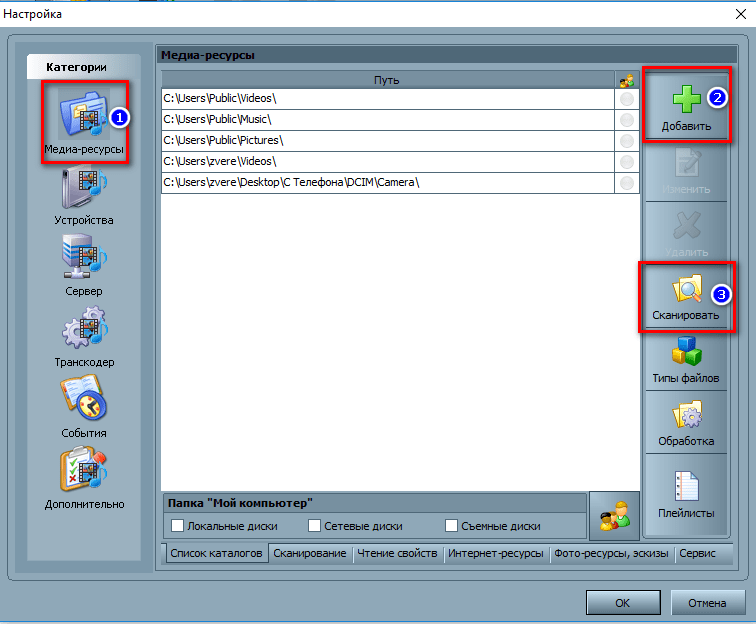
After changing the name, you need to add folders with media content (if you did not do this in the "initial setup or decided to add more folders. Everything is simple. Press the button" Add»(2) and select the folder you want to add. After that, you need to " Scan»(3) so that the files from the folder / folders go to the server.
If you did everything correctly, then your files should appear on the right side (as highlighted in yellow in the screenshot).
If you have your files there, then we already have quite a bit. Launch and use. Everything is very simple here - we press the button " Run«.
If you have Windows Firewall enabled, the system will ask you whether to allow it access to the network. Choose which ones to allow access and click " Allow access«.
 Similar
Not only computers, but also televisions, smartphones, media boxes and other devices that support viewing multimedia content are capable of exchanging and accessing data on the same local network. This means, for example, that you can view a collection of images or video clips stored on your computer on a large TV screen without transferring files using removable media.
This viewing is possible thanks to DLNA- a special set of protocols that allow compatible devices to exchange media content within the local network. Thanks to DLNA the user can listen to music, view images and videos in real time on the screen of one device, while the content itself is physically located on another device. Connection by DLNA can be both wired and wireless.
In most cases, it is proposed to use third-party software to pair a computer and a TV - a home media server, but in Windows 10 you can do without it, since this version of the system already has all the necessary components, namely a server and a client DLNA, and
multimedia player.
Turn on DLNA Windows 10 is easy.
Team control / name Microsoft.NetworkAndSharingCenter in the window "Run" open up Network and Sharing Center and click on the left.

In the next window, expand the section.


And press the button in the next window.

If at the same time you suddenly receive a message "Media streaming is not enabled", go to the service management snap-in, find the setting Windows Media Player Network Sharing Service, open its properties, set the startup type "Auto" and run.

After that, streaming should start without issue.
Note: If you are unable to start the Player Network Sharing service, please check if the service is disabled. Windows Search.
You’re almost done, all you have to do is make sure your TV or other device is available in the streaming media options window and still has access to your computer. After applying folder settings Images , Video and Music must be made viewable on a supported device DLNA... The names of the sections in which the one responsible for viewing shared multimedia content on TVs and other devices is located may differ, it all depends on the model of a particular device. The setting can be called Smart TV , network environment , UPnP etc.

Unfortunately, streaming doesn't always work the way you'd like it to.
In some cases, the TV recognizes a computer on the network, but does not see shared folders and files, files may not play or play with errors. Problems can be caused by incorrect network settings, the lack of appropriate drivers on the PC, as well as the device's support for a number of multimedia formats.
As part of this article, I will write how to create a home media server for Windows 10. Creating a DLNA server will allow other devices to use the media library located on the PC. This is primarily useful for those who have Smart TVs.
What is DLNA Server?
DLNA (Digital Living Network Alliance) is a special protocol that allows compatible devices to transmit and receive media traffic (video, music, photos) on a home LAN, as well as broadcast it in real time.
If the devices support this technology, at the user's request, they can be configured and subsequently automatically combined into a single network.
What is required for streaming playback?
Advice! To play media content on another device (tablet, smartphone or smart TV), you do not need to set up a DLNA server, homegroup, or share a folder. Use the function.
For a home media server to work in Windows 10, it is not necessary to share the folder for public access on the network. It is possible to be on a public network (that is, network discovery is hidden), but streaming will work.
To set up a Windows 10 DLNA server, you need:
- The two devices must be on the same home local network (for example, connected to the same router). How these devices will be connected (via LAN or Wi-Fi) does not matter.
- To enable Smart TV (or other device) and support DLNA technology. On LG TVs, it is called Smart Share, in Samsung - AllShare, in Philips - Simple Share.
Customization
There are several ways to set up a home media server:
- using built-in Windows 10 tools;
- using special programs.
Built-in Windows 10
To turn on:
- In the search bar in Windows 10, enter “Media Streaming Settings” and open the app you find.
- Click Enable Media Streaming.

- All devices that are on the network will have access to the media files. If desired, some can be deleted or configured.

- By unchecking the "Use default settings" checkbox, you can set some filters that will be applicable to this device.
- You can now access your media streaming on your TV from the Music, Videos, and Pictures folders. To transfer video from anywhere to the broadcasting device, right-click on the file and select "Bring to device" in the context menu.

- The Windows media player will open, through which the network device is searched. The specified content is then launched and streamed to the Smart TV.

- A similar function is available in the "Movies and TV" player. Depending on which player is selected "by default", that one will be used for streaming playback.

If you want to open the broadcast directly from the TV, place the media content in the folders publicly available on your home network, or add a new one. This can be done using Windows Media Player:

Using programs
In fact, there are not many free and convenient programs with the necessary functionality. Among the programs for the DLNA server, I would like to note:

In general, programs can be more fine-tuned compared to the way Windows 10 is configured for streaming. They work with playlists, a variety of audio and video formats (including RAW), and have convenient sorting and navigation. The interface is easy to understand and should not be difficult for the average user.
Advice! If you are using an Android Box, you can also access media. To do this, on a Windows 10 computer. On Android, download ES-Explorer, open LAN and click Scan. Select the device found in the local network and you will get access to the shared folder.
If you found this article on a direct search on the Internet, you probably already know what DLNA is and for the most part you only care about setting up a DLNA server on Windows 10. More on this below, and for beginners a little theoretical lesson.
What is DLNA
DLNA stands for Digital Living Network Alliance... This term refers to a special software protocol through which compatible devices can connect to your computer's media library. This is a very useful technology that saves you the hassle of transferring files to other devices for playback. For example, you have a movie library on your computer, but you want to watch some of them on your TV or tablet. Instead of copying a movie to a USB flash drive, disk, or transferring it over a wire to a tablet, just connect to your computer via DLNA protocol. After that, the media content (photo, video or music) will be streamed over the network at high speed and without delays. DLNA uses UPnP (Universal Plug and Play) technology to access the media library, which provides compatibility with hundreds of a wide variety of devices without the need for complex additional software or drivers.
How to set up DLNA on Windows 10
Windows 10 includes everything you need to set up DLNA. You can make your PC a DLNA server or a client to connect to another server PC. The good news is that all of this is customizable and works without the need for additional downloads. In principle, there are many different DLNA servers, but the basic capabilities of Windows 10 will be enough for the average user for simple use.
To set up DLNA on Windows 10, you need the classic Control Panel. By the way, this instruction is suitable not only for Windows 10, but also for previous operating systems, such as Windows 8.1 or Windows 7.
By default, Windows opens DLNA access only to files and folders in standard libraries located on drive C. Since few people store their media files on the system drive, it makes sense to include files and folders from your media disks or other partitions in the library. This is done as follows:
Find the folder you want to include in your media library. Right click on it and select Add to library... Depending on the type of content, select Video, Images or Music... After that, all the content of the folder you selected, including subfolders, will be available to the connected devices.
How to connect to DLNA server on Windows 10
When everything is set up and ready, all that remains is to connect the end device on which you will play the content. It already depends on what operating system or application you are using to connect.
If you want to connect to a DLNA server from another computer, please make sure both devices are on the same network. Then open Explorer and click on the button Network in the left pane. A list of available media devices will open. Select your server in it, after which Windows Media Player will open with access to your media library. From there, you can play videos, music or view photos. Everything is done as simple and convenient as possible, so even the most distant users should not have problems with connection.
How to disable DLNA in Windows 10
- If you decide to turn off media streaming, open Network and Sharing Center, and click on the link Change advanced sharing options.
- In the new window, expand the item All networks and then click Choose your media streaming options.
- On a new window Deny all.
After that, connected devices will not be able to access your media library.


