There are situations when the display sensor can go astray from the initial state. After that, the screen inaccurately detects the place of the tactile touch. Owners of devices running Android OS need to know how to adjust the sensitivity of the touch screen. This article will tell you in detail about the whole procedure.
In total, this process consists in reconfiguring the screen of the device to accurately determine the location of the touch. This is the very first step for a comfortable smartphone use. If you neglect this setting, then in the future you can get a bunch of errors and malfunctions (most often this factor is expressed in communication via SMS and in working with applications).
Android sensor calibration, programs, setting: video
Sensor calibration process on Android devices
The Android shell carries with it a system calibrator that will simplify the work in this matter. The screen calibration procedure begins with the "Settings" section, in which you need to select the "Display" category, as a result of which a menu with the corresponding options will pop up on the screen.Horizontal calibration
The above concept means the adjustment of the position sensor in space, to adjust the horizontal line of the smartphone. This will further improve the clarity of all movements. In the menu that appears at the very end of the list, find the "Horizontal calibration" section. Having found the point of interest, follow the instructions of the smartphone exactly.
The smartphone needs to be placed on a horizontal plane and then select the required function, then the utility will adjust the sensitivity of the touch screen itself. The end result of the setup is that a completion notification appears on the display.
Adjusting the sensitivity of the touch screen on Android: video
Gyro calibration
The next stage of tuning is gyroscope adjustment. This is a navigation device. It is required to determine the spatial position of the device. He responds in a timely manner to changes in position in space. For example, when the smartphone is rotated in different projections, the device adapts the picture shown on the screen in accordance with the position of the phone.The adjustment of this sensor in all respects is similar to the horizontal adjustment described earlier, so there should not be any special difficulties. This will require:
- Go to the "Settings" section.
- Find the "Display" category.
- In the menu that opens, click on "Gyro sensor calibration".
- After completing the above points, we can say with confidence that the Android touch screen sensitivity has been adjusted.
Although touch-sensitive devices are very convenient, over time, the sensor can lose accuracy, and this, in many cases, does not depend on the type of screen, or the make and model of the device.
In this regard, any such sensor (and screen) sooner or later requires debugging or calibration. This article describes how to calibrate and customize the screen on Android.
The essence of the problem
It is known that while the phone or tablet is new, the quality of the sensor is very high. It reacts quickly enough to touches, quite accurately determines the point on which the user pressed, etc. But over time, as the actual service life of the device increases, the quality of the sensor decreases significantly, and errors and inaccuracies begin to appear.
How do you know when you need to calibrate the display on your mobile device? Usually, you have to do this when they start errors of the following type appear, which significantly interfere with work:
- The sensor does not always work- some actions are not recognized and the device does not react in any way;
- Some types of actions are not recognized or work poorly, but not all (for example, tap can work fine, while swiping does not work every time, or vice versa);
- The actual place where the action was performed is not accurately determined(for example, the button you pressed is not the one you actually touched);
- The waiting time for a response after performing an action has significantly increased on the touch screen;
- The display became worse only when using the stylus, or, on the contrary, only when using a finger;
- In graphical applications, this problem can manifest itself as line break etc.
The occurrence of such a problem, in fact, is a normal and logical process, the consequences of which can be easily eliminated by basic means, that is, without involving a service.
When does it arise?
Long-term use of the device- the first reason that the quality of the sensor on a phone or tablet will gradually decrease. This is a normal process that all modern phones are subject to, the more the lower quality screen is installed on the device. Also, such a phenomenon also occurs, on the contrary, when the device, which was previously actively used, is inactive for too long.
In some cases, such screen debugging is required immediately after purchase, since it happens that initially the sensor is configured incorrectly... After changing the display, it is also almost always necessary.
Changes in software settings also affect the quality and speed of the sensor. These can be any viruses or other software problems, or there can be settings, deliberately or accidentally, changed by the user. For example, the sensitivity of the sensor can be changed for convenience in the phone settings.
But, the decrease in the quality of the device can occur for other reasons. For example, this happens when scratches and scuffs appear on the screen, a poor-quality protective film is applied or bubbles remain under it, etc. In this case, the calibration will not be effective enough and the problem will not be eliminated.
Definition
What is calibration, and how does it solve the problem of an unresponsive or inaccurate sensor? Calibration is the adjustment of the touch screen performed by the device based on the user's actions on the sensor.
The standard calibration procedure is as follows: Dots, circles or crosses appear on the screen in random order and the user must click on them.
On the basis of such a process, the system builds a certain scheme of points and areas on the screen, thus determining which of them are more responsive, which are less, at which the accuracy is higher, at which it is lower. Based on the data of such diagnostics, the system makes adjustments and troubleshooting.
Calibrate exactly with the device you use it most often. If you use the stylus more often, then calibrate the screen with it, but if you usually use the phone manually, then use your finger to calibrate. This is due to the fact that different objects have different thermal conductivity and the display may react to them slightly differently from a technical point of view.
<Рис.2 Калибровка мультитач>
Calibration methods
This debugging can be done in several ways. The simplest and most effective ones are described below. If, after applying one or another method, there have been no significant changes for the better, then it is advisable to try another method.
Device settings
Since device calibration is a necessary process, the creators of most devices on the Android system have laid such a function in the device settings. How do you use it?
1. Go to Device settings;
2. Go to the section Screen or Display(may be called differently, depending on the device model, Android version or the nature of Russification;
<Рис.3 Настройки>
3. Go to the section Screen Calibration/ calibrate the screen or the like (note that there is no such section at all on some devices, this means that debugging will have to be performed in a different way);
<Рис.4 Экран>
4. If there is such a function, then after clicking on it, a special test will be launched, in which you need to click on certain points as they appear or in a certain order (on different devices, the order of the test may change slightly, but the essence remains the same);

<Рис.5 Тест>
After completing all the necessary steps, the system will show you a notification that the test is over, now section Settings can be closed.
Sometimes, significant improvements in sensor performance are seen right after that. But in most cases, your tablet or smartphone needs to be rebooted.
Engineering menu
Engineering menu- this is a special section of settings, in which you can carry out more complex and more accurate debugging and adjustments. In any case, there is a calibration function in it, for example, on those devices for which this test is not included in the simple device settings menu.
In order to access the engineering menu, you need to perform a number of actions:
1. Open the app Telephone on your device;
2. Dial one of the special numbers (they are different for different devices, all work on some, so it makes sense to try each code in turn until you come across the one that works) - *#*#3646633#*#*, *#*#4636*#*, *#15963#*;
<Рис.6 Вызов меню>
3. You do not need to press the call button, after entering the last character of a suitable combination, the engineering menu will open by itself - go to the top ribbon to the Hardware Testing section;
<Рис. 7 Инженерное меню>
4. The menu that opens after this, scroll down to the item Sensor and go to it.
<Рис. 8 Сенсор>
5. Now we start the actual calibration - for this, go to the section Sensor Calibration.
<Рис.9 Настройка>
6. In the calibration menu, find the section Clear Calibration and press this button in order to reset the old sensor settings;
<Рис.10 Сброс настроек>
7. Now press the button Do calibration 20% if you want to adjust the maximum screen sensitivity and 40% if a little less;
<Рис. 11 Запуск>
8. No additional saving required- just leave the engineering menu by pressing the button Back or Home;
<Рис. 12 Выход>
9. Reboot the device.
After turning the phone back on, the problem should be completely resolved. The sensor should work more clearly... Moreover, this method gives.
Often, a better result than calibration using a test in the phone's settings, therefore, it can be carried out even if, after the test, the user did not notice a significant improvement in the sensor state in the settings.
Using apps
If the calibration is not included in the device settings menu, if the engineering menu has not opened (this sometimes happens), or if the quality of the calibration did not suit you, then you can download a special application that will help you debug the sensor. It is distributed free of charge in the Play Market.
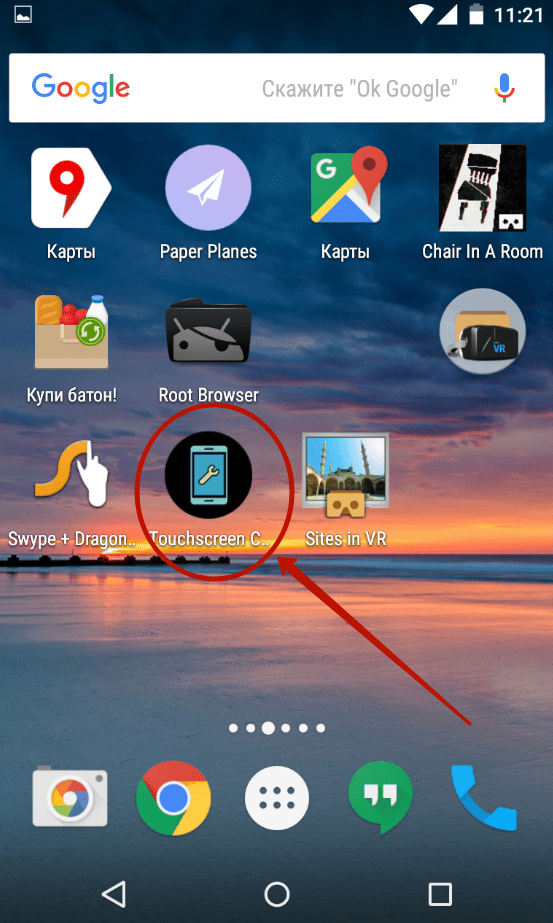
Download and Install Touchscreen Calibration
In order for this application to appear on your phone, do the following:
- Open the Play Market app on your device;
<Рис. 13 Гугл Плей>
- In the search engine, enter Touchscreen Calibration and open the application with the phone and wrench icon;
- Click the Install button;
<Рис. 14 Скачивание>
After that, it will automatically download and install, this will create a shortcut on your device's desktop.
<Рис. 15 Иконка>
The app is now installed on your device and you can start using it. It does not take up much memory and is distributed free of charge.
The load on the phone's hardware resources is moderate or minimal (depending on the technical characteristics of the device).
Using Touchscreen Calibration
As mentioned above, the shortcut for launching this application is located at Desktop your device. Run it from there. It should open immediately, since it does not require a large amount of RAM, and therefore it starts up without freezes and failures.
- In the main menu of the application find the big blue button Calibrate and click on it;
<Рис. 17 Запуск>
Follow all the steps suggested by the program- this will be, as in the first method, a point-by-point test, at the same time, for different types of action - tap, double tap, long press, etc .;
<Рис. 18 Тест>
After completing all the steps a notification will appear on the screen stating that the process has completed successfully;
<Рис. 19 Завершение>
Now you can close applications in any way you like.
Quick TuneUp app
This application is very similar to the previous one. Essentially, they both serve the same purpose, but use different methods to accomplish this from a hardware and software point of view.
Therefore, if after working in the previous program there were no significant changes in the quality of the sensor, then it makes sense to download this application and try to correct the situation with the help of it.
You need to download this application in the same way as the previous one, only enter a different combination in the search engine in the Play Market, namely Quick TuneUp. After clicking on the Install button, the application will automatically download and install on your device. You can find the shortcut to launch it on the main Desktop.
<Рис. 21 Ярлык приложения>
2. Find the item in the main menu of the program Display Calibration and click on it;
<Рис. 22 Функционал>
3. Now you need to wait a little, since this process is presented not in the form of a point-by-point test, but in the form of automatic troubleshooting, and then - automatic screen debugging;
4. When starting the process, a notification will appear on the main screen of the app showing the progress of debugging;
<Рис. 23 Процесс калибровки>
When the process is complete, you only need to restart your phone.
After turning on again, there should be no difficulties with the operation of the sensor.
Other problems
In some cases, errors in sensor operation may be of a different nature. For example, a common situation is when at certain points the screen periodically triggers spontaneously.
This happens in cases where the touch screen glass is severely damaged, it bends and at some points adheres too tightly to the screen, causing the sensor to be triggered.
From the outside, such a problem may not be noticed at all.... Nevertheless, it is quite complex and requires correction in the conditions of a service center. Generally, in such cases, a complete replacement of the display glass is recommended.
It is also worth contacting the service center when none of the listed calibration methods helped. This may also indicate that the quality of the sensor has decreased due to damage to the glass or malfunctions in the hardware of the device.
Let's now figure out how to calibrate the screen (touchscreen) of an Android phone or tablet, as well as what signs indicate that it's time to calibrate. Consider ways through the built-in capabilities of Android (not all models have), as well as special programs from Google Play.
This article is suitable for all brands that produce phones on Android 9/8/7/6: Samsung, HTC, Lenovo, LG, Sony, ZTE, Huawei, Meizu, Fly, Alcatel, Xiaomi, Nokia and others. We are not responsible for your actions.
Attention! You can ask your question to a specialist at the end of the article.
Screen Calibration Signs
While the phone is new, the sensor works efficiently, reacts to touches quite quickly, accurately identifies the point that the user pressed. As the operating time of the gadget increases, the quality of the sensor's operation decreases significantly, inaccuracies and errors begin to arise.
How do you know when you need to calibrate the display on your Android smartphone? Often this needs to be done when errors appear that significantly interfere with the work:
- Some actions work poorly or are not recognized, but not all. For example, tap may work fine, but swiping doesn't work every time, or vice versa.
- - some actions are not recognized, and the device does not react in any way.
- The waiting time has increased significantly after various actions on the touch screen.
- The place where the action was performed is not precisely defined. For example, this is not how the button is pressed, which you actually touched.
- In graphics applications, a line being drawn is interrupted.
- When using a stylus, the display became worse, or vice versa, when using a finger.
However, there are cases when the touch screen itself could fail as a result of shock or moisture ingress. Here it will be necessary to change to a new one, which cannot be done without the help of the service center.
When the need arises to calibrate the screen
The first reason for the decline in the quality of the sensor is the long-term operation of the device. All modern touchscreen phones are subject to this process, and the more the degree of exposure, the lower the quality screen is installed on the device.
A similar phenomenon occurs in a situation when the phone was previously actively used, and then was in a very long inactivity. Debugging the screen may also be required after purchasing the phone, as it happens that the sensor is configured incorrectly initially. Also, calibration is almost always necessary after changing the display.
The speed and quality of the sensor is affected by changes in the software settings. These could be software problems, viruses, or user-changed settings. For example, the sensitivity of the sensor can be changed to make it more convenient to work with the phone.
A decrease in the quality of its work can occur due to the application of a poor-quality protective film, scratches on the screen, the appearance of bubbles under the protective film, etc. In this situation, the calibration will not be effective and the problem will not be eliminated.
How can you calibrate your Android screen
Calibration is the adjustment of the touch screen, which is performed by the device based on the actions performed by the user with the sensor. The standard calibration process is to display dots, circles and crosses in random order on the screen, and the user needs to click on them.
On the basis of this process, the system will build a certain scheme of sections and points on the screen, determining which ones are more responsive, and which ones are less, which ones have higher accuracy, and which ones are lower.
After this diagnosis, the system performs troubleshooting and adjustment. If you use a stylus on your phone more often, then it is they who need to calibrate the screen, and if you use the gadget manually, then calibrate with your finger.
Calibration through the settings of the phone itself
The Android system has a fairly wide functionality that allows you to perform many settings for the device.
To calibrate the smartphone sensor through the standard menu, follow these steps:
- Go to the gadget settings.
- We select the item "Phone settings". Another calibration option can be found in the "Screen" section.
- We select "Calibrations".
This procedure involves sequential pressing of dots in different parts of the display. The user's task is to press the desired point as accurately as possible so that the phone remembers the correct settings. After completing the procedure, you need to check the correct response on the touchscreen keyboard of the smartphone.
Some models do not have a standard calibration option. The solution to the problem will be setting up using the engineering menu.
There you need to enter special commands for the OS, allowing you to fine-tune the device. for each specific phone model is called a special combination of symbols.
The Engineering Menu is an option for advanced users. Due to incorrectly selected settings, the smartphone may not work correctly.
Calibration using apps
There are many utilities that have been created to calibrate the sensor. There are free and paid versions, some of which require root rights.
ClinOmeter
The application not only calibrates the touchscreen, but also changes the tilt height, tilt angle and tilt of the object in relation to gravity.
SGS Touchscreen Booster
The program is capable of quite good optimization of the phone's sensor.

Failures in the sensor of an Android-based smartphone are a common problem for not the most accurate users. It is enough to drop the phone once, spill something on it or sit down without noticing it, and there is a significant risk of damaging the touchscreen. Having damaged it, you will no longer be able to use the screen normally, dialing a message or simply answering a call will no longer be possible. Such a smartphone is absolutely useless. That is why it is necessary to calibrate the screen in order to fix any problems. However, not all so simple.
To begin with, you should make sure as much as possible of the state of the sensor's sensitivity. To do this, remove the protective film, if any, and try to type some letter.
If touch recognition is not correct, for example, instead of one letter, a completely different one is typed, then screen calibration is simply inevitable. This can be done in different ways, depending on the phone model, brand, and the version of the Android operating system.
Today we will consider all kinds of calibration methods on different devices, you can try everything, depending on the situation.
How to do it through the settings of the device itself?
Due to the fact that calibration problems are a common problem for users, the Android OS developers have added the ability to carry out it without installing unnecessary applications.
In order to go directly to the settings, you need to open the general "Settings", go to the "Display" section, and there we find the item with the name Screen Calibration... If there is no such item, then find a similar one, the name may differ on different devices and versions of the Android OS.
The calibration process itself is a small test where you need to touch the screen in different places. After completion, the device will automatically remember the touches, after which the calibration can be considered complete.
Important. Upon completion of all actions, you should make sure that the touchscreen is accurate, depending on the result, the calibration can be performed again.
We carry out the procedure through the engineering menu
If you are not well versed in smartphones, then for sure you hear about this setting mode for the first time.
The engineering menu is a treasure trove of the most varied configurations of your Android. Once in it, you can access all available configurations. This mode is suitable for users who like to completely customize a particular device for themselves.
So, what does it take to get into this very menu? First, you need to open the dialing window, and enter the following combinations there:
- * # * # 3656633 # * # *
- * # 15963 # *
- * # * # 4636 * # *
Which combination is right depends on the smartphone itself.
If suddenly nothing happened, then in order not to suffer with the input, you can simply download a special application from, it is called MTK Engineering Mode Start. With it, you can perform various manipulations with the phone.
Closer to the point. Here we are in the engineering menu. Now you need to do the following:

Using apps
There are many programs that are designed specifically for performing sensor calibration. There are both paid and free versions. Some of them require Root rights on the device. Below we will tell you about several such applications.
To use this program, you need root rights, so before proceeding with the settings, we need to take care of this. We have already described how to get root rights on the pages of our site, information about this is freely available.

Designed primarily for tablets. The procedure is carried out using the same test, but in addition can significantly improve not only the accuracy of touch recognition, but also improve overall performance, as well as responsiveness. This program is indispensable for some Android tablets with handwriting or drawing functions.
The interface is designed in such a way that you can figure it out at an intuitive level, there are no complicated settings, the most ordinary user can figure it out.
Able not only to calibrate the touchscreen, but also to measure the tilt angle, tilt height, as well as the tilt of the object relative to gravity.

To some people, "calibration" seems like a very scary and incomprehensible word. They don't even know that professional photographers are necessarily calibrating a new monitor. As well as sometimes it is required to calibrate the screen of a smartphone. But not in the same sense - no one will give you detailed adjustments to the color gamut. In this case, the sensor is calibrated. It allows you to ensure that the device will perfectly recognize different types of clicks. In short, today we will talk about how to calibrate the sensor on Android.
Perhaps we have intimidated you a little. If you had time to think that calibration is required for absolutely any smartphone and tablet, then this is not the case. Modern technologies have allowed the creators of such devices to achieve the ideal behavior of the touchscreen and accelerometer. In this regard, on new devices, calibration is often not needed - they already function perfectly.
But on old gadgets, the Android operating system may behave incorrectly. Especially if the device has a resistive shield. Fortunately, even in the olden days there weren't many smartphones with this type of touchscreen display. And now even ultra-budget devices receive a capacitive screen, which does not require special adjustment.
It should be noted that some devices require sensitivity adjustment. If you calibrate the screen on Android, you can reduce or increase the sensitivity. This way you can fine-tune the behavior of the device to suit your expectations. This is especially true when buying a new device when you can't get used to its behavior.
Note: both a smartphone and a tablet can be calibrated. The type of device is not at all important, you only need the Android operating system.
Returning to new devices, they may also need calibration, but only in the following cases:
- The gadget was repaired after getting into the water;
- The device was replaced with a screen;
- The smartphone was severely hit when dropped, although it did not receive any visible damage.
Why can't you calibrate the color rendition?
In the introduction, we talked about professional photographers who calibrate the monitor to display colors as close to reality as possible. Why can't this be done on a smartphone or tablet?
Everything is very simple. To calibrate monitors, special devices are used that are not designed for use in tandem with a portable gadget. Also, smartphones and tablets do not support color calibration at the hardware level - you will not find the corresponding settings either in the Recovery menu or anywhere else. Easy color adjustment is available only to owners of Samsung smartphones equipped with a display created using the technology Super AMOLED... And it consists only in choosing one of three or four picture display modes. If you want to see the available options, then perform the following manipulations:
Step 1. Go to " Settings».
Step 2. Go to the section titled " Display».

Step 3. Click on the item " Screen mode».

Step 4. Choose the mode that suits you. The brilliance of the picture displayed on the screen will depend on it.

Sensor calibration
As for the sensor, it is easiest to calibrate it on devices with a resistive screen. A special utility is installed on them, launched from " Settings". It allows you to quickly calibrate the sensor so that exactly the icon or button is pressed to which you brought your finger. Find a similar item " Settings»It is possible even on old MP3-players equipped with a rather large display (it is pointless to calibrate the sensor of a small screen).
But what about modern smartphones that have a capacitive touchscreen? Is it really impossible to calibrate them? Fortunately, in some cases, this is still possible. Moreover, sometimes you can even slightly tweak the color rendition, and not just the sensor. But in fact, it all depends on the specific model of the device. It is possible that the manufacturer of your device has closed access to certain parts of the operating system, in connection with which you can download the calibration program, but it will not work properly.
To calibrate the touchscreen, we recommend downloading the application, which is called that: Touchscreen Calibration... It is free and has a simplified interface. To carry out the calibration, do the following:
Step 1. Run Touchscreen Calibration.
Step 2. Click on the blue button that prompts you to start the calibration.


Step 4. At the end of the procedure, you need to click on the button " OK»In the pop-up window.

Step 5. Reboot your device.
If you need to check the operation of multitouch, then we suggest you download the following applications:
- Tooch Multitest - has a simplified appearance, but easily diagnoses multitouch operation. If the sensor does not work in some area of the screen, then you will certainly notice it.
- MultiTouch Visualizer 2 - This program shows how many touches the screen has detected. It makes this application using large multi-colored rings, each of which is signed with a corresponding number. Additionally, the utility tests the operation of the "pinch" function.
- MultiTouch Tester is another simple application that fixes the points of contact of the screen with your fingers. Possible problems with defining touches on one axis!
Other ways to solve the problem
If, using one of the applications discussed above, you notice that your sensor is unstable, then you need to do something about it. First of all, we recommend contacting the service center. The professionals working there will make a full diagnosis, during which the cause of the problem will be accurately identified. It is possible that the sensor of your smartphone has ordered a long life. In this case, it will need to be replaced. For some new devices, it changes only with the display itself - in this case, you will have to prepare for serious monetary costs.
You can also try to calibrate the sensor through the engineering menu. But only advanced users should think about this. And by no means all smartphones this method of solving the problem works. Earlier we already talked about how to get into the engineering menu, so we will not repeat ourselves. Whether there is an item in the corresponding menu regarding the operation of the sensor depends on the specific model of the gadget. The calibration process can be just as different. In this regard, we will not talk about it in full detail.
Using Display Calibration
If the display seems too dim for you, or you notice uneven distribution of pixels, then use Display Calibration... If earlier we considered a program for calibrating the Android touchscreen, then Display Calibration adjusts the color rendering. And in some cases, it manages to slightly improve the display of the picture.
Step 1. Run the application.

Step 2. Click on the big button " Calibrate».

Step 3. Wait for the end of the calibration process.

Step 4. After the pop-up window appears, click on the " Close"And restart the device.

Summarizing
In today's article, we tried to talk about all the known methods of calibrating the smartphone screen. Unfortunately, most often they are either inaccessible to the average user, or make subtle changes. But it just so happens that you cannot get a display created using Super AMOLED technology from a TFT screen - any LCD panel displays a strictly defined color range. As well as the sensor, most often it is not able to offer greater sensitivity than the one for which it is sharpened.


