Sometimes when reinstalling the Windows operating system or when switching from a newer system to an older one, an error occurs: " An operating system wasn't found. Try disconnecting any drivers that don't contain an operating system". Also, this error may occur due to improper intervention in the hidden boot partition of the hard drive. In this manual, you can learn how to fix the error "An operating system wasn't found".
In Windows 7, 8 or 10, the system boots from a hidden partition (reserved by the system). For each of these operating systems, the hidden partition has a different size: in Windows 7 - 100 MB, in Windows 8 - 350 MB, in Windows 10 - 500 MB.
When installing the system, you probably could see these sections.

The hidden section contains the operating system boot files. If for some reason this section becomes inactive, then the operating system will not boot accordingly and you will see the error "An operating system wasn't found". Try disconnecting any drivers that don"t contain an operating system".

To fix this problem, all you need to do is make section active.
A hidden partition must always be primary and active. This is an iron rule, thanks to which the BIOS understands that the download files are located on the specified partition. Let's take a look at what is stored on this hidden partition as an experiment. First, let's go to Disk Management,

Since I'm using Windows 7, you can see that I have 100 MB System Reserved. If you assign a letter to this hidden partition, it will be displayed in the "Computer" window, provided that the item "display hidden protected system files" is activated in the system settings.

As you can see, this disk contains OS boot files.
Below we will consider two ways by which the error will go away and the system will boot up normally again. By the way, all manipulations can be carried out both on Windows 7 and on Windows 8 and Windows 10.
Method 1. How to make a partition active using Acronis Disk Director
First you need to create an Acronis Disk Director boot disk if it doesn't exist. The image can be downloaded on the Internet, and then burned to disk. If you do not know how to do this, you can read the article. Next, boot from this media.The hidden section must always be active, as I wrote above, that is, in the program it must be marked with a red flag. As you can see below, the hidden section is inactive,

We fix this - right-click on the section and click on the "Mark as active" item,

For the changes to take effect, click on the button with the "Apply pending operations" checkbox.

After the operation is completed, you can see that the partition has become active.

Now it remains to restart the computer. If everything is done correctly, the system will boot up and you will be taken to your usual desktop.
Method 2. How to make a partition active using the Windows installation disc
If there is no disk with Acronis Disk Director at hand, then do not despair. You can do without this program, but we still need the installation disk with the operating system. Boot from it by pressing any key on the keyboard,The active partition is used to host the boot loader of the operating system. If the bootloader partition is no longer active, the operating system will not be able to boot.
Only the main section can be active. The extended partition or logical drive cannot be active. Only one partition on a physical disk can be active.
If the computer contains several physical hard drives, then each of them can contain an active partition. In this case, the operating system is loaded from the physical hard disk that is listed first in the BIOS hard disk priority setting.
How to make a hard disk partition active
1. From the command line
Enter commands:
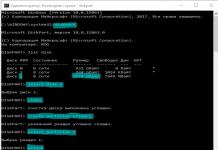
Diskpart list disk sel disk 0 list part sel part 1 active
* select the numbers of the required disks and partitions.
In the console it looks like this:
2. Using the Computer Management snap-in.
Usually this operation has to be done by booting from the LiveCD. Because if the partition has become inactive, then it will not be possible to boot the operating system from it.
1 Press WIN+R
2 Enter a command
3 Press Enter or OK:

4 In the window Computer management go to Disk Management.
5 Right-click on the required partition and select Make section active:

6 Click Yes:

3. Using Acronis Disk Director.
Right-click on the desired partition.
Select an item Additionally and click on the item Make Active:

Click OK:

Click the button Run to make changes:

It happens that a certain section of the hard disk needs to be made active or vice versa inactive. For example, the user has a new hard drive or a new partition has been created on it. And it happens that, due to lack of experience, they did the wrong thing. This article will show you how to carry out these operations.
The Windows bootloader is installed on the active partition of the disk, which starts loading the operating system. If you activate the wrong partition, then the operating system simply will not start. Therefore, more experienced users should penetrate these bowels.
Activating a hard disk partition can be done in several ways. This article will look at two of them. First, let's look at activating the partition through the Disk Management menu.
The first way to activate a hard disk partition
To start, press the key combination "Win + R". In the window that appears, enter the command "diskmgmt.msc" and click "OK".

A window with hard disk partitions will appear. Select the desired section, right-click on it and select "Make section active".

Voila! The section is active.
The second way to activate a hard disk partition
The second way to activate a hard disk partition is through the command line. You must run the command prompt with administrator rights. Click "Start", in the line "Run" enter "cmd". Right-click on the command prompt shortcut and select "Run as administrator". On the command line, we will run the built-in "Disk part" utility. To do this, we will write several commands in the already running command line. Let's start with the "diskpart" command and press "Enter". The line "DISKPART>" will appear.


To select the disk we need, enter the command "sel disk #". Instead of #, we indicate the serial number of the disk we need and we see that the disk we need is selected.

Then we need to select the section to be activated. We display a list of partitions with the “list part” command and, similarly to the selection of disks, select a partition with the “sel part” command.

Now all we need is to give the command "active" and the partition will be activated.

To deactivate the desired hard disk partition through the command line, you will need to do the same manipulations, with the exception of the last command. Instead of "active" we prescribe "inactive".

Deactivating a partition through Disk Management is possible only after formatting the partition. And this is not always desirable.
On computers with x86 family processors, the MBR partition can be marked as active via the Diskpart command line utility. This means that the computer will start booting from this partition. You cannot mark dynamic disk volumes as active. When you convert a basic disk with an active partition to a dynamic disk, the partition automatically becomes a simple active volume.
To make a partition active, complete the following procedure.
- Start DiskPart by typing diskpart on the command line.
- Select the drive containing the partition you want to make active, like so: DISKPART> select disk 0
- List the disk partitions with the command list partition.
- Select the required section: DISKPART> select partition 0
- Make the selected partition active by entering the command active.
Changing Disk Type in DiskPart
Windows XP and Windows Server 2003 support basic and dynamic disks. Sometimes it becomes necessary to convert a disk from one type to another, and Windows provides the means to accomplish this task. When you convert a basic disk to dynamic, partitions are automatically converted to volumes of the appropriate type. However, you can't simply convert volumes back to basic disk partitions. First you need to delete the volumes of a dynamic disk and only then convert it back to basic. Removing volumes will result in the loss of all information on the disk.
Converting a basic disk to dynamic is an elementary process, but it imposes some limitations. Before starting this operation, take into account the following considerations.
- Only computers running Windows 2000, Windows XP, or Windows Server 2003 work with dynamic disks. Therefore, if the disk to be converted contains earlier versions of Windows, you will not be able to boot those versions after the conversion.
- Disks with MBR partitions must have at least 1 MB of free space at the end of the disk. Otherwise, the conversion will not be performed. The Disk Management console and DiskPart reserve this space automatically; however, when using other disk utilities, you must take care of the availability of this free space yourself.
- Disks with GPT partitions must have contiguous, recognized data partitions. If the GPT disk contains partitions that are not recognized by Windows, such as those created by another operating system, you will not be able to convert the disk to dynamic.
In addition to the above, the following is true for any type of disk:
- you cannot convert disks with sectors larger than 512 bytes. If larger sectors are used, the disk must be reformatted;
- dynamic disks cannot be created on portable computers or removable media. In this case, disks can only be basic with primary partitions;
- you cannot perform disk conversion if the system or boot partition is part of a mirrored, striped, striped, or RAID-5 volume. First you must undo overlapping, mirroring, or striping;
- however, you can convert disks with other types of partitions that are included in mirrored, striped/striped, and RAID-5 volumes. These volumes become dynamic of the same type and you must convert all disks in the set.
Converting a Basic Disk to Dynamic in DiskPart
Converting a basic disk to dynamic is performed in the following sequence.
- Start DiskPart by typing diskpart on the command line.
- Select the drive to be converted, for example: DISKPART> select disk 0
- Convert the disk by entering the command convert dynamic.


