BIOS (BIOS) - base system input-output, this term is literally translated from English. This is a firmware hardwired into the flash memory on the motherboard (system) board, which is responsible for starting the computer when it is turned on. With its help, initial equipment analysis, its setting in automatic mode or as specified. Incorrect configuration or failure of a piece of equipment leads to failures when loading the operating system or prevents it from starting.
Why BIOS won't start
As a rule, the loading of data and settings from the BIOS is so transient that the user does not have time to read most of the information about the process displayed on the screen. In the BIOS of modern motherboards there is a setting, hiding this information behind the manufacturer's full-screen logo. If the normal startup process is interrupted, and information about the problems that have arisen is displayed on the monitor, you will have to take measures to eliminate failures. The reasons may be overheat accessories, misconfiguration or their failure. Common problems include:
- partial or complete hard disk failure;
- frequency reduction rotation or stop of fans;
- failure system clock;
- partial failure power supply;
- conflict newly installed equipment.
Having discovered a critical BIOS malfunction suspends launch operating system and displays error messages. In some situations, problems exclude this possibility, in which case the BIOS does not load on the computer and the user sees a black screen. To make changes to the settings, you need to enter the control menu using specially assigned keys or their combinations on the keyboard.
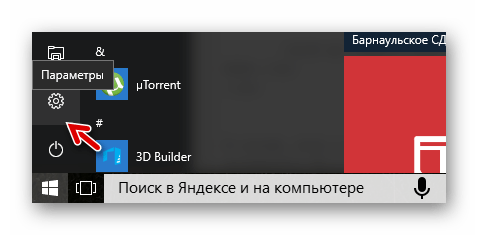
Entering the BIOS if it cannot be loaded correctly
If the settings load fails, if the problem is correctable, the bottom of the screen displays possible key combinations, providing access to the parameters. This information is outlined in red in the illustration, but only describes special case. Motherboard manufacturers assign their own combinations, and this must be taken into account.
Typical keys to navigate to settings F2 or Delete(del). In the case of a laptop, options are added ctrl+F1, Esc and others, which the on-screen menu necessarily informs about or this information is indicated in the device passport.
On the keyboard of almost all laptop models there is a key for activating the function buttons. At the same time, the top row of keys (F1-F12), in addition to standard instructions, contains small icons corresponding to additional function. If pressing a combination (for example, Ctrl+F1) does not result in entering the configuration of the basic I/O system, first press and hold function selection key. It is usually denoted by the symbols fn.
The BIOS may not turn on when broken keyboard or malfunction of the port to which it connects. An easy way to make sure it works is by pressing a key Capslock or Numlock, at which the corresponding indicator light. If this does not happen, you can replace keyboard PS/2 to a USB device or vice versa. USB keyboards should be switched to free ports.
Failure components, both as a result of power surges and due to defects in production, disrupts the correct launch of the operating system. Diagnose or fix such a failure in individual cases You can also use BIOS.
The above malfunctions can appear, both in a frozen initial BIOS screen saver (after which the computer does not start further) with a suggestion to use the keys to enter, and total absence any image on the monitor. Often this is accompanied by beeps from a speaker connected to the motherboard. Also, the computer may turn on, but the BIOS will not boot.
The correct sequence of actions in such cases - complete shutdown all additional accessories: hard drives, optical drives and expansion cards (sound, network). Recommended disconnect cables periphery: external modems, printers, other devices.
Only the main devices are left connected: a monitor, keyboard and mouse, if the BIOS is equipped with a graphical menu. It is preferable to use devices connected to PS / 2 ports instead of USB, if the appropriate connectors are available.
Having gained access to the settings management, the previously disconnected devices are connected in turn, evaluating which of them is malfunctioning and disrupts the correct operation of the BIOS.
Entering the settings management, in the corresponding section check output voltage power supply, make sure the cooling fans are connected and spinning. It also controls and configures the devices from which the operating system is loaded, the order in which they are polled.
The problem with the computer freezing due to overheating of the processor or chips motherboard optionally resolved body cleaning or replacing fans. By adjusting the rotational speed of the coolers, choosing a hard mode of operation, results are sometimes achieved without financial costs. 
Correcting the listed problems or entering incorrect settings in the BIOS when installing new equipment can also disrupt the correct operation of the computer. For modern motherboards, it is permissible to manage part of the BIOS functions programmatically from the operating system. If incorrect parameters are entered, the start of the computer and the BIOS may be disturbed. In this case, it is recommended to remove the battery inside the system unit to reset the settings. After a few minutes, replace the battery and try to start again.
Computer won't boot past BIOS
First of all, you need to determine why the problem occurred. The following illustration shows a special case in which both incorrect configuration of the OS boot device and failure of the hard drive are possible. 
In the first case, they try choose the right device, in the second, only replacement or repair.
The design of modern motherboards includes many elements, for correct setting which require high qualifications. In addition, the correct diagnosis of these parameters is also important. The BIOS itself will help with this.
Entering the control menu, immediately select shutdown section, depending on the BIOS version, it looks different. Further, two possible options actions:

Can't enter BIOS after update
Replacement BIOS firmware can activate previously inaccessible settings, disable support for some devices or enable new modes of their operation. As a result, not only the correct operation of the OS may be impossible, but even entering the control menu BIOS settings may become unavailable.
The first thing to do is - reset settings using a jumper on the motherboard. Denoted by the inscription Clear CMOS or similar abbreviation. 
Switch the jumper according to the motherboard manufacturer's instructions, wait a few minutes and return to initial position. If you still cannot enter the menu, unplug from motherboard sound cards, hard drives, printers connected to USB ports and other equipment, except for the keyboard. Repeat the steps above.
If they also do not lead to the desired result, testing of the processor and memory modules is required, in extreme cases, BIOS firmware using a programmer. It is better not to perform such actions on your own, but to contact service center or workshop.
The BIOS is a basic input and output system that stores special algorithms necessary for the proper functioning of the entire computer. The user can make certain changes to it in order to improve the performance of the PC, however, if the BIOS does not start, then this may indicate serious problems with the computer.
There is no universal way to solve this problem, because, depending on the cause, you need to look for a solution. For example, in some cases, in order to “revive” the BIOS, you will have to disassemble the computer and carry out some manipulations with the hardware, while in others it will be enough just to try to enter it using the capabilities of the operating system.
Reason 1: Component problems
If, when you turn on the PC, the machine either does not show any signs of life at all, or only the indicators on the case are on, but there are no sounds and / or messages on the screen, then in most cases this means that the problem lies in the components. Check out these components:

Physical damage to important computer components does occur, but main reason the inability to start the PC normally is a strong dust pollution of its insides. Dust can get into the fans and contacts, disrupting the power supply from one component to another.

When disassembling the system unit or laptop case, pay attention to the amount of dust. If there is too much of it, then do the "cleaning". Large volumes can be removed with a low power vacuum cleaner. If you use a vacuum cleaner while cleaning, then be careful, as you can accidentally damage the inside of the PC.
When the main layer of dust is removed, arm yourself with a brush and dry wipes to remove the remaining dirt. Possibly dirt got into the power supply. In this case, it will have to be disassembled and cleaned from the inside. Also check the contacts and connectors for dust.
Reason 2: Compatibility issues
In rare cases, the computer and BIOS may stop working due to the incompatibility of any component that is connected to the motherboard. It is usually quite easy to calculate the problematic object, for example, if you recently added / changed the bar random access memory, then most likely the new bar is incompatible with the rest of the PC components. V this case try starting the computer with the old RAM.
Less commonly, it happens when one of the computer components fails and is no longer supported by the system. It is quite difficult to identify the problem in this case, since the computer does not start. Various beeps or special messages on the screen that the BIOS gives can help a lot. For example, by an error code or a sound signal, you can find out with which particular component of the problem.

In the case of incompatibility of certain components on the motherboard, the computer often shows signs of life. The user can hear the operation of hard drives, coolers, the launch of other components, but nothing appears on the screen. Most often, in addition to the startup sounds of computer components, you can hear any extraneous signals that the BIOS or some important PC component plays, thus reporting a problem.
If there is no signal / message or they are illegible, then you will have to use this instruction to find out what the problem is:

If you completely assembled the computer (without finding a problematic element), connected all devices to it and it began to turn on normally, then there can be two explanations for this behavior:
- Perhaps due to vibration and / or other physical impact on the PC, the contact from some important component has come out of the connector. In the actual disassembly and reassembly, you have simply rewired an important component;
- A system failure has occurred due to which the computer has problems reading any component. Reconnecting each item to the motherboard again or resetting the BIOS fixes this issue.
Reason 3: System failure
In this case, the OS loads without any complications, work in it also proceeds normally, however, if you need to enter the BIOS, you can’t do anything. This option development of events is extremely rare, but there is a place to be.
The way to solve the problem that has arisen is only effective if you have a normal boot operating system, but you can't get into the BIOS. Here you can also recommend trying all the keys to enter - F2, F3, F4, F5, F6, F7, F8, F9, F10, F11, F12, Delete, Esc. Alternatively, you can use each of these keys in combination with Shift or fn(The latter is relevant only for laptops).
This method will only be applicable for Windows 8 and higher, since this system allows you to restart the PC, followed by enabling BIOS. Use this instruction to reboot and then start the basic input and output system:
If you have an operating Windows system 7 and older as well, if you haven't found the item "Firmware and UEFI Settings" v « Additional options» , you can use « command line» . Open it with cmd commands in line "Run"(called by the key combination Win+R).

You need to enter the following value in it:
shutdown.exe /r /o
After clicking on Enter the computer will restart and enter the BIOS or offer boot options with entering the BIOS.

As a rule, after such an entrance, the basic I / O system is loaded without any problems in the future, if you are already using keyboard shortcuts. If it is impossible to re-enter the BIOS using the keys, then a serious failure has occurred in the settings.
Reason 4: Incorrect settings
Due to a failure in the settings, the hotkeys for entering may change, so if such a failure occurs, it would be wise to reset all settings to factory settings. In most cases, everything returns to normal. This method is recommended only when the computer boots without problems, but you cannot enter the BIOS.

Q
QUESTIONS:
Computer turns on but WILL NOT BOOT!
only black screen…What to do?…
Where to start troubleshooting if the computer does not boot the BIOS POST?
There is not even a sound signal, but the power supply is working, the fans are spinning ...
A
ANSWER:
If the computer turns on, but DOES NOT BOOT (DOES NOT START), then there can be quite a few reasons.
Sometimes inexperienced people describe such a situation like this: "...computer boots, fans spin, but screen is black" - as if for the computer, the rotation of the fans is more important than anything else ...
PRIMARILY should pay attention -
can you hear it at the start one short beep from the system block?
Or this peep not one but several.
Then what exactly are these peeps(for example, 3 short + 1 long or in some other sequence) - these are motherboard error codes that should be issued at the start BIOS POST (Power On Self Test= power-on self-test).
One short beep is a message that everything OK.
And if there is no squeak at all, or vice versa, if there are several of them of different duration or one long one, this indicates that there are some kind of malfunctions.
There are special guides (for example, "wikipedia.org - BIOS beeps") that describe which faults correspond to certain sequences of sounds. Some of the more important options on this list that are specific to your motherboard can be found at manual(user instructions).
If you hear a certain sequence of sounds, then usually, according to the description, you can immediately understand (unfortunately, not always with great accuracy) which of the devices connected to the "motherboard" is to blame for the problem.
If there are no sounds, or the guide did not help,
then the sequence of actions is:
We will act according to the principle of a comic saying:
"Electronics is the science of contacts!"
As you can imagine, there is (only) a fraction of a joke in this joke...
1. Open system unit.
Enough to take off left side cover, if you look "from the face".
That is, it is convenient to put the system unit on the right side
and remove the cover that turned out to be above.
We look at whether there is a lot of dust in general in the case and on the motherboard.
First, lightly clean with a vacuum cleaner. A window brush from a hardware store helps a lot - choose a flat, rather than a round brush with the longest bristles. We sweep with a brush, especially in the gaps of the radiator grilles, and suck it out with a vacuum cleaner (in the other hand).
Be careful! Do not break any parts soldered to the motherboard with a brush or a bell of a vacuum cleaner!
If you unscrew the fans from the case and from the processor cooler, then the picture is depressing:

cooler(from English COOLER= cooler) is called a radiator (such an aluminum or copper lattice “brick”) with a fan installed on it.
What kind of cooling is there, if the cooler's radiator is deafly clogged with a fur coat of dust!
Here's what a new or cleaned stock CPU cooler looks like (somewhat outdated):

But the options for modern more advanced models:

2. Next, you need to click (remove) / snap (insert) the RAM modules. For this action, pay attention to the plastic (usually black) levers on the ends of the module. If you bend these levers to the sides with a little effort, the RAM module itself “pops out” of the slot.
When we took it out, we clean the knife contact with the same brush (the slot where the modules are inserted).
On the modules themselves, look at the condition of the gold-plated contacts -
whether everything is in place, whether some is dirty.
It does not interfere with gently wiping with a soft cloth dipped in alcohol.
Vodka will do too. just not cologne!!!
Insert the module into the slot very carefully. Get the knife contacts into the slot, you can under a slight slope, as it will. And then lightly press with your fingers first on the edge of the module, which turned out to be higher, then on the other edge so that the module clicks into the slot. In this case, the levers along the edges of the module will themselves rise to a vertical position.
If the video card has a cooler (radiator with a fan), check its condition.
You can use a small screwdriver to unscrew the fan and clean it from dust along with the radiator.
If the cooler was noisy, then you can drop a little machine oil into its bearing (at least from a sewing machine) - to do this, temporarily remove the sticker covering the bearing.
You need VERY LITTLE oil - do not overdo it !!!
Dip a small screwdriver into the oil and transfer to the bearing LITTLE DROP with this screwdriver. Then spin the fan, gently pushing the blades with your finger to spread the oil over the bearing.
After that, you can try to "start".
4. If it doesn't start, disconnect all hard drives, optical drives and other peripherals from the motherboard.
We leave ONLY RAM, CPU and VIDEO CARD.
Don't forget to unplug the wires USB, leading from the motherboard to the front wall of the case (to the USB connector or card reader built into the front panel, if any) - because of them there is often a problem, like yours.
5. We try to "start".
If it does not start in this position, reset it to zero BIOS
(Basic Input-Output System= basic I/O system)
This is done by rearranging jumper(from English JUMPER = jumper), i.e. jumper, usually located near the battery (see photo below). It says something like "ClearRTC"(erase real time= REAL TIME CLOCK) or Clear CMOS.
For reference:
CMOS = Complementary-symmetry/metal-oxide semiconductor- technology of construction of semiconductor electronic boards.
This abbreviation is purely historical - once BIOS CMOS was the only chip on the motherboard ( SYSTEM BOARD= SYSTEM BOARD WITH CONNECTORS)
Usually, a group of 3 contacts is intended on the board for installing a jumper. The jumper is installed so that the middle and one of the extreme ones are closed. Rearrangement to a position where it closes the middle and OTHER EXTREME resets BIOS settings to default (from English DEFAULT= default).
One of these three contacts is usually signed - look for a little white number next to it 1
or some icon in the form of a small arrow (or just a wide white strip, as in the photo below). And next to it, there is a small plate that says something like
(may be exactly the opposite):
1-2 NORMAL
2-3 CLEAR CMOS (RTC)
This means that in position 2-3
the custom settings will be erased BIOS.
Move the jumper to position CLEAR CMOS and wait 10-15 seconds.
Thereafter DO NOT FORGET return to position NORMAL.
![]()
If you did not find such a jumper, remove the battery for 30 seconds and insert it back.
On company boards gigabyte there is no jumper, and the manual (user manual) says exactly this:
![]()
I translate the explanatory text for this manual:
BATTERY:
If you want to erase CMOS values
1. Turn off the computer and unplug the power cable from the outlet
2. Remove the battery and wait 30 seconds (highlighted in the picture)
3. Reinstall the battery
4. Connect the power cable and start the computer
[Written to the right:]
WARNING:
EXPLOSION HAZARD incorrect installation batteries
- Replace only with an equivalent model recommended by the manufacturer.
- Dispose (dispose of) used batteries only in accordance with the manufacturer's recommendations
When removing the battery, be VERY CAREFUL!!!
There were cases when careless handling caused BREAK BATTERY -
very unpleasant "VESCH", I will report to you!
(in the manual above there is a warning about this)
This, of course, is not an explosion (as it is written there), but ...
a small (Thank God!) amount splashes out of the battery CAUSTIC ALKALINE!
Which, as you know, immediately corrodes any clothes and is very
NOT USEFUL FOR EYES, EARS, NOSTRILS AND COMPUTER COMPUTER!!!
Keep in mind that all this must be done
ON A COMPLETELY POWERED-OFF MOTHERBOARD!!!
(That is, it is necessary, as it is written in the manual, to disconnect the power cable from the outlet!)
Some motherboards have a special indicator light, which, just by its glow, reminds you that it is necessary to de-energize the board before turning something on or off on it.
For example, look at the photos above - at the bottom left there is such a green light bulb.
6.
If it still does not start, check how the processor is installed, the memory itself, etc.
It's already, as they say - "AEROBATICS" so if you don't have experience, don't bother!
However, disassembly processor cooling systems and replacing thermal paste, which may have already dried up and instead of accelerating the removal of excess heat, works like a “fur coat”, is not so difficult - read step by step description procedures in the topic about laptops:
Once again I encountered glitches on the Gigabyte motherboard (before that, there were problems with timings on expensive memory), in this case, the GA-EP45-DS5 board.
Such a large, beautiful board, with "golden" radiators and heat pipes, with high-quality capacitors, large quantity USB and SATA connectors, in general, everything is fine in it, but you can’t enter the BIOS!
I did it anyway, but it didn’t work out quickly, I had to work out.
When loading, press the Del key as usual. Diagnostics is running and as a result a black screen with a cursor.
Of course, I googled, the problem with the inability to enter the BIOS of the Gigabyte board is quite common (judging by the questions on various forums and groups) and the solutions are different, now I will try to group everything and give you a selection of tips from the network, also from my practice and I will tell you how everything works for me did manage to get into BIOS Gigabyte EP45.
How to enter motherboard BIOS PC boards:
1. When the computer starts, as a rule, a picture of the brand of the installed motherboard or BIOS manufacturer is displayed and you can see the control keys (for example, entering BIOS setup- DEL, recovery mode F9, menu to select the disk from which the computer will boot this time F8 or F12, and so on). We need to clearly define the keyboard button to enter the BIOS (usually Del, but it may be different, for example F2) and press it several times, you can not rush much, but you can’t hesitate either, otherwise we reboot and try to press again.
2. It happens that the USB keyboard does not have time to initialize (decide) and pressing the Del key or another does not give anything, as the most reliable option in this case, use a keyboard with a PS / 2 connector
or try switching your USB keyboard to another USB port and press the BIOS entry key a little later, not immediately when the computer starts (allow time for the keyboard to be detected).
3. It happens that a buggy and “sick” screw does not initialize normally and the boot process is delayed or completely freezes and does not reach the BIOS entry, so you can try to disable all SATA and USB devices(except for the keyboard of course) and try to enter the BIOS without them.
4. Perhaps you should start by resetting the BIOS settings to the default settings, for this a jumper (jumper) on the motherboard is used - it is more correct to find this particular jumper in the instructions for the motherboard. Or you can do it easier - disconnect the computer's power cable and pull out the BIOS battery, then close the contacts (where the battery was installed) to discharge the capacitors and reset the BIOS settings.
5. Replacing the battery sometimes helps (here you need to take into account that if item 4 did not help, and the BIOS keeps the settings, date and time of the computer when the power cable is disconnected, then you don’t need to change the battery for now), on the other hand, if the battery is old, then you can replace it, it's not very expensive, you won't have to climb later in six months and configure the BIOS again.
6. I read that some craftsmen tried to change the video card to another or use the built-in one, it helped someone, I tried it, in my case it did not help.
7. They say that if you connect the monitor via a DVI cable (not VGA or HDMI, it's DVI without adapters), then it starts entering the BIOS (this did not help me).
8. If all of the above did not help, then the next step is to restore the BIOS, or better immediately upgrade to a new version (if any) or downgrade if new version BIOS is not.
The last point helped me.
It turned out that I had a BIOS version EP45-DS5 F13a, and she beta!

I went to the website of the board manufacturer - Gigabyte, found a list with BIOS. It turns out we have nowhere to rise, it remains to go down.
I took a flash drive, cleaned it, it was in FAT32, just what I needed, downloaded and unpacked the contents of the motherboard_bios_ga-ep45-ds5_f12 archive into it, we need the ep45ds5.f12 file - in fact, it is the BIOS file.

After the bios downgrade, everything worked out, I managed to enter the settings the first time!

Great, the problem is solved, you can continue the configuration


 Samsung s8 irises do not work")
")


 What is transcoding")


