Android is the most used, multifunctional and powerful operating system, on the basis of which an unlimited number of high-quality, interesting and affordable applications has been created. Due to its versatility and great demand, successfully used for software smartphones, tablets, netbooks, "smart" watches, smartbooks, televisions. But even the most proven shells, there are small difficulties, from which even this system is not insured during use. Therefore, we will look at what to do when problems arise with the Wi-Fi connection on your Android device. Today we will find the answer to the question why Wi-Fi does not turn on on android?
Causes and decision
Wai Fi on the phone or Android tablet may not work for several reasons. It should be noted that not only the owners of tablet computers may encounter, but also people using mobile phones on the basis of this popular system. How to be users if the WiFi SAMSUNG device does not turn on, we will look for the cause and eliminate the root of the problems. 
- One of the root causes, if Wi-Fi stopped working on Android, which is extremely rare - this is incorrectly established date and time. To eliminate it, it is enough to go to the "settings", set the correct date and time, given the time zone.
- The second and most frequent problem is a password change when automatically connected to the network. That is, the password is changed by the user, but the Android system still "does not know." To eliminate this problem using the interface or hotkeys, go to the Wi-Fi network connection settings, delete the profile with which it was configured to connect and create a re-selection connection, select your own connections available, enter the necessary characters, in the window that appears. Next, the connection to the passrollated network will occur automatically.
- Failures in software (software) - the third of the possible reasons when Wi-Fi on Android ceases to connect. To do this, use the Wi-Fi Fixer utility, created specifically to solve this problem. Without making any changes in the program settings, you download and install this application. After installing the utility, information on the current status of the device will appear, and all devices that have been connected ever are displayed in the "Known" tab. Then reboot your smartphone or computer tablet, we try to make a re-connection.
- The fourth problem, if Wi Fi does not work on android - failure in the settings. To avoid it, you can reset the settings to factory, with further restoration. We go to the "Settings" select "Restore and Reset", click "Reset Settings". Either make a full "Hard Reset", but then all data is deleted, that is, the device will be, as after purchase.
Sometimes users set the unsuitable Android firmware, as a result of which the correct operation of the radio modulus is disturbed, including the WiFi module on samsung phones or tablets. The output in this situation is to install or update the basic firmware on Samsung.
Again these viruses!

One of the most unpleasant reasons when the Wi Fi does not turn on is the impact of malicious programs, the so-called viral programs, to the operation of the device's radio modules. To eliminate viruses in the phone, you need to make a deep scanning of the built-in antivirus.
Customize router
The revered seventh place occupies an error when connecting to Wi-Fi - failure or incorrect adjustment of the router. Eliminating this error is carried out in the settings of the router. How to do this can be learn from the instructions of the device. This is especially true if the home network is used. In the control menu, select "Wireless Settings". We change the parameter to "Auto", in the "Channel" line, and the "Mode" string to the "11 BGN mixed" parameter. Turn off the filtering of the addresses to ensure that the router does not filter addresses connected devices. We try to connect.
And now it's right to the master
If none of the above methods helped, then the problem in the radio modulus itself, WiFi will not work until they disappear into the microcircuit. In this situation, the best solution will be the appeal under warranty in the service center (for example, Samsumg) or to a competent and proven computer master.
It must be remembered, any interference of non-competent persons in the system's work, even when solving a problem when Wi Fi does not connect, it creates a huge risk, turn your favorite gadget to a useless piece of plastic, to resuscitate significant financial costs and your nerves.
Upon unlawful tradition, leave the video instruction, perhaps it is she will help you restore WiFi's performance on a samsung tablet or telephone.
Video instruction
I will describe all the ways to turn on the Wi-Fi network on a laptop (after all, everything that can be turned off and turn on?!) I will start with ways to be simpler and more common, then I will go to more complex methods that will be needed.
So, if you see on taskbar icon Wi-Fi turned off (or not see the icon at all), then this is an article for you.
Enable Wi-Fi using the slider / button on the laptop housing.
On many laptop models to enable Wi-Fi, you must use the slider or separate button to turn on Wi-Fi. Often this switch is located on the front end of the laptop.

The switch looks different, but carries one function - turn on and off the wireless network.
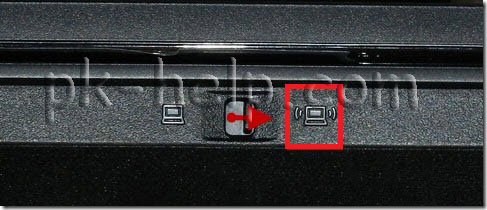
To enable Wi-Fi, simply move the slider to the Position.
How to enable Wi-Fi using a key combination.
If there is no sliders on your laptop or separate Wi-Fi on, look carefully on the keyboard, on it you can detect the Wi-Fi icon on one of the function keys (F1-F12).

It can be located on different buttons, it all depends on the manufacturer and model of the laptop.

In order to enable Wi-Fi, you must click this key or use the key combination.

Consider key combinations that are most commonly used in laptops from different manufacturers:
- Acer.. Close keys:
+ . - ASUS. Combination
+ . - HP.. Here click
+ . - Lenovo.. The desired buttons:
+ . - Samsung. Or
+ either + . - Dell. Key combination
+ or +
How to enable Wi-Fi in Windows Settings.
If the specified procedures did not help and you still wonder the question How to enable Wi-Fi on a laptop? You must check whether the wireless network connection is enabled in the Windows settings. To do this, you need to get into the Network Management Center and Common Access. One of the way is right-clicking on network icon In the lower right corner of the screen and select "Network Management Center and Common Access".


Another way to use hot keys

It does not matter how much way you used the result will be one - the network connections window will appear on the monitor. Next, you need to find a wireless connection to click on it with the right mouse button and select "Enable" (if the Enable option is not available means Wi-Fi network is enabled).

Enabling Wi-Fi through Windows Device Manager.
If your Wi-Fi adapter is not turned on, it is necessary to check whether it is involved in the task manager. To do this, click the "Start" button, right-click "Computer" and select Management. In the left menu, select Device Manager.

Or press the key combination


If the adapter icon is marked down the down arrow, then it is turned off, in order to enable it, click on it with the right mouse button and select "Enter".
Updating drivers for Wi-Fi.
Another reason not to work Wi-Fi may be - not a suitable driver or its lack. To install the desired driver, go to the site of the laptop manufacturer, find your model (on some sites it will do it difficult, you can write a laptop model in the comments, I will try to help you) and download the driver for the Wi-Fi network card for your operating room Systems. After that, it is enough to install the drivers, after rebooting the Wi-Fi laptop must earn.
It doesn't matter how you turned on the wireless network, as a result you should see the Wi-Fi icon in the taskbar. When you click on it, you will see the available Wi-Fi network.

Not every user knows how to enable Wi-Fi on a laptop when any unexpected problems occur. Beginner users are lost, failed to activate Wi-Fi standard methods.
We will try to consider all possible ways to enable Wi-Fi and bring the most common fault solutions that can be subjected to a laptop wireless network adapter.
The simplest method of activating the wireless network on a laptop with "Windows" is the use of a key combination manufacturer provided for this.
We give examples of these combinations for the most common models of laptops (in most cases, the keyboard is used, in rare - special switch):
- HP (HP ProBook, Satellite, Pavilion, 4535S and others) - Fn + F12;
- Acer (ASPIRE ASPIRE) - Fn + F3, similar to Packard Bell;
- ASUS - Fn + F2;
- Lenovo (G580, G50, G500, G570 and others), including IdeaPad - Fn + F5;
- Samsung - fn + f12 or f9;
- Dell (Dell Inspiron and others) - Fn + F12 or F2;
- MSI (MSI) - Fn + F10;
- TOSHIBA - FN + F8;
- DNS - Fn + F2;
- DEXP - FN + F12;
- Sony VAIO - using a mechanical switch.
This method will not always work, so let me go to the consideration of the program methods.
Through systemic tray
The second Wi-Fi Enable Method is to activate the adapter manually through the system tray.
To take advantage of the option, it is enough to click on the network icon in the lower right corner of the system and click on the Wi-Fi icon. The wireless connection module will turn on and automatically starts finding networks available for connecting networks.
It is possible that instead of the window presented above, the system will display other with limited functionality, where the key, with which you want to include Wi-Fi, will be simply absent.
If for any incomprehensible for the user reason it appeared just such a window, then we turn to the next method.
In the control center
The previous method could not work for several reasons - for example, the wireless adapter was disabled in the Windows 10 or Windows 7 settings.
To fix it, you must step by step to execute the following instructions:
- Click on the keyboard the combination of the Win + R keys and in the "Run" window that opens via the "NCPA.CPL" phrase. Click on ENTER or OK.
- We are looking for in the "Network Connections" window "Wireless Network Connection" window. If it is highlighted in gray, and in the status bar, the value "disabled" is displayed, which means the wireless connection adapter was really disabled systemically.
- To activate by clicking the right button on the dedicated block and click on the "Enable" button.
- Successful inclusion will be accompanied by activation of the adapter and displaying its name in the status bar.
- We return to the first method considered by us - the Waifa Activation button should appear on the place put on it.
This method also did not help? There is nothing terrible in this, just go to the next way.
Enable through Device Manager
This is a rarity, but sometimes the network adapter can be disconnected in the system device manager. This usually happens after the emergence of any failure, independent of the user itself.
Determine whether the wireless network adapter is really disabled through the device manager, it is extremely simple - go to the second method described in this article, open the "Run" window with the Win + R command, enter the appropriate request, click on OK and see the network window Connections. If there is no wireless adapter in this window, it means that the problem really lies in the device manager.
If none of the above methods worked, then it is likely that the problem with the wireless network adapter drivers.
Driver Update
An outdated or missing driver can become the main reason why there is no access to Wi-Fi or the distribution does not work through Wi-Fi Direct. Installation or reinstalling a suitable driver will not take a large amount of time - it is enough to go to the manufacturer's website, find the used laptop model and download the desired driver from the list of proposed.
conclusions
It is not necessary to panic when it is impossible to enable Wi-Fi on a laptop - you need to sequentially check all possible causes of such a problem, ranging from the most likely.
Video instruction
We attached detailed instructions in video format. It clearly reflects the process of applying each of the above methods.
One of the most common problems of the owners of mobile computers is, when the laptop does not connect to WiFi and stopped working wireless Internet. Usually the wireless network does not work after updates of the Lapplet software or router, as well as a fresh operating system, which was recently installed on the PC, does not see the Wi Fi network.
The main thing in this situation determine the reason why I stopped working normally a laptop. And there is no reason for the reasons that sometimes even a highly qualified specialist cannot immediately correct the problem. Below is a step-by-step instruction of eliminating this fault.
1 stage - determination of the cause
If there is no Wi Fi network, then the reason lies not always in the computer, and the most likely the problem with the Wi-fi translator device. In connection with this statistical fact, at the first stage, it is recommended to clarify whether the router itself stopped working.
To this end, you just need to enable Wai Fi on another device. If you catch the right networks successfully manage and the gadget works on the Internet normally, then the reason is in the laptop. If the device does not see the desired wai fay, then the reason is in the router. Below are specific recommendations what to do in each of the specified situations.
2 Stage - Enable Wi Fi Adapter in Computer
When identifying the reason in the PC, start solving the problem, it is advisable to analyze the current position of the laptop wireless network adapter, and if it is turned off, it is necessary to simply turn it on and try to connect to the Wi Fi network again.
Lappops are equipped with special light bulbs showing a wireless network status and various methods to enable WiFi. In the overwhelming majority of cases, the LEDs indicating the WiFi status are mounted on laptops in front or on the side of the PC panel, but it happens that they are installed on the peripheral part of the display or inside the WiFi power key (in any case, manufacturers try to make the adapter indicator to the visible part of the laptop).
 The adapter is turned on in the following ways:

In 1 method, simultaneously pressing the "Fn" and the button with the image of the Wi-Fi icon. In 2, only one key, and in the 3rd - you want to turn on, moving the switch slider.
If Wi-Fi does not work after executing the second stage of the instruction, it is necessary to continue to make the specified manual further and proceed to the next step.
3 Stage - Enable WiFi tools
In addition to methods for activating the adapter with physical keys and switches, there are ways to enable WiFi through the OS in the computer.
To this end, it is required to make the following algorithm of actions:

In the case when for some reason, the laptop cannot enter the Internet you need to start working with the instructions of the next step.
4 Stage - Debugging Software Wireless Module
It is required to analyze the performance of the Wi-Fi module drivers.
To do this, perform the following steps:

Note: In the absence in the "Network Adapters" window, the user devices are required to install the drivers. Software usually goes on a CD bundled with a computer. You can also download them from the official resource of the manufacturer of the equipment.
5 Stage - if the reason is in the router
At the initial stage of the instruction was analyzed why Wi-Fi stopped working in the PC and the most likely direction of action to troubleshoot network problems. But, since the stamps of routers today there is a huge amount and not less than firmware to routers, so at this stage will have to be limited to generalized wishes for debugging the device.
So, when except the laptop and another gadget also sees the network, then the cause of the problem is likely in the router. Below is a list of actions that make the user in such a situation:
- Can help reduce the remoteness of the laptop from the router. It is recommended to experiment with the location of the devices and turn on the wireless network. A positive result may appear after eliminating interference, such as large furniture and household appliances, microwave ovens, interior overlap. When there is no signal even with direct visibility, then proceed to the next step;
- Determine whether the Wi-Fi light on the router is shining;
- Enter the router settings, where to analyze the following items:
A) whether the Wi Fi module is enabled;
B) whether SSID is enabled;
C) whether mas laptop is not included in the list ignored.
This is the entire list of problems in which Wi Fi does not work, and there is no possibility to enable it in the computer. Each individual case has its own nuances, for example, the Internet has stopped working and the laptop does not see the desired router on the banal cause of the device cable cliff, etc., but this is the topic of a separate publication.
One of the most common problems on mobile gadgets with the Android platform is the lack of Internet access. We will talk about why the wireless, Wi-Fi, network is not connected, or is unstable. If there is no Wi-Fi connection on your tablet, smartphone or phone, first of all, it is necessary to find the reason for incorrect work, and only then to seek ways to eliminate errors. We list several types of problems, and you find our own among them, and, depending on this, use this or that recommendation or instructions.
Wrong date and time
This is a non-prolonged error, however, it is still worth checking. What if the problem is that your mobile gadget shows the wrong time and date? To check, open the "Settings" of the smartphone / tablet and see the "date and time". If the settings are incorrect, change them.
Incorrectly entered password
You may have changed a password of the network, but "forgot to tell" about this to your "smart" computer? This problem, unlike the first, on the contrary, is quite often found. Go to Wireless Connection Settings and remove the "old" profile from which you are trying to connect to the network. Now try to connect to the network.
Failures in Po
This reason, due to which Wi-Fi does not connect, is also often found. Unstable software Software is detected simply: To do this, download to the device and install the software. We recommend using for these purposes. This is a small application specifically designed to solve problems with unstable Internet on mobile devices. Neither your settings nor your content will suffer.
After starting the utility, the main window will open, where you can see the Internet connection status. And the KNOWN tab contains information about all connections.

All you have to do is restart your smartphone and connect once again on Wi-Fi.
Failure in settings
Keeping custom settings - another common problem. And only one solution is here, and not the most pleasant: reset parameters to the source (from the manufacturer). To restore the factory settings, open the "Settings" and go to the appropriate item. With it, you can reset the parameters and restore their initial values.
Click on the "Settings Reset" button.

Installing inappropriate firmware
If the problem with connecting the device to the wireless technology network occurred after the firmware, it means that you used the unofficial version. This was the cause of unstable or incorrect work. And the only solution is to reflash the device, returning to him the factory software.Viruses
And this problem often, alas, meets. Perhaps using one of the applications to the mobile device were viruses. There are a variety of programs scanning the operating system and removing malicious codes. Be sure to check the smartphone / tablet.
Incorrect router settings
The incorrectly specified parameters of the router is a frequent cause of the inoperability of the Wi-Fi-connection. To configure the right router, you need to perform everything as in the instructions. If you did not throw off the box from under the router, find the documents and configure everything correctly.Open the Device Management Menu and select Wireless Settings. You must change the parameters of two lines. "Channel" - set the parameter "Auto", "Mode" - parameter "11 BGN mixed". Click the "Filtering MAC addresses" tab and change the parameter to "Disabled".


