Note. Parental Controls have been included with Windows operating systems starting with Vista. If you have an earlier version of the OS, then you will have to use third-party programs. Tools to restrict access to applications, games, and websites are found in many complex security applications, such as Norton Internet Security and Kaspersky Internet Security.
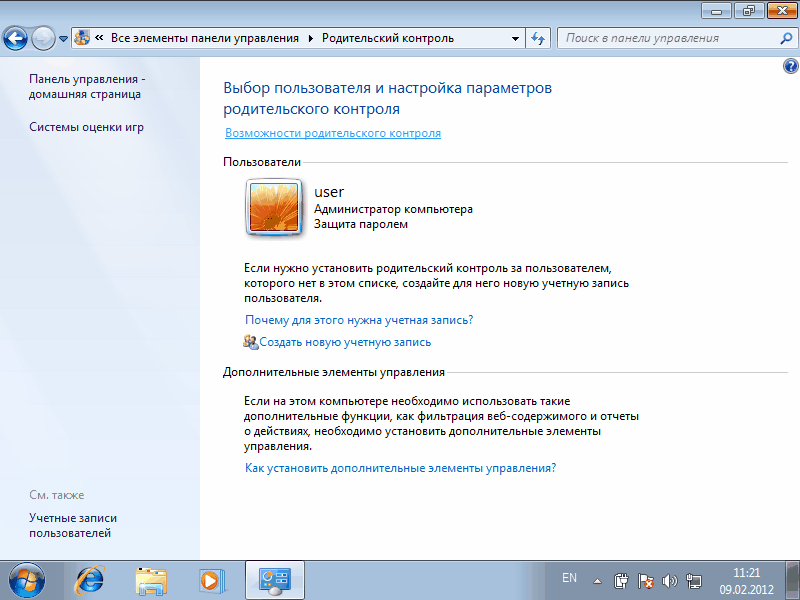
The Windows component responsible for parental control settings is called Parental Controls. To get to the page of its settings, it is enough to type in the start menu in the search bar the phrase parental control(or parental control) and click Start.
Before us is the page for setting up parental controls. And the first thing we need to do is create a new account for the child. You can do this right here by clicking on the item "Create a new account"
Here, simply enter the desired username and click the "Create Account" button. By default, an account is created without a password, but you can tick the box "User must set a password the next time he logs in", then the first time he tries to log into the computer, the system will ask for a password. 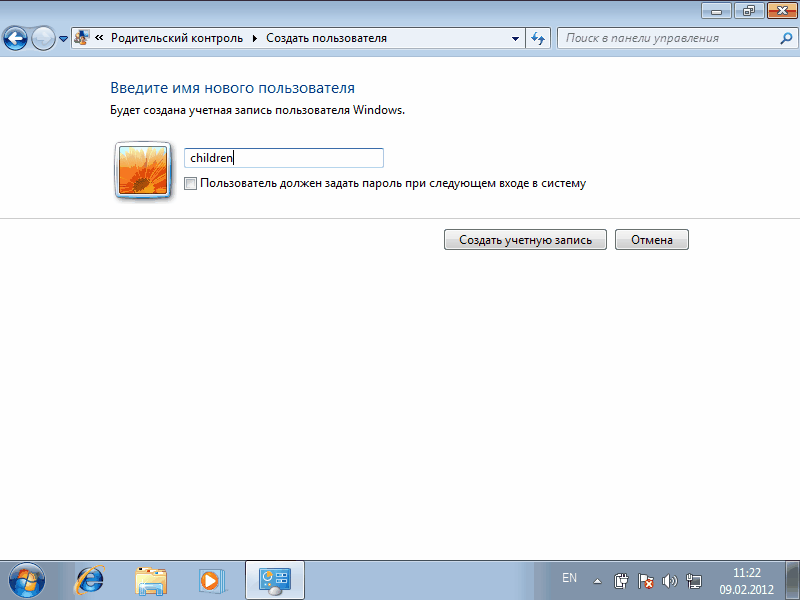
If we are talking about a password, then it should be borne in mind that the parent's account must be protected by a password, otherwise all our efforts will not make sense. Therefore, you will see a similar warning, click on it and set a password.
Keep in mind that kids can get creative when it comes to getting around taboos, so the password should be quite complex. It is also very useful to change it periodically (this approach is often used in corporate networks to improve security).
Now we need to set up the constraints. To do this, select the account we created and click on it. 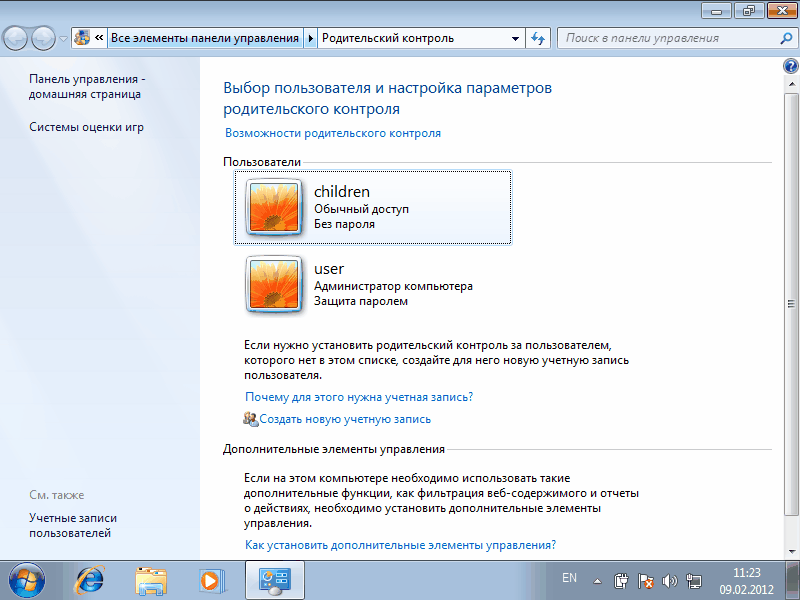
We get into the settings of the selected user. Here we can enable or disable parental controls for it, as well as configure some restrictions. 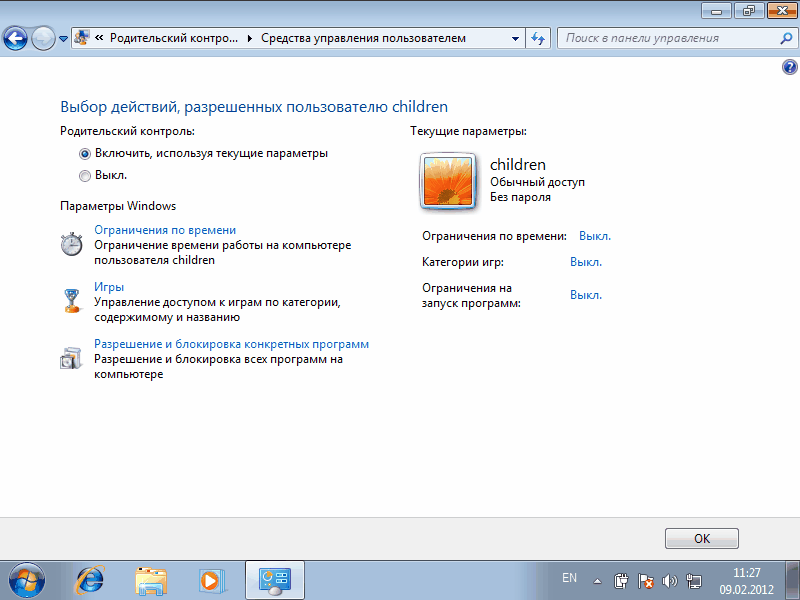
We will limit the time the child spends at the computer. For example, let's allow him 2 hours on weekdays and 4 hours on weekends at the computer. 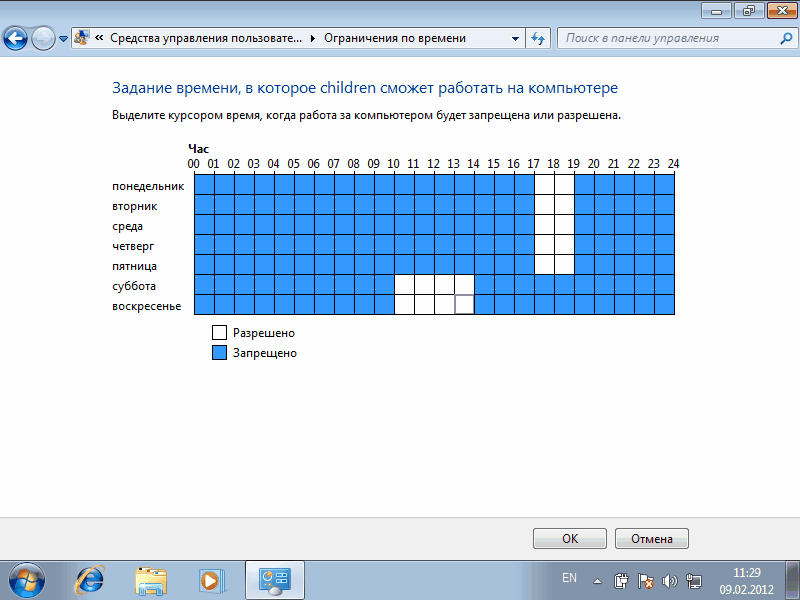
Now, if a child wants to "work overtime", then when he tries to log in, he will be given the following warning: 
The next step is to set up a limit for games. Games are grouped by type according to the rating, you can also allow or prohibit games that do not fit into any category. 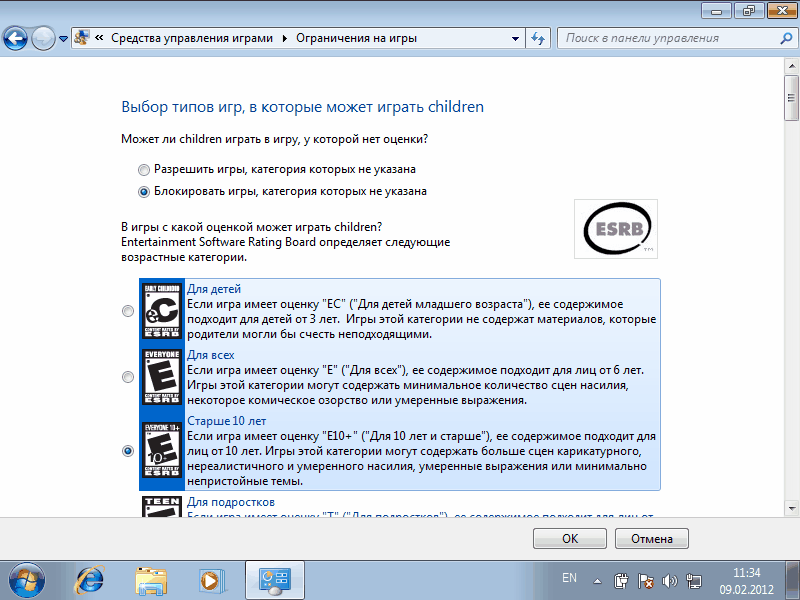
Here we can set restrictions in more detail, by content type. For example, we will prohibit games containing scenes of violence. 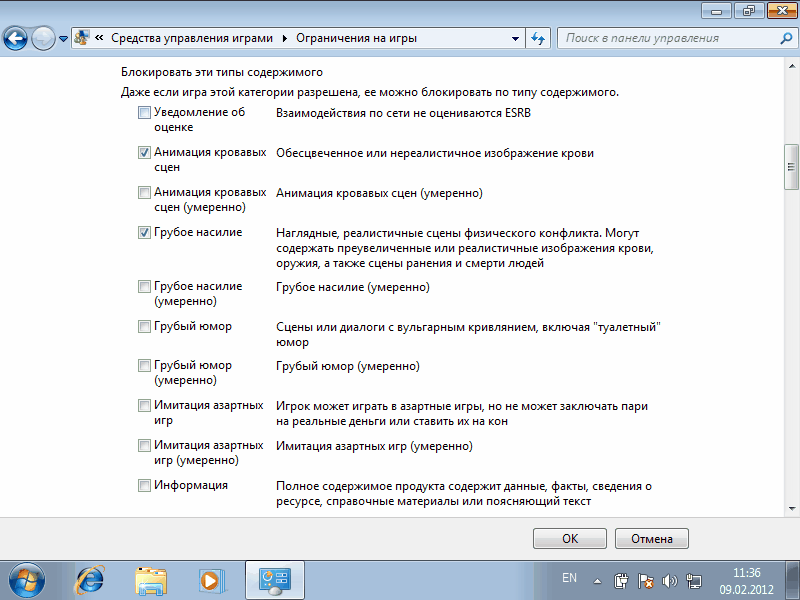
This setting is not worth pinning great hopes on, the ESRB rating for which they are selected contains only English-language games. Also, on-line games launched in the browser are not tracked. However, we can manually set restrictions on the games that are installed on the computer. 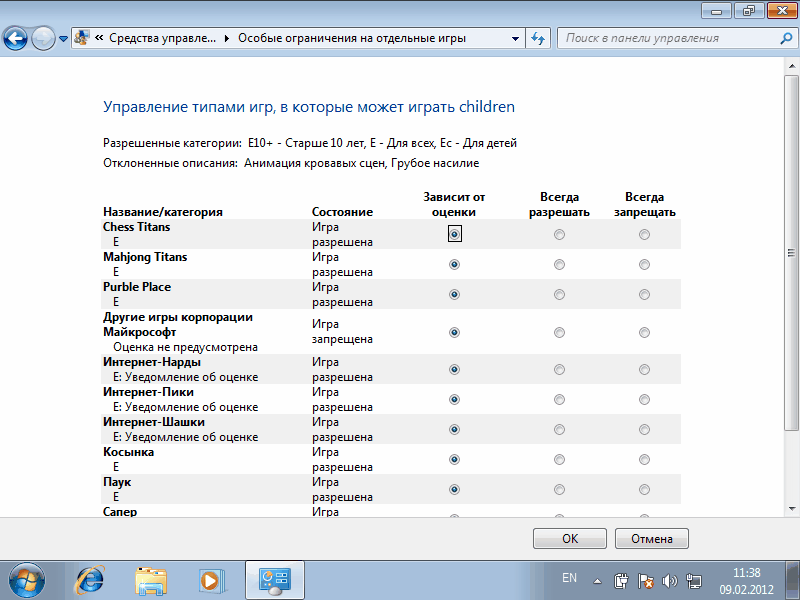
We will set up programs that our child will be allowed to run on the computer. Please note that you need to check those programs that we prohibit. If a program is not in the list, you can add it manually. To do this, click on the "Browse" button and find the folder with the installed program.


