The Windows 7 operating system has built-in archiving tools that allow you to back up the Windows operating system and user data. Archiving will create a backup image of the system and other user data, with which you can restore the system after serious troubleshooting.This article will review the use of built-in Windows backup tools 7. The built-in tools for backup the operating system, according to their capabilities, can satisfy most computer users.
How to make backup? There are quite a few backup programs, including popular programs such as Acronis True Image Home, Nero Backitup, Norton Ghost, Paragon Drive Backup Professional. Also, the backup system can be made without third-party software using the Windows backup and backup tools.
Why preferably to do backup? Because, in the case of reinstalling the Windows operating system, for some reason, all the data on the system disk will be lost on your computer. You will have to re-install all programs, make other operating system settings.
Suddenly, due to the failure of a hard disk or from the effects of viruses, you can lose all your data, and not always lost data will be able to recover recovery experts.
The output from this situation will be to create a backup system and other files you need. After a sudden failure of the system or equipment, you can restore all data from the backup. The operating system, driver, programs and other files that you archived will be restored on your computer.
Now you can go to the review about how archiving in Windows 7 works.
In order to start the backup system, enter the "Start" menu \u003d\u003e "All programs" \u003d\u003e "Service" \u003d\u003e "Archiving and Recovery". You can start the built-in Windows backup and backup tools, and the "Start" menu \u003d\u003e "Control Panel" \u003d\u003e "Archiving and Restore Files".
It may happen that in case of serious problems with the operating system, you will not be able to download the operating system in the usual or in safe mode. Then you will have to use the Windows 7 installation disk to restore the system, or the boot flash drive, with the operating system recorded on it.
Windows boot flash drive can be created using specialized programs that you can read on my site in the "Programs" section.
In the absence of your installation disk with the Windows 7 operating system, you should create a system recovery disk. The recovery disk that contains the recovery environment can be used to load a computer.
On such a disk recovery system contains the Windows operating system restore means using which you can restore the operating system after a serious error, or restore the system from the created system image.
Creating a system recovery disk
For those users who have pre-installed operating systems on their computer, create a boot disk recovery system is simply necessary. Computer manufacturers are now often not equipped with their installation disk Windows. In this case, the system recovery disk will help boot the computer to restore it if you cannot boot in another way it is possible.
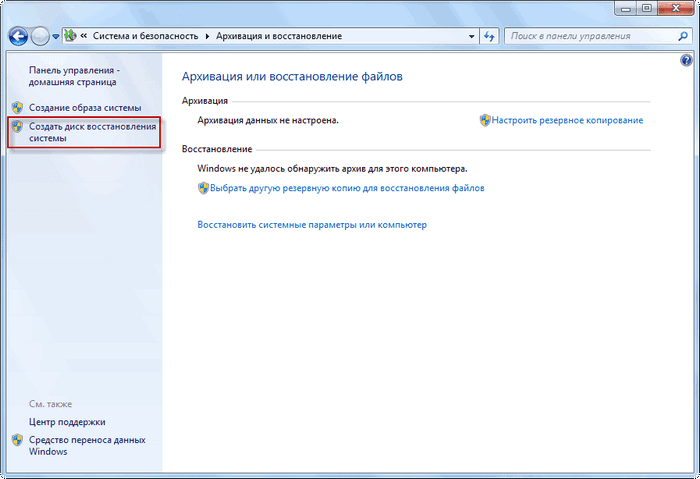
In the Archiving and Recovery window, you must click on the "Create System Recovery Disk" item to create a system recovery disk. In this case, you will have an emergency CD to restore the system, in case of serious troubleshooting with the operating system.
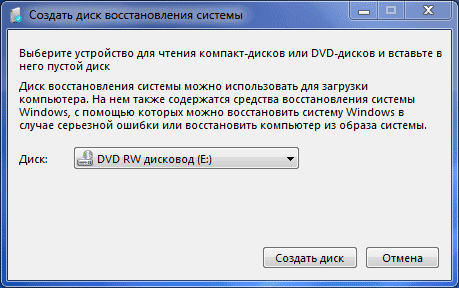
After clicking on the "Create System Recovery Disk" item, the Create Recove Disc window opens. To create a system recovery disk, you must insert a blank CD or DVD disc into the optical disk device, and then click on the Create Disc button.
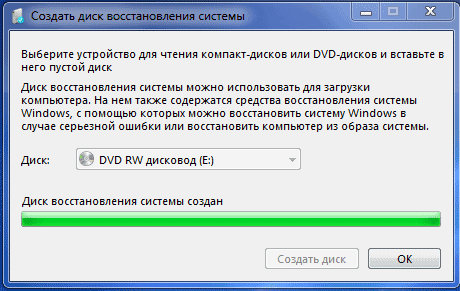
Next, the process of creating a system recovery disk occurs. After completing the creation of a recovery disk, you need to click on the "OK" button. Windows 7 recovery disk is about 150 MB.
Now you will have the opportunity to access the system recovery options using the recovery boot disk if it is not possible to download the computer in other ways.
To download the computer from an emergency or installation disk, you will need to select the boot priority from the CD / DVD disc drives to the BIOS, and in the case of using the boot flash drive from the USB disk to which such a loading flash drive is connected.
If you create an insertion disk with the Windows 7 installation disk when creating a recovery disk, it means that the necessary files for creating a system recovery disk have not been detected. In this case, you will need to insert the DVD installation disk with the Windows 7 operating system into the optical drive of the computer.
Using the Windows 7 installation disk or emergency disk to restore the system, you can boot on your computer, and you will have access to all operating system recovery parameters.
Creating a system image
If you select "Creating a System Image and Restore" window, then a system image will be created for restore it, which includes copies of the disks required for the Windows operating system. In the image image, you can enable additional discs and use it to restore, in case of malfunctions. This cannot use individual recovery elements.
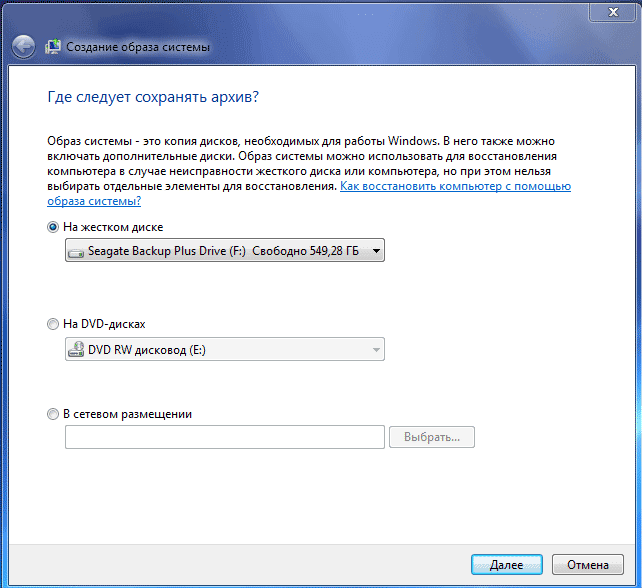
In the "System Image Creating" window, you will need to select a place to store a backup.
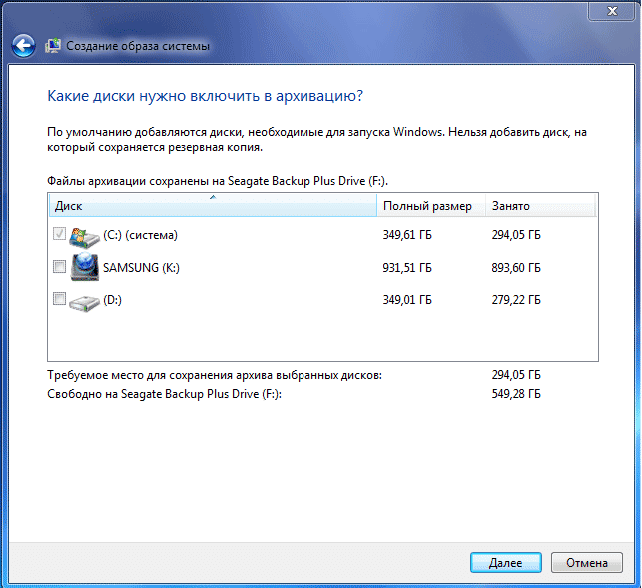
In the "System Image Creating" window you need to select discs to be included in archiving. At the same time, it will not be added to the disc on which a backup will be saved. Then click on the "Next" button.
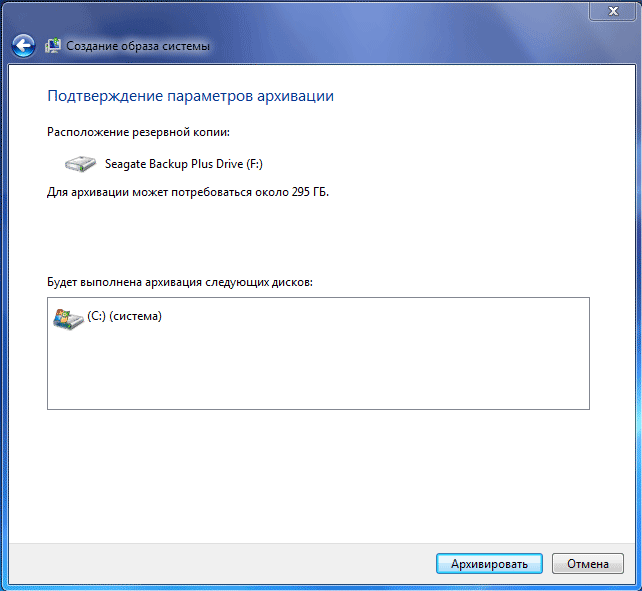
In a new window "Creating a System Image" window, you will need to confirm the archiving parameters and the location of the backup. After that, click on the "Archive" button.
Archiving in Windows 7
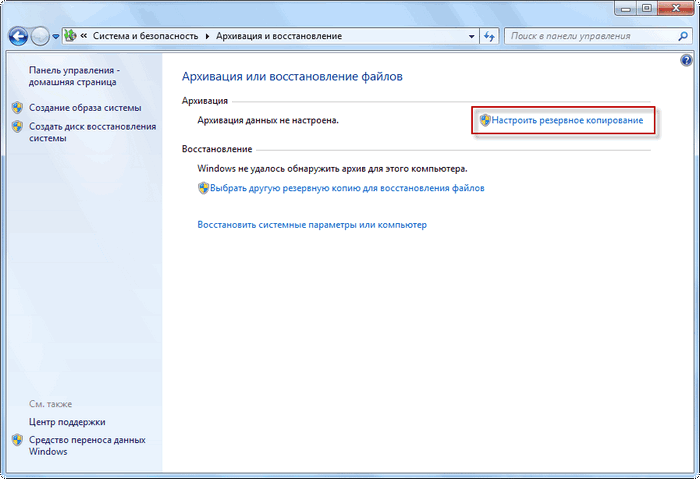
We now turn to the archiving and backup settings. In the Archiving and Recovery File window, you need to click on the "Configure Backup" item.
The following opens the archiving window. You will have to wait some time while the data archiving is launched. You will see the inscription "Start of data archiving" in the window, while the archiving itself does not occur.
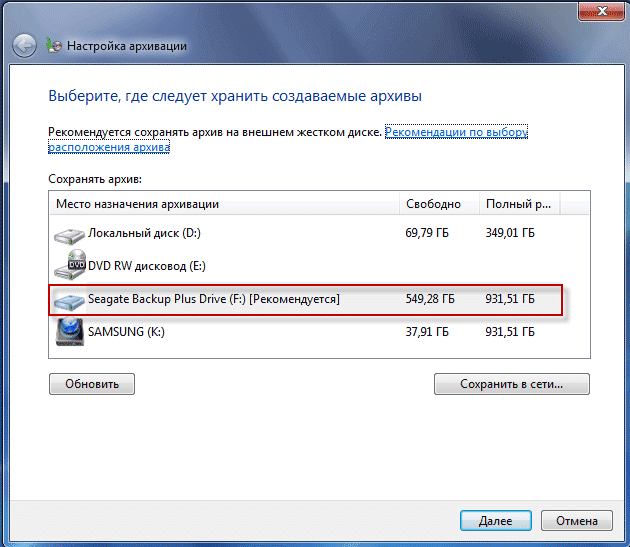
Then the archiving Configuration window opens. In this window, you must select a place to store the backup of the archive.
The best option for storing the backup system being created will be an external hard disk. Because if you save backups on another section of your computer's hard disk, then in the event that the hard disk fails, then the operating system will be lost forever, your data and created backups for recovery. The data is physically located on a single hard disk, they are only located on different logical disks.
In this image, it can be seen that the system itself suggested me a storage space - an external hard disk, with a sufficient place to create a backup.
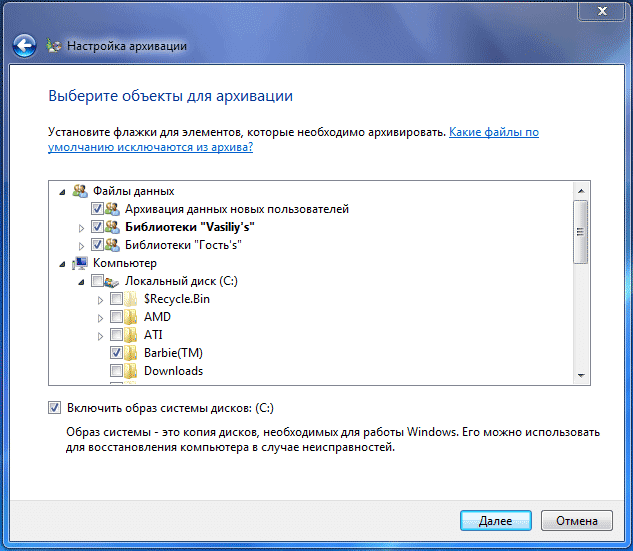
In the Archiving Settings window you will need to choose what to archive.
If Windows selection is provided, the operating system will archive files stored in standard folders, in libraries, on the desktop, and will also create an image of a system that will allow you to restore the computer in case of malfunctions. All your data and settings will be archived, and you can restore the system from a backup if necessary.
In this case, you can select specific discs, select individual folders located on the selected disk. Be sure to check the box in front of the "Turn on the image of the disk system: (C :)", so that you have the opportunity if you need to restore the system from the created backup.
The data you choose will be archived on schedule if you do not start archiving manually. After completing the selection of objects to archive, click on the "Next" button.
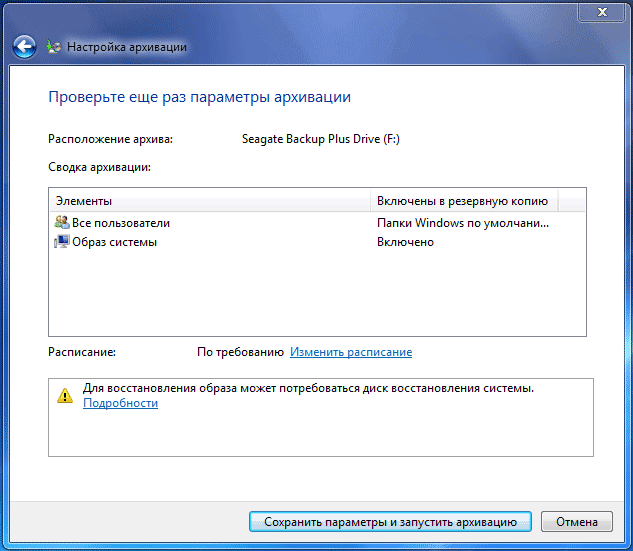
In the Backup Backup window, you again need to check the archiving settings, and then click on the "Save Settings and Run Archiving" button.
Before starting the start of archiving, you can click on the "Change Schedule" link, to select your schedule or backing up on request.
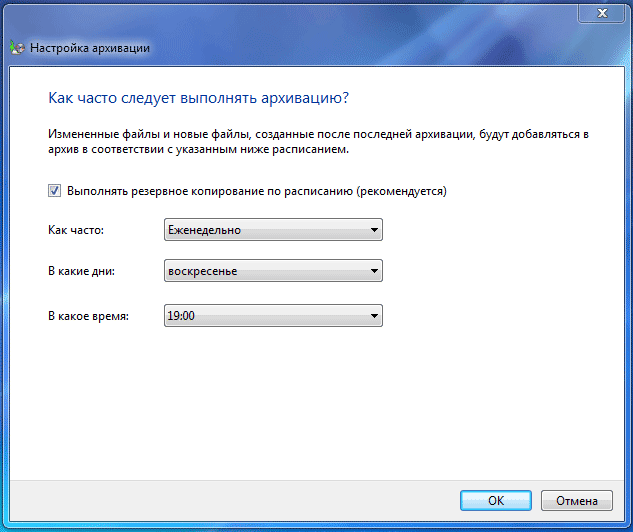
If you will be archived not on schedule, but manually when you need it, then you will need to select the checkbox in front of the "Scheduled archiving (recommended)" item, and then click on the "OK" button.
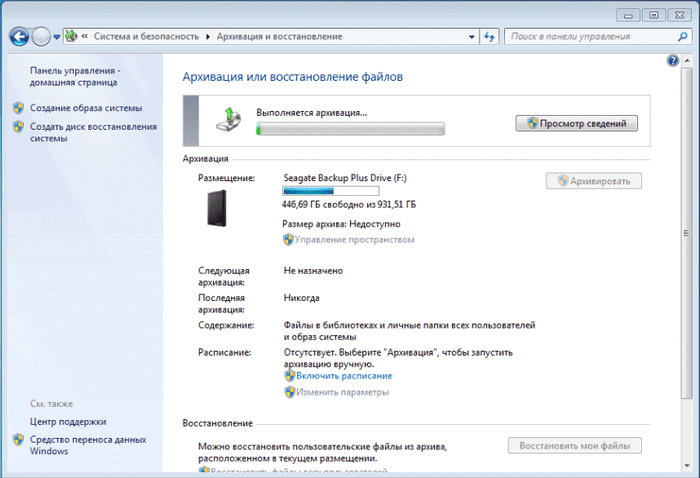
Next you will need to start the start of archiving. The backup time will depend on the volume of disks and files that will be archived as well as from the power of your computer. Backup Running repetition will be faster, because only the changed files will be overwritten after the previous backup.
It should be remembered that in the case of a scheduled backup configuration, an external hard disk must be connected to your computer at this time. If you make backup without a certain schedule, the optimal option will be the archiving of about once a month. In this case, you will save the system settings that you did relatively recently.
Important data that you often change, archive need more often than once a month to always have a relevant backup version for recovery.
How to disable archiving in windows 7
Sometimes, it is necessary to disable archiving, if you have configured creating backup copies on a schedule, and on that disk where you save backups, the free space ends. In this case, you will need to disable the creation of backups on schedule.
To do this, you will need to enter the "Start" menu \u003d\u003e "Control Panel" \u003d\u003e "Administration" \u003d\u003e "Services". In the "Services" window, you need to find the "Block-level archiving module service (WbenGine service is used to perform archiving and recovery operations)."
To disable automatic archiving, you need to change the type of service to "automatically" to "manually". To do this, you need to right-click on the "Automatically and select the" Properties "item in the context menu.
In the "Properties: Archiving Module Service at the Block Level", in the "General" tab, in the Start Type item, select "Manually" and click on the "OK" button. Next, you need to restart the computer. Now you can run backup on your own manually.
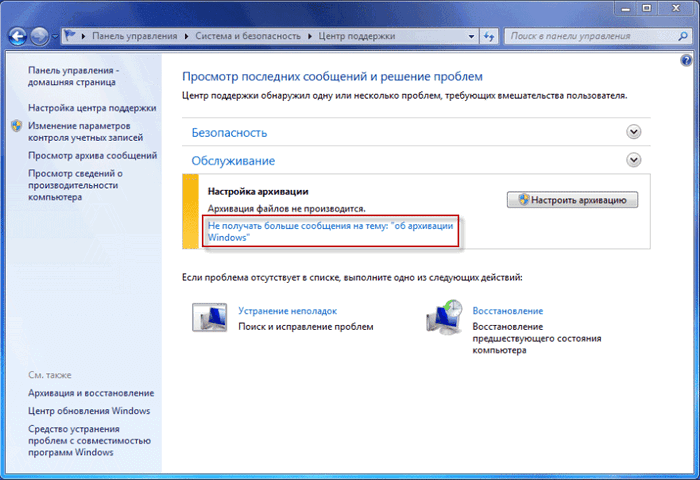
If you are annoyed from time to time, the appearing messages about the need to set up archiving from the notification panel (tray), then such messages can be turned off. To do this, you need to enter the "Start" menu \u003d\u003e "Control Panel" \u003d\u003e "Support Center". In the "Support Center" window, in the "Service" field, in the Archiving Setup item, you must click on the link "Do not receive more messages on the topic:" On Windows Archiving ".
Conclusion
Using the built-in operating system tools - archiving Windows 7, you can back up Windows, the entire contents of your hard disk or make copies of individual disks, files and folders.
In the event of a serious failure of your computer, you can restore the system and all your data from the backup. Archiving allows you to make backup not only manually, but also by your selected schedule.
Backup in Windows 7


Recommended

What kind of games are better?
Monitor - a device designed to play visual information on the screen. Good, high-quality monitor will give novelty already a little ...


")


