The Photoshop program allows you not only to edit and eliminate defects in the photo, but to change the image beyond recognition. One of the interesting effects is the change in eye color. You will need - photoshop; - selected ...
Each person has photographs that help to resurrect in memory the most interesting, important, enchanting moments of life. And in our time, some of these images are stored in electronic form. What makes it possible to change something in them, ...
Sometimes camera owners want to make their photos unusual, different from the boring rectangular standard. Thanks to the capabilities of Photoshop, it is quite possible to make a photo oval, round or any other arbitrary shape. To you…
Very often, when processing images, it becomes necessary to remove some fragment or, conversely, add it. Perhaps this detail will decorate another drawing, or it has become superfluous in the original picture. Photoshop offers several ways...
Each user of this software product, how Adobe Photoshop, knows that in this program, if desired and able, you can create anything: retouch photos, create volumetric images etc. best gift on Saint's day...
Many are familiar with the situation when you came out well in the photo, but the background is uninteresting or boring. Or maybe you just want to change the background to make the photo original, more picturesque and brighter. Or experiment...
Removing the background from a portrait or photograph of an object is done if it clutters up the picture or if you need to transfer the object to another background. This operation can be carried out using a raster graphics editor, such as GIMP. Instruction...
Cutting out any element from a photo is not at all difficult, especially if you have the right programs. Some of them allow you to cut a photo along the contour in just a few mouse clicks. Instruction 1Open the Microsoft program ...
Adobe Photoshop is one of the most widely used image editing programs. With it, you can change the appearance, figure, and even "swap bodies." This application gives unimaginable scope for creativity. ...
Sometimes, in order for a photo to look complete, a mere trifle is missing. It is worth rounding the edges of the photo, and the view is completely different. There are two ways to give your photo a little zest with soft, rounded edges6 or by using…
The ability to work in Photoshop gives you the opportunity not only to retouch photos and add beautiful color effects to them, but also to radically transform photographs, making them unusual and eye-catching. For example, you can from any…
Photoshop opens up great opportunities for you to create various visual effects in photographs and any other images. With the help of Photoshop, you can simulate almost any phenomenon - for example, depict in any photo ...
In most cases, not only on amateur, but also on professional cameras, frames are obtained as a kind of semi-finished product - in order to achieve maximum quality and beauty of the image, photos need to be retouched, aligning ...
I found free image SVG on the web. I'm experimenting with web design using SVG. The problem I have is that the background of the SVG is white.
How to uninstall/remove White background using Adobe Illustrator?
Answers
Brendan
Try the Direct Selection tool (shortcut A or the white mouse pointer in the toolbar) and see if you can click it.
If you can't select and remove it, chances are the white "background" isn't a background at all; rather it is the color of the artboard. For obvious reasons, it's white in Illustrator, but it's ultimately an arbitrary thing. If you really want to change the artboard color, you can do this.
Omne
Assuming there is a background, you should be able to select and remove it. You can achieve this with many various methods, one problem with SVGs is that sometimes they have many complex layers and groups.
First try to see if you can select it with the Direct Selection tool, if it is in a group then double clicking on the object will isolate it and you will be able to select it individually.
I don't understand why the magic wand tool doesn't work for you if it's the only white color object that should have worked...
Alternatively, you can try to find this object from your objects, look in the layer window.
Since this is a royalty-free SVG, it would be helpful if you could give us a link.
Jamix
Thanks, it turned out that my "background" was a black rectangle that I found in the "Layer" window.
Machei
A simple web tool that allows you to change colors vector image using a raster graphics editor
spnk.pl/svg-edit-colors/
Kurt
Please explain what you mean or how to use the tool you linked. Giving only a link without explanation is not welcome ...
Machei
Sorry, I didn't have time to explain it. My tool was created 2-3 days ago, you can remove the background (or other element) of the specified color using a bitmap editor. Also I uploaded the tutorial on YouTube.
answeru
it's so easy, if you want to change the background of the SVG file, please visit the layers palette first, there you have to select the path you really want to edit, and after selecting that part (path) in the layers panel, click on (small vertical red line ) window) at the bottom of the window will make the background transparent and you're done.
How to make PNG with transparency in Adobe Illustrator? Very simple. We open desired file and go to menu File > Save for Web & Devices(Alt+Ctrl+Shift+S). In the window that opens, in the list Optimized file format select PNG and check the box Transparency(Transparency).
Then we determine which colors will be transparent. All colors present in the image are contained in the tab color table(Color Chart) and are displayed as colored squares. Select a tool from the toolbar on the left side of the window eyedropper(pipette).

Colors can be defined in two ways. The easiest way is to specify the color with an eyedropper directly on the image - after that the color will be highlighted on the color table with a dark stroke. If you know exactly which color should be transparent, you can select it directly on the color table by clicking the corresponding colored box. And in the first and second cases, if you need to select several colors, you need to work with the Shift (or Ctrl) key pressed. Now let's make the selected colors transparent. To do this, click on the icon Maps selected colors to Transparent(Make selected colors transparent). In the top image, this icon is circled and the red color is set to transparent. A transparent area will appear on the image, and the square on the color table will change its appearance - part of it will become a white triangle. Clicking the Maps selected colors to Transparent icon again will cancel the transparency of the selected color.
A few words about the method of setting transparency. The dropdown menu is responsible for it. Specify Transparency Dither Algorithm, in Russian - Transparency simulation algorithm (fig. below). There are four choices: No Transparency Dither - no algorithm, Diffusion Transparency Dither - diffuse algorithm, Pattern Transparency Dither - pattern-based algorithm and Noise Transparency Dither - noise-based algorithm. In the diffuse algorithm mode, the Amount slider becomes active, allowing you to change the diffusion value. What to apply in practice? Depending on the purpose and image. I always leave the default - No Transparency Dither.

Click Save - transparent PNG ready. The work was done in Adobe Illustrator version CS4, but all actions and keyboard shortcuts are relevant for earlier versions.
If the image had clear boundaries, then no further processing is required. In the case of using shadows or if the transparency borders are not quite clear, sometimes you have to tinker by re-opening the created transparent PNG in Photoshop and erasing one pixel of the image border with an elastic band. If the transparent PNG is made by someone else, and you need to use it, and the background color of the image is significantly different from the background color of the web page, then such edge processing is simply necessary. You will have to use the Pencil tool to align the colors along the edges, picking up pages close to the background. In this case, it is necessary to convert the image to RGB before processing, and at the end of it - back to indexed colors. The pictures show how this is done. The first picture is a transparent PNG, prepared for a red background (a rough red border is visible on a white background), the second is an enlarged border, completely removing which we get “teeth”.
Illustrator has several options for setting transparency for both vector and bitmap objects. The simplest of them is to select an object and set the desired opacity for it using the slider Opacity(Opacity) of the custom palette Transparency(Transparency). This palette, which can be open or closed, is called from the list of palettes that opens when the command is activated Window(Window). If, when choosing a command Window=>Transparency the palette opens in an incomplete form, then you need to sequentially use the commands Show Thumbnails(Expand from icon) and Show Options(Show Options) from the palette menu.
In addition, the visibility of individual areas of the image can be controlled using layer masks (clipping masks - clipping mask) and translucency masks ( opacity mask). Stencil-like masks determine how individual layers are stacked on top of each other, can make individual image fragments completely or partially visible or completely invisible, and allow you to make complex transparency adjustments for any object. And since transparency in this case is implemented as a mask over the object, the user can edit the object at any stage of work without affecting the mask. You can also set transparency for groups of objects, however, if you need to edit individual objects from a group, the last of them will have to be ungrouped, and all transparency settings for the group will be destroyed.
Setting opacity without masking
Palette Transparency(Transparency) allows you to easily change the transparency of any objects - both raster and vector (formed by the most different ways: using contours different types, characters from the palette Symbols(Symbols) or as text) and make the underlying objects show through effectively. Pay attention, for example, to Fig. 1, which is taken as the original image. Then a series of contours was added to it: the upper contour was created with the tool Pen(Feather) and filled with a linear gradient, and a series of water droplets obtained using a palette Symbols. All involved contours have their own transparency levels (Fig. 2, 3).


Rice. 3. The final appearance of the photo after adjusting the transparency of individual objects
Establishing a specific transparency option is not an obstacle for subsequent editing of objects for which, if necessary, you can always change the fill or stroke option, size and position, transparency level, etc.
In addition, in the palette Transparency(Transparency) it is possible to select color blending modes ( blend mode): Normal(Normal) (this mode is set by default), Multiply(Multiplication), Screen(Lightening), etc., which can be applied not only to a single object, but also to a group or to a layer, and in combination with the level of transparency, allow you to achieve the desired visibility effect of the object.
Setting opacity for vector objects
Consider the option of setting opacity for individual objects. To do this, draw some simple intersecting objects. Such objects are preferable, because they are easier to get acquainted with the different opacity options. In this example, three overlapping flowers on a black background will act as objects (Fig. 4). Select two objects, for example the two top flowers, and change their transparency values in the palette Transparency, for example, as shown in Fig. 5, - for this you just need to drag the slider Opacity(Opacity). Note that the flowers are now transparent both relative to each other and to the background (Fig. 6).


In the second option, you need to restore the transparency value to 100%. To do this, first group both selected flowers with the command Object=>Group(Object=>Group), which will automatically enable the checkbox Knockout Group Transparency. Then change the opacity again by setting the parameter value Opacity(Opacity) set to 70%. As a result, the objects will become transparent in relation to the background, but not relative to each other (Fig. 7). The point is that enabling the checkbox Knockout Group(Group with background removed) in palette Transparency allows you to remove (albeit only visually) the translucence of translucent objects in a group that overlap each other in this group.

Additionally, draw a series of several small elements of the same type, such as stars (Fig. 8). Group them together with the command Object=>Group(Object=>Group) and set their color blending mode Screen(Lightening) with opacity (Fig. 9). As a result, the stars will change their color and will look something like the one shown in Fig. 10.


Rice. 9. Adjusting the Opacity and Blending Mode for the New Group

Rice. 10. Appearance entire image after adjusting the opacity settings
Select both groups of objects, then group them again and check the box Isolate Blending(Isolate blend mode) in the palette Transparency- this will isolate objects when setting the blend mode for them. As a result, the color blending mode will be applied to the objects included in the group, and all other objects (in this case- one single star on a green flower) will be ignored (Fig. 11). Keep in mind that the checkbox Isolate Blending(Isolate blend mode) only makes sense if you're talking about color blending modes other than Normal(Normal).

Rice. 11. Changing the appearance of the image as a result of isolating objects
Adjusting the opacity of a bitmap
Now let's try experimenting with bitmap(Fig. 12). Form a vector outline around the image in the form of a rectangle filled with white (Fig. 13). Change the opacity in the palette Transparency, for example, as shown in Fig. 14. The image will resemble fig. 15. The result can be much more interesting if the rectangle is filled with a radial gradient (Fig. 16, 17). In addition, it is worth experimenting with opacity modes, changing, for example, the default mode Normal on mode Screen(Fig. 18).


Rice. 15. Appearance of the image after changing the opacity of the rectangle

Rice. 16. Adjusting the Opacity of the Rectangle in the Transparency Palette After Filling with a Radial Gradient

Rice. 17. Appearance of the image after filling the rectangle with a gradient and changing the opacity in Normal mode

Rice. 18. Appearance of the image after filling the rectangle with a gradient and changing the opacity in Screen mode
Controlling opacity with a layer mask
Layer mask, or clipping mask ( clipping mask), allows you to remove, or, as they say, mask unnecessary areas of the image (Fig. 19, 20) without destroying the content of the layer.


Rice. 20. Visibility of the image after creating an oval layer mask
Creating a layer mask is carried out in several stages. First, a contour is formed above the image layer, which is supposed to be used as a mask in the future. Then you need to select the image and the outline. It is often more convenient to do this in the palette Layers, successively clicking on the round buttons corresponding to the objects while holding down the key Shift- while the appearance of the circle button for each selected element will change. After that you need to press the button Make/Release Clipping Mask on the palette Layers or use the command Object=>ClippingMask=>Make. As a result, everything that falls inside the contour will remain visible, and the area outside the contour will be hidden. If mask clipping was unsuccessful, you can cancel it at any time by calling the command Object=>ClippingMask=>Release or by clicking on the button Make/Release Clipping Mask on the palette Layers.
Please note that the button Make/Release Clipping Mask on the palette Layers is usually unavailable and becomes active only if the palette contains Layers activated area Group(Fig. 21). In addition, keep in mind that any objects that are subsequently added to the layer group with the layer mask are also clipped to the mask (Fig. 22) and become invisible. At the same time, objects embedded in the layer above the group will be visible (Figure 23).


Rice. 22. The result of cropping the added stars on the layer mask - some of the stars became invisible

Rice. Fig. 23. Appearance of the image with the Layers palette open - the asterisk added above the group with the layer mask is visible
texture text
Very often, layer masks are used when creating texture text, that is, text cut out of some kind of texture or simply from a photograph. For example, let's use a photo (Fig. 24) and print arbitrary text over it (Fig. 25). Select the text along with the outline of the photo and apply the command Object=>ClippingMask=>Make. As a result, the image will resemble Fig. 26, and the palette Layers takes the form corresponding to Fig. 27. If desired, the resulting image can be subjected to further editing, for example, make a stroke (Fig. 28), apply a suitable filter (Fig. 29), etc.


Filling with a texture of arbitrary vector paths
Open a suitable texture (Fig. 30), which you plan to use to fill some contour (Fig. 31) - in this example, a fragment of the lizard contour created by us in one of the previous lessons is used - and copy the contour to the texture via the clipboard (Fig. 32), if necessary, editing its size and position. To hide the space outside the path, which is visually equivalent to filling the path with a texture, select the path along with the texture and use the command Object=>ClippingMask=>Make. As a result, the image will resemble Fig. 33, and the palette Layers takes the form corresponding to Fig. 34.
To complete the image, make a copy of the outline through the clipboard, right-click on the copy and select the command to mirror it. Transform=>Reflection with parameters as in Fig. 35. Place the copy properly (fig. 36) and give the lizard a slightly curved shape using the filter Twist(bend) - command Effect=>Distort & Transform=>Twist(Effect => Distort and Transform => Bend) with approximately the same parameters as in fig. 37. The result obtained may resemble fig. 38.


Rice. Fig. 36. Appearance of the image obtained on the basis of two combined contours, previously filled with a texture


Simulate the effect of the intersection of objects
And now let's look at a more complex version of creating a clipping mask - we need it to simulate the effect of crossing objects. First, form three circles (in this example, their role will be played by Latin letters " o”) in such a way that each next circle partially overlaps the previous one (Fig. 39). Select all three circles and copy them to the clipboard with the command Edit=>Copy(Editing=>Copy). Then paste a copy from the clipboard with the command Edit=>Paste in Front(Editing => Paste in front) so that the original image and its copy are superimposed on each other. After that, use the Restangle tool to form a rectangle without filling and without borders at the intersection of the first and second circles (Fig. 40). Note that the rectangle must end up on the same layer Layer 1, but above all other objects (Fig. 41).


Rice. 40. The appearance of a rectangle at the intersection of the first two circles

To create a layer mask, select the formed rectangle and the first circle and apply the command Object=>ClippingMask=>Make(Fig. 42). Then, in the same way, create a rectangle at the intersection of the second and third circles and select this rectangle along with the second circle (Fig. 43). If the usual way to do this fails, then select the desired objects through the palette Layers: for this while pressing the key Shift click on the circle buttons available for each element of the layer (Fig. 44), and in this case the appearance of the circle button for each selected element will change. Create a clipping mask with the command Object=>ClippingMask=>Make- the resulting image will resemble rice. 45.


Rice. 44. Layers palette window with second circle and second rectangle selected

In the end, to make the image more spectacular, select on the palette Layers three lower circles and put a shadow on them with the command Effect=>Styleize=>Drop Shadow(Effect => Styling => Shadow) and then draw the background under the circles with a gradient, for which you will need to create a new layer Layer 2. To do this, activate the layer Layer 1, open the palette menu Layers and select command New layer(New layer) - as a result above the layer Layer 1 a layer will appear Layer 2. Draw a rectangle on it (this will cause the circles to be under the rectangle and be invisible), which will act as a background, fill it with a suitable gradient and apply a shadow with the command Effect=>Styleize=>Drop Shadow(Effect=>Stylization=>Shadow). To make the circles sit on top of the background rectangle, change the layers L ayer 1 and Layer 2 places by dragging one on top of the other in the palette Layers(Fig. 46). It is possible that the image will take approximately the form shown in Fig. 47.


Rice. 47. Final appearance of intersecting circles on a gradient background
Adjusting Opacity by Creating an Opacity Mask
Translucency mask ( Opacity mask) determines which areas of the image should be clearly visible, and which - only partially, that is, translucent or not visible at all. In this case, any colors can be visible through the specified semi-transparent mask, as well as decorative and gradient fills located below and inside the mask.
The process of forming a mask is quite simple and consists in layering two or more objects one on top of the other, and setting the required level of transparency for each of them and defining the topmost one as a mask using the command Make Opacity Mask(Create Semi-Transparent Mask) from the palette menu Transparency. The creation of an opacity mask will be indicated by the appearance in the palette Transparency mask icons next to the masked objects icon, separated by the “chain” icon, and changing the visibility of image fragments (Fig. 48, 49, 50). Palette appearance Layers will change depending on what is active on the this moment time - image (Fig. 51) or mask (Fig. 52).


Rice. 50. Transparency Palette - image icon on the left, mask icon on the right

Rice. 51. Image and palettes Layers and Transparency - active image

Rice. 52. Image and palettes Layers and Transparency - active mask
The opacity mask is created according to the shape of the topmost selected object, and at least two top objects must be selected - selecting only one of them will create an empty mask. Adding new objects to the image does not affect the translucency mask created before; all added objects will be visible by default, as they are created on top of the mask (Fig. 53), although they can be moved under the mask if desired.

Rice. 53. The result of adding a new object in the form of a frame on top of the masked image
As a result, the upper object will become a mask, and its grayscale fill will affect the extent to which one or another area of the image below it will be visible. For example, filling the mask completely with white will result in the image fragments within the mask being completely visible, with a black mask the masked objects will be invisible, and using a gradient black and white mask will cause the masked objects to appear where the white begins. area, and fade out where the gradient turns black. In addition, you can create a translucency mask using any gradient fills, gradient meshes, and even decorative fills.
It's worth noting that the above rule regarding mask color and object visibility is ambiguous. Yes, checkbox invert mask(Invert mask) in palette Transparency will cause the black and white effect to be inverted and black areas become transparent, while white areas, on the contrary, become opaque (Fig. 54); enable/disable the same checkbox clip(Crop) lets you swap masked and unmasked areas.

Rice. 54. Change the appearance of the image as a result of inverting the mask
A translucency mask can be formed from any vector object and transformed using various distorting filters, which allows you to achieve very interesting effects. Text can also be saved as an opaque mask to quickly create custom text titles (while still allowing text to be edited). The shape of the opacity mask can be adjusted - just click on the mask icon in the palette Transparency when the key is pressed Alt. As a result, the object, on the basis of which the mask was created, will be selected and become available for editing. When finished editing, click on the image icon.
For complete removal opacity mask, select it and use the command Release Opacity Mask(Remove the transparency mask), and to temporarily hide it, use the command Disable Opacity Mask(Remove the transparency mask). Both commands are selected from the palette menu Transparency.
Photo Effects
First, open some photo (Fig. 55) and form a rectangle over it, fill it with a linear gradient and process it with a filter ZigZag (Effect=>Distort & Transform=>ZigZag- Effect => Distortion and transformation => Zigzag) (Fig. 56).


Rice. 56. Appearance of the object? on the basis of which the semi-transparent mask will be created
Create a mask with the command Make Opacity Mask Transparency. As a result, the image will resemble Fig. 57, and in the palette Transparency the icon of the created mask will appear (Fig. 58). And now try to edit the mask: select it by clicking on the icon in the Transparency palette while holding down the key Alt, use the effect Inner glow (Effect=>Styleize=>Inner Glow- (Effect => Styling => Inner Light) and add a suitable shadow ( Effect=>Styleize=>Drop Shadow- Effect => Stylization => Shadow). It is possible that the image will resemble Fig. 59.

Rice. 57. Appearance of the photo after applying a translucent mask


texture text
As mentioned above, texture text is quite often created using a layer mask, but no less wide opportunities for cutting text from a texture or any photo open up when using translucent masks.
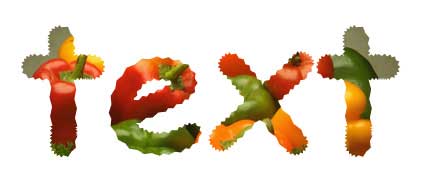
Take, for example, fig. 60 and print black text on top of it (as with any textured text, the letters must be large and wide enough) (Fig. 61). Select the text and photo and use the command Make Opacity Mask(Create Semi-Transparent Mask) from the palette menu Transparency with the checkbox enabled clip(Crop). It is possible that the result will resemble Fig. 62, and in the palette Transparency the created mask icon will appear (Fig. 63). Please note that in case of an unsuccessful initial text location, it is easy to move it after creating the mask, having previously selected it with tools Selection(Highlight) or Direct Selection(Partial selection).


Rice. Fig. 62. Appearance of texture text cut out of a photo using a semi-transparent mask

In conclusion, try to give the text a three-dimensional effect. To do this, select the text and copy it to the clipboard with the command Edit=>Copy(Editing=>Copy). Then paste a copy from the clipboard with the command Edit=>Paste in Front(Editing => Paste in front) so that the original image and its copy are superimposed on each other. Then slightly move the bottom copy of the text to the right and down and on the palette Transparency reduce its opacity from 100% to around 50-40%. The resulting texture text will be similar to the one shown in Fig. 64.

An equally interesting result can be obtained with a gradient text fill (Fig. 65). At the same time, to form a spectacular shadow at the very end, before creating the mask, copy the created text to the clipboard, and then create the mask in the usual way - in this case, after creating the mask, the palette Transparency will have the same form as shown in Fig. 66, and the text will resemble Fig. 67.


Rice. 67. The appearance of texture text based on a gradient semi-transparent mask
Next, paste a copy of the text from the clipboard with the command Edit=>Paste in Back(Editing => Paste in Back) so that the copy is below the original text. Finally, move the bottom copy of the text 2-3 pixels to the right and down (Figure 68).

Translucent colored text
Open the photo to be based on translucent text(Fig. 69). Print text over the uploaded photo in any bright color, for example, orange (Fig. 70) - the layers palette will look like in fig. 71 (notice that the text layer is on top of the background layer). Swap layers by simple drag and drop, then select both layers in the palette Layers and create a mask with the command Make Opacity Mask(Create a semi-transparent mask) (Fig. 72). The text obtained in this way will retain its original color (that is, orange), but the background will show through it very effectively (Fig. 73). When finished, apply a shadow to the text with the command Effect=>Styleize=>Drop Shadow(Effect=>Stylization=>Shadow) with suitable parameters (Fig. 74).


Translucent button
Create a circle and fill it with a radial black and white gradient (Fig. 75). Then make two copies of the circle and place each copy with the command Edit=>Paste(Editing => Paste) on a separate layer, then in the palette Layers three layers will appear: Layer 1, Layer 2 and Layer 3 with the same circle on each. Temporarily lock and make layers invisible Layer 2 and layer 3. Go to layer 1, activate the palette Gradient and change the gradient fill settings to something like the one shown in fig. 76. As a result, the circle on the first layer will take the form in accordance with fig. 77, and the appearance of the palette Layers will look like rice. 78.


Unlock Layer Layer 2, select with the tool Selection both bottom layers and create a mask with the command Make Opacity Mask(Create Semi-Transparent Mask) from the palette menu Transparency with checkboxes enabled clip(Trim) and invert mask(Invert mask). To check the mask, temporarily turn on the mode Transparency Grid(Transparency Grid) command View=>Show Transparency Grid(View=>Show transparency grid), and you will see that the circle is translucent in its central part (Fig. 79, 80).


Rice. Fig. 80. The appearance of the circle after creating the mask with the Transparency Grid mode turned on
Unlock Layer Layer 3, select the circle, fill it with white and use the select direction(Partial selection) change the outline of the circle so that it looks like the figure shown in fig. 81. Form a rectangle over the modified white circle so that it completely covers the future mask. Then fill it with a linear black and white gradient (Fig. 82). Select both objects with the tool Selection(Select), create a mask with the command Make Opacity Mask(Create a semi-transparent mask) and adjust the transparency parameters in accordance with fig. 83. The resulting button will resemble the one shown in fig. 84.
The final touch could be adding a black shadow to the right and bottom of the button. To create it on top of the layer Layer 3 create a new layer Layer 4, copy the circle from the layer Layer 1 to the clipboard and paste it on the layer Layer 4 team Edit=>Paste(Editing=>Insert). Then delete the circle's fill, make a 4 px thick black border around it, Gaussian blur with 5 px blur options (command Effect>=Blur>=Gaussian Blur- Effect>=Blur>=Gaussian Blur) and move it with a slight shift to the right and down in relation to the created button (Fig. 85).


Rice. 82. Forming a rectangle over the contour of a white modified circle


Illustrator has several options for setting transparency for both vector and bitmap objects. The simplest of them is to select an object and set the desired opacity for it using the slider Opacity(Opacity) of the custom palette Transparency(Transparency). This palette, which can be open or closed, is called from the list of palettes that opens when the command is activated Window(Window). If, when choosing a command Window=>Transparency the palette opens in an incomplete form, then you need to sequentially use the commands Show Thumbnails(Expand from icon) and Show Options(Show Options) from the palette menu.
In addition, the visibility of individual areas of the image can be controlled using layer masks (clipping masks - clipping mask) and translucency masks ( opacity mask). Stencil-like masks determine how individual layers are stacked on top of each other, can make individual image fragments completely or partially visible or completely invisible, and allow you to make complex transparency adjustments for any object. And since transparency in this case is implemented as a mask over the object, the user can edit the object at any stage of work without affecting the mask. You can also set transparency for groups of objects, however, if you need to edit individual objects from a group, the last of them will have to be ungrouped, and all transparency settings for the group will be destroyed.
Setting opacity without masking
Palette Transparency(Transparency) allows you to easily change the transparency of any objects - both raster and vector (formed in a variety of ways: using contours of different types, symbols from the palette Symbols(Symbols) or as text) and make the underlying objects show through effectively. Pay attention, for example, to Fig. 1, which is taken as the original image. Then a series of contours was added to it: the upper contour was created with the tool Pen(Feather) and filled with a linear gradient, and a series of water droplets obtained using a palette Symbols. All involved contours have their own transparency levels (Fig. 2, 3).
Rice. 3. The final appearance of the photo after adjusting the transparency of individual objects
Establishing a specific transparency option is not an obstacle for subsequent editing of objects for which, if necessary, you can always change the fill or stroke option, size and position, transparency level, etc.
In addition, in the palette Transparency(Transparency) it is possible to select color blending modes ( blend mode): Normal(Normal) (this mode is set by default), Multiply(Multiplication), Screen(Lightening), etc., which can be applied not only to a single object, but also to a group or to a layer, and in combination with the level of transparency, allow you to achieve the desired visibility effect of the object.
Setting opacity for vector objects
Consider the option of setting opacity for individual objects. To do this, draw some simple intersecting objects. Such objects are preferable, because they are easier to get acquainted with the different opacity options. In this example, three overlapping flowers on a black background will act as objects (Fig. 4). Select two objects, for example the two top flowers, and change their transparency values in the palette Transparency, for example, as shown in Fig. 5, - for this you just need to drag the slider Opacity(Opacity). Note that the flowers are now transparent both relative to each other and to the background (Fig. 6).
In the second option, you need to restore the transparency value to 100%. To do this, first group both selected flowers with the command Object=>Group(Object=>Group), which will automatically enable the checkbox Knockout Group Transparency. Then change the opacity again by setting the parameter value Opacity(Opacity) set to 70%. As a result, the objects will become transparent in relation to the background, but not relative to each other (Fig. 7). The point is that enabling the checkbox Knockout Group(Group with background removed) in palette Transparency allows you to remove (albeit only visually) the translucence of translucent objects in a group that overlap each other in this group.
Additionally, draw a series of several small elements of the same type, such as stars (Fig. 8). Group them together with the command Object=>Group(Object=>Group) and set their color blending mode Screen(Lightening) with opacity (Fig. 9). As a result, the stars will change their color and will look something like the one shown in Fig. 10.
Rice. 9. Adjusting the Opacity and Blending Mode for the New Group
Rice. 10. Appearance of the entire image after adjusting the opacity settings
Select both groups of objects, then group them again and check the box Isolate Blending(Isolate blend mode) in the palette Transparency- this will isolate objects when setting the blend mode for them. As a result, the color mixing mode will be applied to the objects included in the group, and all other objects (in this case, a single star on a green flower) will be ignored (Fig. 11). Keep in mind that the checkbox Isolate Blending(Isolate blend mode) only makes sense if you're talking about color blending modes other than Normal(Normal).
Rice. 11. Changing the appearance of the image as a result of isolating objects
Adjusting the opacity of a bitmap
And now let's try to experiment with a bitmap (Fig. 12). Form a vector outline around the image in the form of a rectangle filled with white (Fig. 13). Change the opacity in the palette Transparency, for example, as shown in Fig. 14. The image will resemble fig. 15. The result can be much more interesting if the rectangle is filled with a radial gradient (Fig. 16, 17). In addition, it is worth experimenting with opacity modes, changing, for example, the default mode Normal on mode Screen(Fig. 18).
Rice. 15. Appearance of the image after changing the opacity of the rectangle
Rice. 16. Adjusting the Opacity of the Rectangle in the Transparency Palette After Filling with a Radial Gradient
Rice. 17. Appearance of the image after filling the rectangle with a gradient and changing the opacity in Normal mode
Rice. 18. Appearance of the image after filling the rectangle with a gradient and changing the opacity in Screen mode
Controlling opacity with a layer mask
Layer mask, or clipping mask ( clipping mask), allows you to remove, or, as they say, mask unnecessary areas of the image (Fig. 19, 20) without destroying the content of the layer.
Rice. 20. Visibility of the image after creating an oval layer mask
Creating a layer mask is carried out in several stages. First, a contour is formed above the image layer, which is supposed to be used as a mask in the future. Then you need to select the image and the outline. It is often more convenient to do this in the palette Layers, successively clicking on the round buttons corresponding to the objects while holding down the key Shift- while the appearance of the circle button for each selected element will change. After that you need to press the button Make/Release Clipping Mask on the palette Layers or use the command Object=>ClippingMask=>Make. As a result, everything that falls inside the contour will remain visible, and the area outside the contour will be hidden. If mask clipping was unsuccessful, you can cancel it at any time by calling the command Object=>ClippingMask=>Release or by clicking on the button Make/Release Clipping Mask on the palette Layers.
Please note that the button Make/Release Clipping Mask on the palette Layers is usually unavailable and becomes active only if the palette contains Layers activated area Group(Fig. 21). In addition, keep in mind that any objects that are subsequently added to the layer group with the layer mask are also clipped to the mask (Fig. 22) and become invisible. At the same time, objects embedded in the layer above the group will be visible (Figure 23).
Rice. 22. The result of cropping the added stars on the layer mask - some of the stars became invisible
Rice. Fig. 23. Appearance of the image with the Layers palette open - the asterisk added above the group with the layer mask is visible
texture text
Very often, layer masks are used when creating texture text, that is, text cut out of some kind of texture or simply from a photograph. For example, let's use a photo (Fig. 24) and print arbitrary text over it (Fig. 25). Select the text along with the outline of the photo and apply the command Object=>ClippingMask=>Make. As a result, the image will resemble Fig. 26, and the palette Layers takes the form corresponding to Fig. 27. If desired, the resulting image can be subjected to further editing, for example, make a stroke (Fig. 28), apply a suitable filter (Fig. 29), etc.
Filling with a texture of arbitrary vector paths
Open a suitable texture (Fig. 30), which you plan to use to fill some contour (Fig. 31) - in this example, a fragment of the lizard contour created by us in one of the previous lessons is used - and copy the contour to the texture via the clipboard (Fig. 32), if necessary, editing its size and position. To hide the space outside the path, which is visually equivalent to filling the path with a texture, select the path along with the texture and use the command Object=>ClippingMask=>Make. As a result, the image will resemble Fig. 33, and the palette Layers takes the form corresponding to Fig. 34.
To complete the image, make a copy of the outline through the clipboard, right-click on the copy and select the command to mirror it. Transform=>Reflection with parameters as in Fig. 35. Place the copy properly (fig. 36) and give the lizard a slightly curved shape using the filter Twist(bend) - command Effect=>Distort & Transform=>Twist(Effect => Distort and Transform => Bend) with approximately the same parameters as in fig. 37. The result obtained may resemble fig. 38.
Rice. Fig. 36. Appearance of the image obtained on the basis of two combined contours, previously filled with a texture
Simulate the effect of the intersection of objects
And now let's look at a more complex version of creating a clipping mask - we need it to simulate the effect of crossing objects. First, form three circles (in this example, their role will be played by Latin letters " o”) in such a way that each next circle partially overlaps the previous one (Fig. 39). Select all three circles and copy them to the clipboard with the command Edit=>Copy(Editing=>Copy). Then paste a copy from the clipboard with the command Edit=>Paste in Front(Editing => Paste in front) so that the original image and its copy are superimposed on each other. After that, use the Restangle tool to form a rectangle without filling and without borders at the intersection of the first and second circles (Fig. 40). Note that the rectangle must end up on the same layer Layer 1, but above all other objects (Fig. 41).
Rice. 40. The appearance of a rectangle at the intersection of the first two circles
To create a layer mask, select the formed rectangle and the first circle and apply the command Object=>ClippingMask=>Make(Fig. 42). Then, in the same way, create a rectangle at the intersection of the second and third circles and select this rectangle along with the second circle (Fig. 43). If the usual way to do this fails, then select the desired objects through the palette Layers: for this while pressing the key Shift click on the circle buttons available for each element of the layer (Fig. 44), and in this case the appearance of the circle button for each selected element will change. Create a clipping mask with the command Object=>ClippingMask=>Make- the resulting image will resemble rice. 45.
Rice. 44. Layers palette window with second circle and second rectangle selected
In the end, to make the image more spectacular, select on the palette Layers three lower circles and put a shadow on them with the command Effect=>Styleize=>Drop Shadow(Effect => Styling => Shadow) and then draw the background under the circles with a gradient, for which you will need to create a new layer Layer 2. To do this, activate the layer Layer 1, open the palette menu Layers and select command New layer(New layer) - as a result above the layer Layer 1 a layer will appear Layer 2. Draw a rectangle on it (this will cause the circles to be under the rectangle and be invisible), which will act as a background, fill it with a suitable gradient and apply a shadow with the command Effect=>Styleize=>Drop Shadow(Effect=>Stylization=>Shadow). To make the circles sit on top of the background rectangle, change the layers L ayer 1 and Layer 2 places by dragging one on top of the other in the palette Layers(Fig. 46). It is possible that the image will take approximately the form shown in Fig. 47.
Rice. 47. Final appearance of intersecting circles on a gradient background
Adjusting Opacity by Creating an Opacity Mask
Translucency mask ( Opacity mask) determines which areas of the image should be clearly visible, and which - only partially, that is, translucent or not visible at all. In this case, any colors can be visible through the specified semi-transparent mask, as well as decorative and gradient fills located below and inside the mask.
The process of forming a mask is quite simple and consists in layering two or more objects one on top of the other, and setting the required level of transparency for each of them and defining the topmost one as a mask using the command Make Opacity Mask(Create Semi-Transparent Mask) from the palette menu Transparency. The creation of an opacity mask will be indicated by the appearance in the palette Transparency mask icons next to the masked objects icon, separated by the “chain” icon, and changing the visibility of image fragments (Fig. 48, 49, 50). Palette appearance Layers will change depending on what is active at the moment - the image (Fig. 51) or the mask (Fig. 52).
Rice. 50. Transparency Palette - image icon on the left, mask icon on the right
Rice. 51. Image and palettes Layers and Transparency - active image
Rice. 52. Image and palettes Layers and Transparency - active mask
The opacity mask is created according to the shape of the topmost selected object, and at least two top objects must be selected - selecting only one of them will create an empty mask. Adding new objects to the image does not affect the translucency mask created before; all added objects will be visible by default, as they are created on top of the mask (Fig. 53), although they can be moved under the mask if desired.
Rice. 53. The result of adding a new object in the form of a frame on top of the masked image
As a result, the upper object will become a mask, and its grayscale fill will affect the extent to which one or another area of the image below it will be visible. For example, filling the mask completely with white will result in the image fragments within the mask being completely visible, with a black mask the masked objects will be invisible, and using a gradient black and white mask will cause the masked objects to appear where the white begins. area, and fade out where the gradient turns black. In addition, you can create a translucency mask using any gradient fills, gradient meshes, and even decorative fills.
It's worth noting that the above rule regarding mask color and object visibility is ambiguous. Yes, checkbox invert mask(Invert mask) in palette Transparency will cause the black and white effect to be inverted and black areas become transparent, while white areas, on the contrary, become opaque (Fig. 54); enable/disable the same checkbox clip(Crop) lets you swap masked and unmasked areas.
Rice. 54. Change the appearance of the image as a result of inverting the mask
A translucency mask can be formed from any vector object and transformed using various distorting filters, which allows you to achieve very interesting effects. Text can also be saved as an opaque mask to quickly create custom text titles (while still allowing text to be edited). The shape of the opacity mask can be adjusted - just click on the mask icon in the palette Transparency when the key is pressed Alt. As a result, the object, on the basis of which the mask was created, will be selected and become available for editing. When finished editing, click on the image icon.
To completely remove the opacity mask, select it and use the command Release Opacity Mask(Remove the transparency mask), and to temporarily hide it, use the command Disable Opacity Mask(Remove the transparency mask). Both commands are selected from the palette menu Transparency.
Photo Effects
First, open some photo (Fig. 55) and form a rectangle over it, fill it with a linear gradient and process it with a filter ZigZag (Effect=>Distort & Transform=>ZigZag- Effect => Distortion and transformation => Zigzag) (Fig. 56).
Rice. 56. Appearance of the object? on the basis of which the semi-transparent mask will be created
Create a mask with the command Make Opacity Mask Transparency. As a result, the image will resemble Fig. 57, and in the palette Transparency the icon of the created mask will appear (Fig. 58). And now try to edit the mask: select it by clicking on the icon in the Transparency palette while holding down the key Alt, use the effect Inner glow (Effect=>Styleize=>Inner Glow- (Effect => Styling => Inner Light) and add a suitable shadow ( Effect=>Styleize=>Drop Shadow- Effect => Stylization => Shadow). It is possible that the image will resemble Fig. 59.
Rice. 57. Appearance of the photo after applying a translucent mask
texture text
As mentioned above, texture text is quite often created using a layer mask, but no less wide opportunities for cutting text from a texture or any photo open up when using translucent masks.
Take, for example, fig. 60 and print black text on top of it (as with any textured text, the letters must be large and wide enough) (Fig. 61). Select the text and photo and use the command Make Opacity Mask(Create Semi-Transparent Mask) from the palette menu Transparency with the checkbox enabled clip(Crop). It is possible that the result will resemble Fig. 62, and in the palette Transparency the created mask icon will appear (Fig. 63). Please note that in case of an unsuccessful initial text location, it is easy to move it after creating the mask, having previously selected it with tools Selection(Highlight) or Direct Selection(Partial selection).
Rice. Fig. 62. Appearance of texture text cut out of a photo using a semi-transparent mask
In conclusion, try to give the text a three-dimensional effect. To do this, select the text and copy it to the clipboard with the command Edit=>Copy(Editing=>Copy). Then paste a copy from the clipboard with the command Edit=>Paste in Front(Editing => Paste in front) so that the original image and its copy are superimposed on each other. Then slightly move the bottom copy of the text to the right and down and on the palette Transparency reduce its opacity from 100% to around 50-40%. The resulting texture text will be similar to the one shown in Fig. 64.
An equally interesting result can be obtained with a gradient text fill (Fig. 65). At the same time, to form a spectacular shadow at the very end, before creating the mask, copy the created text to the clipboard, and then create the mask in the usual way - in this case, after creating the mask, the palette Transparency will have the same form as shown in Fig. 66, and the text will resemble Fig. 67.
Rice. 67. The appearance of texture text based on a gradient semi-transparent mask
Next, paste a copy of the text from the clipboard with the command Edit=>Paste in Back(Editing => Paste in Back) so that the copy is below the original text. Finally, move the bottom copy of the text 2-3 pixels to the right and down (Figure 68).
Translucent colored text
Open the photo on the basis of which the translucent text will be created (Fig. 69). Print text over the uploaded photo in any bright color, for example, orange (Fig. 70) - the layers palette will look like in fig. 71 (notice that the text layer is on top of the background layer). Swap layers by simple drag and drop, then select both layers in the palette Layers and create a mask with the command Make Opacity Mask(Create a semi-transparent mask) (Fig. 72). The text obtained in this way will retain its original color (that is, orange), but the background will show through it very effectively (Fig. 73). When finished, apply a shadow to the text with the command Effect=>Styleize=>Drop Shadow(Effect=>Stylization=>Shadow) with suitable parameters (Fig. 74).
Translucent button
Create a circle and fill it with a radial black and white gradient (Fig. 75). Then make two copies of the circle and place each copy with the command Edit=>Paste(Editing => Paste) on a separate layer, then in the palette Layers three layers will appear: Layer 1, Layer 2 and Layer 3 with the same circle on each. Temporarily lock and make layers invisible Layer 2 and layer 3. Go to Layer 1, activate the palette Gradient and change the gradient fill settings to something like the one shown in fig. 76. As a result, the circle on the first layer will take the form in accordance with fig. 77, and the appearance of the palette Layers will look like rice. 78.
Unlock Layer Layer 2, select with the tool Selection both bottom layers and create a mask with the command Make Opacity Mask(Create Semi-Transparent Mask) from the palette menu Transparency with checkboxes enabled clip(Trim) and invert mask(Invert mask). To check the mask, temporarily turn on the mode Transparency Grid(Transparency Grid) command View=>Show Transparency Grid(View=>Show transparency grid), and you will see that the circle is translucent in its central part (Fig. 79, 80).
Rice. Fig. 80. The appearance of the circle after creating the mask with the Transparency Grid mode turned on
Unlock Layer Layer 3, select the circle, fill it with white and use the select direction(Partial selection) change the outline of the circle so that it looks like the figure shown in fig. 81. Form a rectangle over the modified white circle so that it completely covers the future mask. Then fill it with a linear black and white gradient (Fig. 82). Select both objects with the tool Selection(Select), create a mask with the command Make Opacity Mask(Create a semi-transparent mask) and adjust the transparency parameters in accordance with fig. 83. The resulting button will resemble the one shown in fig. 84.
The final touch could be adding a black shadow to the right and bottom of the button. To create it on top of the layer Layer 3 create a new layer Layer 4, copy the circle from the layer Layer 1 to the clipboard and paste it on the layer Layer 4 team Edit=>Paste(Editing=>Insert). Then delete the circle's fill, make a 4 px thick black border around it, Gaussian blur with 5 px blur options (command Effect>=Blur>=Gaussian Blur- Effect>=Blur>=Gaussian Blur) and move it with a slight shift to the right and down in relation to the created button (Fig. 85).
Rice. 82. Forming a rectangle over the contour of a white modified circle


 What is transcoding")


")


")


 How to find out the number of processors")


