To get access, click on the "Get Demo Account" button, access will be sent to the mail.
Why is he better than the rest?
Dual Panel GUI
The interface of the file manager is made in the form familiar to the user: two areas for convenient operation with files.
In each of them you can open files on the server, remote FTP or on your computer.
When displaying files in a table, you can easily sort files and directories by type, size, creation date, etc. by clicking on the heading of any of the columns.
Drag&Drop function
You can work with files and folders using the mouse, dragging files and folders to the server or remote FTP and back, to do this, select necessary files and folders, grab them and drag them to the right place.

Working with remote FTP
Click on the " Remote FTP" in order to connect to a remote server from the file manager. You can save connections and edit them if necessary in the future.

You can open external FTP in both the left and right panels, and even do it at the same time to work through the file manager with two completely third-party FTPs. In order to open the FTP of your hosting account, just click the " Home FTP".
Tab interface
The tabbed interface will allow you to open many files at once and manipulate them in the file manager area, just as you do in the operating system.
This interface will make it convenient for you to work with several files at once, make it easy to copy code from one file to another, etc.
You can collapse or expand open files. You can also resize open window as you wish. The files you open are displayed at the bottom of the file manager on the tab bar.

You can manipulate the windows as you like, resizing them and placing them on the screen in the desired order.

Basic functions for working with files
The file manager will allow you to perform all the basic functions for working with files and directories, such as: copying, moving, renaming, changing attributes, etc. Moreover, you can perform all these actions in a large number of ways.
1. Copy
In order to copy a group of files, you can select them with the mouse while holding down the button ctrl. Then just drag and drop them to the desired location. As soon as you release the mouse button over the selected location, the file manager will display a dialog box asking you whether you want to copy the files or not, if files with such names exist, you will be prompted to overwrite the files.

You can also copy files or folders by selecting them by right-clicking to bring up the context menu. Then you need to click the "Copy" button.

A few more ways to copy is to use the button in the menu " File" or the button at the bottom of the File Manager.
There is also a keyboard shortcut for quick access to the copy function - ctrl + 5.
2. Move
To move, you can use all the same methods as for copying, with the exception of " drag and drop". Hotkey combination for moving Shift+5.
3. Rename
To rename a file or directory, you can also use the context menu, menu item in the drop-down menu " File" or a combination of hot keys - ctrl + 6.
Unlike copy and move given function is not a group and can only be applied to one element.
After pressing the button " Rename" You will see a dialog box to enter the name of the element. Enter a new name and click " OK".

4. Change attributes
To change the attributes of a file or directory, you can use the context menu or the menu item in the drop-down menu " File".
You can set file permissions either in numerical format or by setting the permissions using the corresponding checkboxes for the user, the group he belongs to, and for everyone.
In short, the rights can be set separately for user- directly the owner of the file, for the group ( group), for all ( All).
You can get a digital designation of rights by addition, where:
1
- execution rights;
2
- rights to write;
4
- read rights.
For example, we want to set read and write permissions: 6 = 4(read) + 2(write).
There are 8 options in total:
7
= read, write & execute (read, write, execute);
6
= read & write (read and write);
5
= read & execute (read and execute);
4
= read (reading);
3
= write & execute (write and execute);
2
= write(write);
1
= execute(execution);
0
= no rights.
On our servers, files are executed as a user, so the last two digits in the rights must be equal to 0.
For example, if you need to set permissions for everything for a file, you need to set the value: 700.
5. Removal
You can delete files using the context menu, the button in the drop-down menu " File", using a combination of hot keys - ctrl+8 or button "del".
Before deleting files File manager will display a dialog asking if you really want to delete the selected files.
Working with archives
File manager allows you to work with archives. You can create or unpack archive, as well as immediately download the necessary files/directories as an archive.
1. Creating an archive
In order to create an archive from the selected files or folders, select the required files and/or folders and click the " Create archive" on the Quick Access Toolbar. In the dialog box that appears, you can change the archive name and archive type.

2. Unpacking the archive
To unzip the archive, click the " Unzip archive" on the Quick Access Toolbar. modal window select the path where you want to unzip the archive and click " Unzip archive".

3. Download archive
You can download files and folders in an archive with one click by clicking on the " Download archive" on the Quick Access Toolbar. You can also use the drop-down menu: tab " File", Further " Download" and select the type of archive in which you want to download the selected files/folders.
Multiple download
The most convenient way to work and upload files from your computer to the server is to open your local file system in one of the areas, this is described above. However, if for some reason you are unable to use Java, then you can download the files by clicking on the icon " download files".
You will see a window for uploading files to the server. Select files from your computer and click the "Upload" button. The maximum size of a single file should not exceed 1.5 GB. The file manager will start sequentially uploading the selected files, the process of uploading each of the files to the server will be displayed in the browser as a percentage.

Text editor
File manager contains a convenient text editor to work with the code of your sites.
By pressing the button " Settings"in the right upper corner editor, you can customize appearance text editor to your liking, change the font size and other settings.

The text editor has a syntax highlighting function and can recognize which file you have opened, be it php script, bash script or another programming language. You can also choose your own code highlighting using the drop-down menu in the text editor.

A text editor will allow you to change the file encoding and resave the file in a different encoding.

Viewing graphic files
To view graphic files, the file manager contains a built-in image viewer. You can flip an image, resize it, and move on to the next image.

Search by files and folders
If you need to find a file or folder, you can use the search in file manager. Advanced mode allows you to search only files or only folders, as well as search by file or folder size.

Access control
Using the file manager, you can set a password for a folder and block access to the folder from specified IP addresses. In order to set a password for a folder, select it, in the top drop-down menu, select the tab " Instruments" and then click " Set a password for the current directory". In the dialog box that appears, enter the password for the directory and click the " Set password".

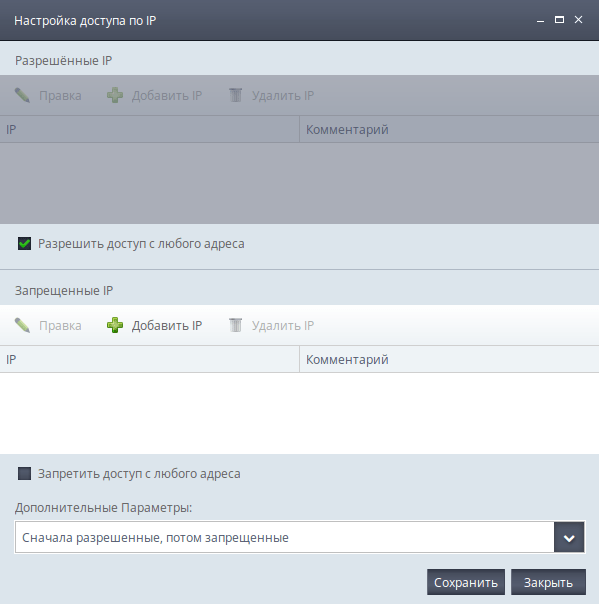
Similarly, you can block access to a folder from individual IPs. From the dropdown menu, select the " Instruments", and then " Set blocking by IP address". In the dialog box that appears, enter a list of IPs in the format: xxx.xxx.xxx.xxx from which you want to open access and from which you want to deny.
Functions for working with Home FTP
The file manager has a number of features that are only available for Home FTP.
1. List of sites
You can easily switch between the sites of your hosting account using the button on the quick access toolbar or select a site from the drop-down menu on the " Transition". By double-clicking the left mouse button on the selected site, you will be redirected to the root directory of the site.
2. Folder size
On Home FTP you can easily get the size of your directories by clicking on the " Size Analysis" on the Quick Access Toolbar.

Also, you can always see the total amount of used disk space on the server at the bottom of the file manager.
Working with backups
Also, right in the file manager, you can view the list of available backups created automatically for your account by our backup system (by date). By clicking on the appropriate backup, You can view its contents and, if necessary, copy the necessary files from it.

Hotkeys
Like most desktop FTP clients our File manager contains a number of hot keys, which speeds up the work with the most common actions.
Below is a list of hotkeys:
ctrl + 3- View;
ctrl + 4- Edit;
ctrl + 5- Copy;
Shift+5- Moving;
ctrl + 6- Renaming;
ctrl+7- Create a new folder;
ctrl+8 or Del- Removal.
If you have any questions about work file manager, You can always contact our service .
Many people know that I have been working with BEGET.RU hosting for a long time and I recommend it to everyone. Today I saw that my favorite hosting is holding a giveaway, the main condition of which was to recommend a hosting service by writing a blog article. Therefore, I decided to talk about the file manager developed by Beget.
First, a little background. Beget LLC is a Russian hosting company. The servers are with us. Previously, it was only St. Petersburg, now, as far as I know, the geography has expanded. MODX on hosting works great, and the prices will please many. Moreover, the first month of using any tariff is absolutely free.
Those who are already interested in my recommendation can follow the referral link and register: https://beget.ru/?id=12867 (yes, yes, the referral system works - up to 40% of each payment of referrals is transferred to the inviter during the entire period of cooperation).
In the meantime, I'll talk about the file manager.
Initially, the file manager was available only to hosting clients, but now it is a separate service and anyone can install it on their server.
The file manager is quite nice. It has two panels, and Drug&Drop also works - you can drag and drop files from one panel to another

Those who are familiar with MC or FAR, or Total Commander understand at a glance. File management is intuitive. Works context menu by right mouse click.
The manager allows you to unpack and pack archives, so installing, for example, MODX is quite convenient - you uploaded the archive and unpacked it.

In addition, you can change the permissions on files and even edit them. By the way, guess which editor SPRUT.io provides?

It's our favorite ACE with autocompletion and custom code highlighting! =))
These are not all the advantages of the SPRUT.io file manager. There is also image viewing, the ability to connect an external FTP server, search through folders and files, multiple file uploads, etc.
All chips are listed on the official website, there is also an installation instruction on your server.
SPRUT.io is an Open Source project, source code
Today we will talk about hosting and why Beget this is the best choice.
Creating a website is a rather complicated and painstaking process. It doesn't matter what your site is for, be it an online store, a blog site, a social portal, in any case, you need high-quality and reliable hosting. One of the most popular hosting companies over the past few years has become Beget.
In fact, the question of choosing a hosting once confronts every webmaster, and since the competition here is simply the wildest, the choice is not so simple. I was always surprised by how similar all hosting providers are to each other (well, no individuality). And just then I came across Beget. If we run a little ahead, then it is bright, not like everyone else, super convenient, very functional, relatively cheap, and most importantly, modern and rapidly gaining popularity hosting. So, first things first:
Website hosting
Hosting is a way of placing a website on the Internet. Once you have hosted your site - anyone can access it by typing Domain name in the browser line.
Servers – powerful computers, which work absolutely around the clock, which allows your site to remain working and visible on the Internet.
Naturally, site owners have to pay rent for such a service. Hosting companies are organizations that provide hosting to users. Their users are people who need to post their own content.
Hosting
Beget is considered the best paid hosting company. The main advantage of Beget is affordable prices and user-friendly interface site management.
You can choose a package for any type of Internet resource. If you cannot decide which package you need, just contact the administration, where you will be answered all your questions.
Also, hosting is becoming easier and more convenient every day, that is, problems with managing a site on hosting from given operator there won't be any at all. Beget is a great option for anyone who would like to start their own internet business.
Registration on Beget
Enter your melons:
- phone number
Click the button to register an account and that's it. Next, you need to pay for the newly created account.
If you need a site that will not have a highly branched structure, then you can choose the cheapest hosting package. If you want to place much more information on your portal than the standard package allows you, then order VIP hosting. You will receive priority support and 35 GB for your files. This is a very convenient service for those who want to create an online market. Naturally, ordering VIP hosting costs much more.
It is also important that thanks to Beget you can rent a full server from all over the world. technical support and 24/7 monitoring. The hosting operator also provides incredibly cheap domains for .РФ and .RU zones.
Beget hosting payment
There are no problems with payment either (although no one has any problems with this now). We choose any method convenient for us and pay.
What I really like here is the custom amount thing. If you have any problems with money, then you can always replenish the balance, which is enough for a couple more days, for example, from a mobile phone.
It is possible to use Promised payment
Beget hosting control panel
In general, in general, you can understand any interface. But after I came here using cPanel, ISP Manager and other PUs, I was pleasantly impressed that Beget did not follow the hackneyed path but created their own control panel. And they quite succeeded. The panel is easy to understand, has a nice design, convenient layout of elements. I will not consider each element separately. everything is like everyone else: databases, ftp access, domain parking, etc.
Free month of testing on Beget
Would you like to see how your site will work on a real host, but don't want to pay to try? Then the service "free hosting" is what you need. All you need to do is register and you can start working.
This is very profitable service for test internet portals. Many webmasters use this option to launch their projects. Of course, such hosting is not serviced in the same way as a paid counterpart.
Hosting support
Judging by the reviews on the Internet, their support is very qualified and it is not limited to standard excuses like "reboot", but really helps to look for some problems. But my review will be the best. For a year of work with this hosting, I NEVER I didn't need their help, and this is in my opinion the best indicator of the excellent work of Beget.
If you have any questions about the operation of domains and servers, you can easily contact consultants or administration in any way convenient for you. All Contact Information available on the official Beget website.
If you only want to open your own Internet portal, then you can discuss all questions directly by phone or through Email, ICQ, Skype. On the company's website, you can not only contact consultants, but also immediately order hosting. Everything is very fast and simple.
Benefits
Beget differs from all its competitors in that it tries to keep up with the times for a second and modernizes and becomes more convenient every day.
One of the main advantages of this hosting company is handy file manager, which will allow you to easily place files on the site and edit them. Also, this manager has an incredibly convenient code editor. Sites hosted by Beget are equipped with very fast and high-quality automatic backups.
File manager on this hosting - this is the stumbling block because of which I fell in love with beget. It is so convenient that I completely forgot about using FileZilla and other similar programs. It also has its own individual intuitive design. Convenient download of files directly from the manager, editing any type of files.
Speed of copying files to local or remote server s - 1 Gb / s, which is incredibly convenient. It is necessary to say about the control panel, which is made as ergonomically as possible so that there are no difficulties in organizing the site.
The control panel is equipped with a service calculator that will allow you to keep track of your spending. You can learn more about all other services provided by the hosting operator in the sections "Services" and "About the site".
Promotions and great offers
Beget always cares about its customers, so visiting the main resource of this hosting provider, you can always count on a variety of discounts, gift packages, additional domains etc.
Anyone who has dealt with Beget at least once will never look for a new hosting operator again. The company guarantees:
- reliable performance;
- quality service;
- profitable offer;
- nice prices.
Feel free to contact Beget consultants and ask about promotions, they will be happy to answer all your questions.
Brief conclusion
In conclusion, I want to highlight all the advantages of this hosting:
- Very simple and reliable hosting.
- handy file manager
- a large number of payment methods
- modern interface
- free ssl certificate for domains
- good site backup
- Favorable prices, coupled with discounts and promotions that allow you to save.
- Friendly administration who will answer any of your questions.
- Round-the-clock maintenance of your sites and accounts for their stable performance.
- Powerful servers that guarantee the constant availability of the resource.
- Simple design and control method.
- The ability to launch a test project thanks to the free hosting service.
- Constant system of discounts and advantageous offers.
I have not yet come across a more convenient hosting for work, and that is why I recommend it to everyone. And I also hope that the beget team will not get tired and will continue to delight its users with excellent work. I really don't want to look for a new one. In general, try, test and return to our site to leave your comment about his work.
You will never be left out of the latest latest Beget news. Any update, any promotion or new service will be immediately posted on the official website of the company in the "News" section. So, working with Beget is:
If you have a desire or need for your own website, then, without a doubt, you should contact the Beget masters who will help you choose a hosting profile and choose the best domain productivity for favorable price. You will be satisfied, and all your content is securely stored from damage and viruses.
Encoding definition
Task:Problems:
Decision:
# To determine the encoding, use the uchardet port from Mozilla - python chardet # https://github.com/chardet/chardet # # Use the dev version, everything is the latest there. # This code is constantly being improved thanks to feedback with users # the more - the more precisely the encoding is determined, but slower. 50000 - chosen empirically self.charset_detect_buffer = 50000 # Take part of the file part_content = content + content[-self.charset_detect_buffer:] chardet_result = chardet.detect(part_content) detected = chardet_result["encoding"] confidence = chardet_result["confidence"] # a crutch for those who use crooked editors in windows # because of this, in utf-8 files we have cp-1251, which is why the library behaves unpredictably when it is detected re_utf8 = re.compile(".*charset\s*=\ s*utf\-8.*", re.UNICODE | re.IGNORECASE | re.MULTILINE) html_ext = ["htm", "html", "phtml", "php", "inc", "tpl", " xml"] # All probabilities are chosen empirically, based on a set of files for testing if confidence > 0.75 and detected != "windows-1251" and detected != FM.DEFAULT_ENCODING: if detected == "ISO-8859-7": detected = "windows-1251" if detected == "ISO-8859-2": detected = "utf-8" if detected == "ascii": detected = "utf-8" if detected == "MacCyrillic": detected = "windows-1251" # if it fails if detected != FM.DEFAULT_ENCODING and file_ext in html_ext: result_of_search = re_utf8.search(part_content) self.logger.debug(result_of_search) if result_of_search is not None: self.logger.debug("matched utf-8 charset") detected = FM.DEFAULT_ENCODING else: self.logger.debug("not matched utf-8 charset") elif confidence >
*.com" "$* = 42;", etc.
Problems:
Decision:
Worker implementation example
Problems:
Decision:
- Add SSH/SFTP support
- Add WebDav Support
- Add terminal
.
Hello friends! I sat down to write about how to find the site file easily and simply, but I can’t resist - I’ll brag, although I have already received congratulations from many: on January 23, 2016, the blog is registered in the section “ Search Engine Optimization» Directory of trust sites. And now I have a button in the footer that you can click on and even leave a comment.
Now to business. Everyone who runs blogs or websites has to make some changes to the code, for example, to edit the design. I now have a different task: to get rid of errors in the validity of HTML. a web resource affects its authority no less than useful optimized content and other components. At first, the validator gave only 5 errors, and I turned to a specialist on the sbup.com forum with the nickname Old, who gives free consultations and also works on a commercial basis. They discovered a global error, due to which the rest are not detected. After eliminating the global one, I got out errors and warnings for about forty.
It was not difficult to fix some, for example, to insert the missing spaces in the links. And in order to eliminate others, it was necessary to find a place that needs to be edited. Beget clients can do without programs such as Notepad++ when searching for files. You can search by text or file name directly in the file manager. If possible, the search area needs to be narrowed down, but if we don’t even guess where the object we are looking for can be, we are looking in public_html (the root of the site).
In practice, it looks like this: I need to delete a certain fragment, select the search by text and insert an expression into the line. It remains to run the search and get the result.
Fortunately for me, the result was one file, but there can be many. The search box, which is collapsed by default, shows the path to the file. To see it in its entirety, the window must be maximized.

So, the file was found in the hosting file manager. The next step is to open it and find the required piece of code to fix.

But don't rush! It's time to download the file to your computer, so that if something happens, replace the one that was tortured. With this approach, you do not need to back up the entire site - an essential detail if the folders with the backup are laid out on the account, and there is not a lot of extra space.

That's all. I told you how to find the site file on Beget hosting, but I think other modern hostings have a search function.
Which we developed for our users and which is used in our control panel. We invite everyone to join its development. About how it was developed and why we were not satisfied with the existing analogues, what crutches of technology we used and to whom it can be useful, we will tell in this article.
Why reinvent your own file manager
In 2010, we used NetFTP, which did a decent job of opening/uploading/fixing multiple files.However, users sometimes wanted to learn how to transfer sites between hostings or between our accounts, but the site was large, and the users' Internet was not the best. In the end, either we did it ourselves (which was obviously faster), or we explained what SSH, MC, SCP and other scary things are.
Then we got the idea to make a WEB two-pane file manager that works on the server side and can copy between different sources at the speed of the server, and also, which will include: search in files and directories, analysis occupied place(similar to ncdu), simple file upload, and a lot of interesting things. In general, everything that would make life easier for our users and us.
In May 2013 we put it into production on our hosting. In some moments it turned out even better than we originally wanted - for downloading files and accessing the local file system wrote a Java applet that allows you to select files and copy everything at once to the hosting or vice versa from the hosting (where to copy is not so important, it could work with both remote FTP and the user's home directory, but, unfortunately, soon browsers will not support it).
Encoding definition
Task:Open the file for editing with the definition of the encoding, write it with the original encoding.
Problems:
If the user's encoding was incorrectly recognized, then when making changes to the file with subsequent recording, we can get a UnicodeDecodeError and the changes will not be written.
All the "crutches" that were eventually introduced are the result of work on tickets with files received from users, we also use all the "problem" files for testing after making changes to the code.
Decision:
Searching the internet for this decision, found the chardet library. This library, in turn, is a port of the library from Mozilla. It is, for example, used in the well-known editor https://notepad-plus-plus.org
Testing it on real examples, we realized that in reality it could be wrong. Instead of CP-1251, for example, "MacCyrillic" or "ISO-8859-7" can be issued, and instead of UTF-8, it can be "ISO-8859-2" or special case"ascii".
In addition, some files on the hosting were utf-8, but contained strange characters, either from editors who do not know how to work correctly with UTF, or from somewhere else, especially for such cases, we also had to add “crutches”.
An example of encoding recognition and reading files, with comments
# To determine the encoding, use the uchardet port from Mozilla - python chardet # https://github.com/chardet/chardet # # Use the dev version, everything is the latest there. # This code is constantly being improved thanks to user feedback # the more - the more accurate the encoding is determined, but slower. 50000 - chosen empirically self.charset_detect_buffer = 50000 # Take part of the file part_content = content + content[-self.charset_detect_buffer:] chardet_result = chardet.detect(part_content) detected = chardet_result["encoding"] confidence = chardet_result["confidence"] # a crutch for those who use crooked editors in windows # because of this, in utf-8 files we have cp-1251, which is why the library behaves unpredictably when it is detected re_utf8 = re.compile(".*charset\s*=\ s*utf\-8.*", re.UNICODE | re.IGNORECASE | re.MULTILINE) html_ext = ["htm", "html", "phtml", "php", "inc", "tpl", " xml"] # All probabilities are chosen empirically, based on a set of files for testing if confidence > 0.75 and detected != "windows-1251" and detected != FM.DEFAULT_ENCODING: if detected == "ISO-8859-7": detected = "windows-1251" if detected == "ISO-8859-2": detected = "utf-8" if detected == "ascii": detected = "utf-8" if detected == "MacCyrillic": detected = "windows-1251" # if it fails if detected != FM.DEFAULT_ENCODING and file_ext in html_ext: result_of_search = re_utf8.search(part_content) self.logger.debug(result_of_search) if result_of_search is not None: self.logger.debug("matched utf-8 charset") detected = FM.DEFAULT_ENCODING else: self.logger.debug("not matched utf-8 charset") elif confidence > 0.60 and detected != "windows-1251" and detected != FM.DEFAULT_ENCODING: # There is a separate logic here # The code is removed for brevity from the example elif detected == "windows-1251" or detected == FM.DEFAULT_ENCODING: pass # If it was determined not very correctly, then most likely this is an error and we take UTF-8)) else: detected = FM.DEFAULT_ENCODING encoding = detected if (detected or "").lower() in FM.encodings else FM.DEFAULT_ENCODING answer = ( "item": self._make_file_info(abs_path), "content": content, " encoding": encoding )
Parallel search for text in files, taking into account the file encoding
Task:Organize text search in files with the possibility of using "shell-style wildcards" in the name, that is, for example, "*.com" "$* = 42;" etc.
Problems:
The user enters the word "Contacts" - the search shows that there are no files with this text, but in reality they are, but on the hosting we have many encodings even within the same project. Therefore, the search should also take this into account.
Several times we encountered the fact that users could mistakenly enter any strings and perform multiple searches on in large numbers folders, in the future this led to an increase in the load on the servers.
Decision:
Multitasking was organized quite standardly, using the multiprocessing module and two queues (a list of all files, a list of found files with the desired entries). One worker builds a list of files, and the rest, working in parallel, parse it and search directly.
The search string can be represented as a regular expression using the fnmatch package. Link to the final implementation of the search.
To solve the problem with encodings, an example code with comments is provided, it uses the already familiar chardet package.
Worker implementation example
# An example worker is given self.re_text = re.compile(".*" + fnmatch.translate(self.text)[:-7] + ".*", re.UNICODE | re.IGNORECASE) # remove \Z(? ms) from end of result expression def worker(re_text, file_queue, result_queue, logger, timeout): while int(time.time())
In the final implementation, the ability to set the execution time in seconds (timeout) has been added - 1 hour is selected by default. In the worker processes themselves, the execution priority has been lowered to reduce the load on the disk and on the processor.
Unpacking and creating file archives
Task:Give users the ability to create archives (zip, tar.gz, bz2, tar are available) and unpack them (gz, tar.gz, tar, rar, zip, 7z)
Problems:
We encountered many problems with "real" archives, including cp866 encoded filenames (DOS) and backslashes in filenames (windows). Some libraries (standard ZipFile python3, python-libarchive) did not work with Russian names inside the archive. Some library implementations, in particular SevenZip, RarFile, cannot unpack empty folders and files (they are constantly found in archives with CMS). Also, users always want to see the process of the operation, but how can this be done if the library does not allow (for example, the extractall() call is simply made)?
Decision:
The ZipFile libraries, as well as libarchive-python, had to be fixed and included as separate packages to the project. For libarchive-python, I had to fork the library and adapt it for python 3.
Creating files and folders with zero size (a bug was noticed in the SevenZip and RarFile libraries) had to be done in a separate cycle at the very beginning according to the file headers in the archive. For all the bugs, the developers wrote off, as soon as we find the time, we will send a pull request to them, apparently, they are not going to fix it themselves.
Gzip processing done separately compressed files(for sql dumps, etc.), there were no crutches using the standard library.
The progress of the operation is monitored with a watcher on the IN_CREATE system call using the pyinotify library. Of course, it does not work very accurately (the watcher does not always work when there is a large nesting of files, so a magic factor of 1.5 is added), but it performs the task of displaying at least something similar for users. Not a bad decision considering there is no way to track this down without rewriting all libraries for the archives.
Help us make Sprut.IO better
There are a lot of obvious opportunities for further improvement of the file manager.As the most useful for users, we see:
- Add SSH/SFTP support
- Add WebDav Support
- Add terminal
- Add the ability to work with Git
- Add the ability to share files
- Add theme switching design and create different themes
- Make a universal interface for working with modules
If you have add-ons that users might find useful, please tell us about them in the comments or on the mailing list.
We will begin to implement them, but I am not afraid to say this: it will take years, if not decades, to do it on our own. Therefore, if you want to learn how to program, know Python and ExtJS and want to gain development experience in an open source project, we invite you to join the development of Sprut.IO. Moreover, we will pay remuneration for each implemented feature, since we do not have to implement it ourselves.
As an engine, it's time to choose hosting - the server on which your site will be located. In this article, we will look at its main features.
In fact, hosting is not just a server. Hosting- it is also a control panel that allows you to customize your site, manage files and databases, domains and subdomains, as well as restore your site from a backup in case of any unforeseen circumstances.
Let's talk about everything in order.
Backing up your sites
Automatic creation of backup copies of your sites (files and databases) is the key to their stable operation. You will not lose several months of work just because you were too lazy to go to the hosting control panel and create a "backup".
If in the future your site becomes crowded on a free plan, you can switch to any other. The prices don't bite.
30 days free hosting
 If a free plan It is clearly not enough for you, you can choose any suitable one from the paid ones. At the same time, whole 30 days from the moment of registration you will be able to fully use hostingBeGetabsolutely free.
There are almost no such test periods on other hostings.
In addition, if for some reason you do not want to use BeGet services after this period, you can simply refuse their services without paying a penny.
Conclusion
Why did we decide to tell you about, and not about any other? Or didn't even review?
It's simple - because we use this hosting ourselves. We like the user-friendly and colorful control panel, amazing file manager, automatic backup, automatic installation WordPress and responsive support.
In addition, in further articles on the Blogger School we will publish detailed instructions on certain aspects of working with hosting- exactly on the example of BeGet. And we would like it to be easy for you to master and implement the acquired skills.
On this, perhaps, everything. If you have any questions on the topic, I invite you to ask in the comments.
In the next article, I will tell how to install wordpress hosting. Subscribe to updates in the column on the right 😉
Hello! in this article I will tell how to use file manager on the Beget Hosting. I wrote about this hosting in .
After registration, you will need to log into your account by entering your username and password. Find yourself in the hosting main menu, in which we click on the "File Manager" tab:
The top menu of the file manager looks like this:

Below is a list of file folders with your sites. Clicking on a site folder will open a list of site files. It will display the name, type, size, owner, attribute, and the date the file or folder was modified:

By clicking on a folder or file with the right mouse button, a menu will appear with the ability to do this or that action:

For example, we need to change the attributes on the folder, so we select the “Change Attributes” item and set desired value:

The file manager is very handy tool for the webmaster, which saves time.
For example, to install a website for us on hosting through the Beget file manager, it is enough to click “Upload Files” in the file manager in the top menu, then select the archive with the site on your computer and click “Download”. The archive with the site will instantly be on the hosting, then right-click on it and select the "Unpack Archive" item. It also unpacks instantly in a matter of seconds. The site is installed, I think it's very cool. Through an FTP client, this procedure would take much longer.
If you have not registered on Beget hosting yet, then do it right now by clicking on the button below, I also remind you that this hosting has a trial period of 1 month.
Register for hosting
That's all! Good luck and good earnings!
To transfer a site running on CMS to another hosting or local server, it is not enough just to copy its files from one place to another, for the site to work, it is also necessary to transfer all the data from the database.
Before you begin migrating your site, be sure to create text file and write down all the data there - address, login and password to enter the hosting account, database name, username, database password, other necessary data
Regardless of which CMS you use, the migration process will consist of the following steps:
Actions on the local server (or old hosting)
1. Archive site files archived in the format .zip
2. Export data from the database or, in other words, create a database backup. Simplified - this is all the data of our database, which is written to a text file with the extension .sql
Actions on a remote server (local server on another computer or hosting)
1. Copy the archive with the site files to the remote server and deploy it preserving the folder structure
2. Check permissions to folders and files and, if necessary, change them.
3. Creating a new database. Remember (write down) the name of the database, username, password to the database
4. Importing a backup copy of the database into the created database. (from file with extension .sql)
5. In the config file site change the old database name, username and password to the database for new
6. In the site configuration section change the paths to the files and temporary folders of the site to new ones(if it's necessary)
Backing up the MODX site to a local server
We will create the archive with a RAR archiver, if it is not installed on your computer, download it from here and install it.
Creating an archive of site files
Open the folder with the files of our site Z:/home/okarina.loc/www, select all files and folders and click right click on any file. In the menu that opens, select the item Add to archive...
Creating an archive with site files
In the archiver window that opens, select Archive Format -zip and press the button OK

Archive type selection
The archive will begin to be created and upon completion we will see a file with the archive in the root folder of our site www.zip

Site archive
The archive can be moved to another folder so that it does not "dangle" on our local site. For example, make a Site Transfer folder somewhere on the disk and transfer it to it.
Create a database backup
In the browser, go to the site admin panel, Tools -> Backup , click the checkbox in front of the item Table name to select all tables in the database and press the button create and upload a backup copy of the selected tables

Backing up the site database
In the file open window that appears, check what is selected Save file and press OK

Saving the database to a file
To find the saved file, click on the icon in the browser panel, as shown in the picture below (for Firefox browser)

Open the folder with the saved copy of the database
Or in explorer open Downloads folder

Downloads folder with a copy of the database
The file you are looking for must have the extension .sql and its name should contain The current date
Move this file to a folder Site transfer

Site ready for transfer
This is the preparatory part for local computer finished. In the folder Site transfer there is an archive of our site and a database.
From this link you can download the contents of my folder Site Transfer
Registering an account on BEGET.RU hosting
We can register a full-fledged account on beget hosting and within 30 days it will work in test mode for free.
We go to the site at beget.ru and select one of the tariffs, for example, start. This rate includes the option register a free domain in the RU zone

Choose a tariff
Please fill in the fields carefully telephone confirmation code will be sent by e-mail- login information.

Hosting registration in BEGET
After registration, your phone will receive sms with confirmation code, which will need to be entered in the window as shown below

Enter the confirmation code to register an account in BEGET
After confirmation, the system will show you an animation of the process of creating your hosting

Create a BEGET account
Be sure to save data highlighted with a red frame in the picture below to a text file! An email with these details will also be sent to the email address you provided during registration.

Hosted by BEGET. Completing the registration process for a new account
To enter the beget.ru hosting control panel for the first time, you can click on the link Go to Control Panel

BEGET hosting account control panel
This completes the registration. Congratulations, you have your hosting!
Transferring site files to BEGET hosting and setting access rights
Login to your hosting control panel and click on the icon file manager

BEGET hosting file manager
When you first visit, you will see a folder whose name will match the site address, in other words, this is your test domain.

Test domain hosted by BEGET
To upload the archive of our site to the hosting, go to the folder [your account].bget/public_html and delete everything from this directory. For this select all files and folders, click right click and choose the item Delete. Then press the button (blue arrow up) download files as shown in the picture below

In the window that appears, click Choose... and select the archive of our site www.zip which is in the folder Site transfer

Uploading the site archive to BEGET hosting
Right click on archive file, select from the dropdown menu Unzip archive

Unpacking the archive with site files on BEGET hosting
After unpacking the archive, you can delete the archive file so that it does not take up space on the hosting, right-click on it and select Delete

Deleting an archive file from BEGET hosting
Climb up in the directory tree, right-click on the folder public_html and choose Change Attributes

Changing attributes of files and folders on BEGET hosting
In the window that appears, enter in the field Code value - 755, click the checkbox Apply recursively and choose only for folders. With this operation, we will set the necessary access rights for all folders of our site

We set the rights for the site folders on BEGET hosting
Right click on the folder again public_html, choose Change Attributes, enter code value 644, apply recursively, to files only

We set the rights to the site files on BEGET hosting
As a result, all folders of our site should have permissions 755 , and the files 644

Rights to files and folders on BEGET hosting
Creating a database on BEGET hosting and importing data
In the control panel, click on the icon MySQL

Database management on BEGET hosting
Enter the name of the database and generate a password
Be sure to write down the database name and password in a text file!

Creating a new database on BEGET hosting
After creating the database, click on the inscription phpMyAdmin

Database login via phpMyAdmin on BEGET hosting
We press the button Import

Importing data into a database hosted by BEGET
We press the button Review..., from folder Site transfer select the file with the database (extension sql), then press the button Forward

Importing data from a backup to a database hosted by BEGET
As a result, a message about successful import will be displayed and database tables will appear in the column on the left
Sometimes the browser does not display a message, or you may not see the tables in the left column. No big deal, just wait 20-30 seconds and reload the page. If tables appear in the left column, then everything is in order.

Imported site data into a database hosted by BEGET
Fine! We deployed the files of our site on the hosting, set up access rights to them, created a database and imported our site data into it. Left just a little bit.
MODX configuration file and latest settings
In the file manager on the hosting, go to the folder public_html/manager/includes, right click on the file config.inc.php and select from the dropdown menu editing

MODX configuration file on BEGET hosting
Change database username, password and database name to those that are used on our hosting. You should have written them to a text file.
On BEGET hosting, the name and database user have the same name

Editing the site configuration file on MODX on BEGET hosting
After saving the configuration file, to increase the security of the site, you need to disable the ability to edit the configuration file, for this, click on the file config.inc.php right-click and select from the drop-down menu Attributes. In the window that appears in the field code value enter 600 and press the button Change

Closing access to the MODX configuration file on BEGET hosting
In the browser, go to the admin panel of our site on remote hosting, in the address bar we type [account name].bget.ru/manager, enter the login and password for access to the admin panel (login: admin, password: 1 ), choose Tools -> Configuration, go to the tab File Manager and in the field Path for file manager press the button Reset

Reset file manager path in MODX admin
Go to tab File browser and in the field File path also press the button Reset, then save configuration changes

Reset file browser path in MODX admin
Go to tab Website, to clear old data from the site cache, click Clear cache and open our site on the hosting by clicking the menu item View

Clearing the Cache in MODX

Our site on MODX hosted by BEGET


