More recently, to combine all digital devices and gadgets (smartphones, tablets) in one big media network, it was almost impossible, since their device did not allow to connect to the local network. With the development of the mobile market, there was a need and the possibility of creating large multimedia servers at home. Consider more detailed what the DLNA server is and the ways to configure it on Windows 7 and Windows 8.
What is DLNA?
DLNA is a special set of instructions (protocol), which will allow you to view the media content located on the main server, using various devices located on the same network. For example, a new film located on a computer can be found on the TV (only if there is an appropriate SMART TV function), on the tablet, telephone or other gadget.
Why do you need a media server?
The placement of such systems of the house, allows you to significantly save memory on all devices, create a single media library and organize all files so that they can be easily found. Another significant advantage of the DLNA is a large channel width, which will allow you to watch the same films in a full full HD or UHD quality, without waiting for the moment when the file is loaded. You will say that in the video in this resolution you can watch online. Yes it is so, but the video that is on the Internet passes additional compression And the quality is significantly lost. This is one of the few advantages that you can evaluate yourself after taking such a system at home.
What is needed to configure the server at home?
To configure such DLNA servers you need:
- all necessary devices combined into a single network (no wired or wireless network is important);
- personal computer S. operating system Windows 7, Windows 8 or Windows 8.1 (note that the 7 version of Windows must be no less than "home extended");
- a little patience and minimal knowledge about the devices that will be connected (for example, new and old SMART TV TVs have small differences in setting up and connecting to networks).
Step-by-step instructions for setting up for Windows built-in means:
For creating DLNA Server You must do the following:
- So, we go to the computer control panel and looking for the item "Network and Internet";
- We are looking for a "home group" and select subparagraph "Selecting a home group parameters and data access":

- Next, we need to combine all devices connected to the network in home group. Such an association is necessary in order for all groups of the group to access data that are located on the main carrier (server). Therefore, in the next window, choose "Create a home group":

- At the next stage, select the types of files (libraries) to which will be provided network access and click the "Next" button:

- After these operations, a window appears in which the setup program will display the automatically generated password. It will need to write it, since all the devices, when connecting to the DLNA, the server on Windows will request this key.

- Next, the settings window will pop up in which once again check the "shared" folders and mark the item allocated in the picture. Here you can change the password to a more memorable, leave the home group or, using the system, check the availability of errors in connections:

- After the required item, go to subparagraph "Select the multimedia streaming parameters." In the "Multimedia Library" field, we enter the name of your DLNA server, and all devices that are displayed in the list are "allowed":

ATTENTION! Allow access, only to those devices that belong to you so that your files do not get in other people's hands! - Save all settings. On this, the DNLA server configuration on your Windows 7 is over, it remains only to connect all the necessary devices and enjoy the media content.
Setting up DLNA using third-party programs
Above, we looked at the configuration method, through the utility built in Windows 7, but to create a DLNA on Windows 7 (8) can also be used third-party programs. One of these programs is called - " Homemade media-server".
Homemade media server - rich in settings, free app To provide shared access and sharing files on Windows 7, 8 and 10 PCs, other UPNP, DLNA, HTTP network devices.


It turns out a convenient option for viewing streaming television, broadcasting and local video on gadgets without additional actions to download and convert content, connecting flash drives and HDMI cables.
Home Media Server Opportunities
Processes customer devices to films, images and audio data, nothing reproducing and without forming yourself. The program supports Smart TV, gaming consoles, media players, as well as mobile gadgets - Almost any technique may turn out to be a full participant in the multimedia network. Endowed with a number of opportunities:
- converting content to the desired format;
- adjustment of the video frame parameters;
- switching audio streams and subtitle support;
- redirection of streaming online broadcasting;
- support for digital television;
- simultaneously launching on the device group;
- work with podcasts;
- remote control via the Web interface.
The home media server also provides a variant of the database and settings. It can be useful to correct the error of using the program and possible errors of work.
Advantages in a homemade media server
The main advantages in comparison with similar products belongs:
- Absolute free. Nic advertising banners and obsessive by third-party developers.
- Multifunctionality. Universal "Combine", the potential in which the borders do not know.
- Support trans coding. Automatically determines and recodulates the non-readable source file in real time.
- Russian-speaking localization. With the extensive functionality, the utility to deal with the options will be easier in understandable.
Download Home Media server can be free for operating windows systems 10, 8 and 7 by reference https: // Site / Domashnij-Media-Server / below, and a large number of Settings and parameters will help users as accurately configure the application for themselves.
Today you will learn how to connect the TV to a computer and about all the capabilities of such a connection, as well as how to organize your media library on Smart TV and other devices supporting home DLNA. server.
What is DLNA?
The integrated digital network consortium (DLNA) is a group of companies that have merged in order to create a generally accepted open standard for connecting devices so that all clients with DLNA support can automatically be on the same network, receive from each other the ability to view the media content.
What devices support DLNA?
DLNA technology is compatible with any devices:
- smart TVs;
- smartphones and tablets;
- PCs and laptops;
- media players and Blu-ray players;
- gaming consoles;
- home Media Servers (NAS);
- wireless printers;
- photo and camcorders;
- audio systems.
All DLNA support devices have an appropriate logo or sticker with a type of supported digital content (for example, audio, video, photos), as well as assignment: server, printer, player, etc. DLNA support has most devices from large manufacturers, such as Intel, HP, Motorola, HTC, Microsoft, Samsung, Sony, LG, Panasonic, etc. Apple has developed its standard - Airplay. If you have a device from Apple, then use it in your mediation, consisting of customers from other manufacturers, is not possible.
How does the DLNA network work?
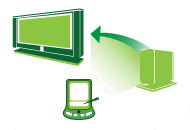
As you already understood, DLNA devices are intended for mutual connection: creating multimedia networks. Each device is assigned its type depending on its purpose. For example, any accumulator: smartphone, media player, TV or PC, can belong as a type of digital media server (Digital Media ServerIt is also a digital media player (Digital Media Player), because they are able to both receive and reproduce digital content from another DLNA device.
How to create a DLNA network?
Wireless router (or wi-Fi Router) is a central element in the network and is used to connect devices to each other in the total home wireless network.
Equipment for building home network with DLNA
You will need:
- tV with DLNA support;
- dLNA digital media server (for example, file server, PC, laptop or media player with HDD);
- wi-Fi router.
I will talk about building a DLNA network not only with a wireless connection, you can also use a wired device for connecting devices, instead of a Wi-Fi router to use a regular router (switch) to connect the source of the files ( home server. - DLNA server) with a display device (DLNA client). You can also use (for distribution of the Internet through a power grid), in addition to this you need Ethernet cables to connect to your network of devices.
How to set home media DLNA server?

1 Connecting a TV with DLNA support to a Wi-Fi router (for example, Samsung with smart TV).
Option 1 - wired connection . Connection using an Ethernet cable to a router. It is enough to connect one end of the cable to the LAN port of the TV, and the other to the free port of the router (or switches, depending on the structure of your network).
Option 2 - wireless connection . If you are using a Wi-Fi router (wireless router), it is enough to connect the TV to an existing wireless network via the built-in or external (USB) Wi-Fi adapter directly to the router. If the TV is strongly removed from the router, you can install a wireless bridge (use the Router in Bridge mode or buy) to connect the TV to the router. I also recommend reading an article about. The wireless bridge is connected to the TV to the LAN port, and to the router wi-Fi Point Access.
Option 3 - Connection using PowerLine adapters. This type Connections uses the power grid without launching Ethernet cables. This method It will help to configure the home network using existing wiring and Cables for connecting DLNA clients no longer need. Powerline adapters produce almost all network equipment manufacturers: TP-Link, NetGear, D-Link, etc. They are called PowerLine devices. Next, you simply, as usual, connect the plug of the router, television and other devices into the power outlet, but now all your devices will form a DLNA network.
2 Adding other DLNA devices compatible with home network

Now you can connect the DLNA servers to the router (devices from which you want to play files on the smart TV) - PC, laptop, phone or media player. All servers will be displayed on a smart TV, as they are on the same network, and you can play content that is stored on them on media. Exist various methods Settings for diverse types of devices in the DLNA network.
PCs and laptops online DLNA
Connect the computer or laptop to the router or router by any of the above options. Most important moment In the DLNA setting on a PC or laptop: the need to establish the corresponding program is a media center (media shell). The most popular them (for each program there is a link with information about it and configuration):
- SERVIIO.
You can not resort to installing media centers to create a DLNA server, and use Windows Media Player 11 or 12. To use them as a DLNA server, you must allow access to files on your laptop or PC: Open Windows Media Player, go to Menu "Parameters", then open the General Access tab windows files Media and activate the exchange of media files.
 Kodi media center interface window
 You can choose the media shell to use as a DLNA server from the list above. After installing the program you like to create a media center (DLNA server), you should configure it and select files (photos, video, music files) to transfer to a TV or another display device.
Mobile devices in the DLNA network
3 DLNA Setup on TV
After you have connected all DLNA devices, turn on the TV and go to your Smart TV home screen (on the example television samsung.). Find and run AllShare app, which will allow you to find music, photos and videos stored on DLNA devices of your network.
If you have a Sony TV (model until 2015), then you need to enable it, click the "Home" button and enable "Media Player". After you select the content type: music, photos, or video, you can see the DLNA server in your home network.
4 Using DLNA on Android OS

To view the video from a computer on smartphones and tablets with the Android operating system, you must install special application. There are quite a few such applications, I can advise Mediahouse or Bubble UPNP, which you can download for free on Google Play.
After you install the application, you need to do a few simple steps:
- select source - your computer or other device with DLNA support and installed from which you will watch video;
- select a receiver, that is, your device on Android OS;
- select video from the list of available files.
In addition to universal applicationsManufacturers mobile devices Offer your own software with DLNA. Samsung - Allshare, from LG - Smartshare, etc.
Using DLNA support applications on Android devices does not require any configuration. It is enough to run a DLNA server (for example, KODI on a computer), and it will immediately appear in the list of available connections in the application on your smartphone or tablet. Select your computer from the list, click "Browse" and specify the desired folder. Do not forget that your smartphone can also work as a DLNA server.
Of course, you can simply connect the computer to the TV, but with the help of special solutions, access to multimedia files is possible from any device. There are applications for telecommissions, smartphones, tablets and web interfaces for the rest. You can even connect from anywhere in the world via the Internet.
With you - media collecting
You can organize your own media server using good free programs, but of course, for the success of this venture you should have a decent collection of own media files. Own server - A great solution for those who have a big selection of video (including from DVDs) and music (including CDs): You can enjoy watching and listening on any devices, independent of Netflix and Spotify services. You can even watch photos - perfect if you have a big photo glare.

Plex or Media Browser: Choice for you
Two most, perhaps, popular solutions for creating their own media server is and. Both work on one principle and provide for the installation of the server program to a computer, a laptop, a NAS-drive or a special home server. You can still try (in the past XBMC), but this decision is more complicated and works a little different.
And Plex, and Media Browser offer server programs for Windows, Linux, Mac OS X, BSD and a variety of NAS servers. To create your own media server you can use normal computer, separate server or a ready-made NAS-drive with server software support.
Plex has client applications for Roku, Amazon Fire TV, Xbox and Playstation, as well as Chromecast support. In addition, you can connect to the server using mobile applications for iOS, Android, Windows Phone And Windows 8. There is a web interface and a Plex functional application for a PC that is useful when the computer is connected to the TV.

Media Browser also has customers for Roku and some other telecases, as well as Chromecast support. Provided mobile applications For iOS, Android, Windows Phone and Windows 8, and from the computer you can connect to the server via the web interface.
Both solutions are very similar on functionality, but Plex selection of client applications is much wider (there is support for PlayStation, Xbox and Fire TV). However, it has to pay for it: the Plex application for iOS costs $ 5, and the Plex Pass subscription for $ 5 per month is required to install applications on Xbox and PlayStation.
Media Browser and related client applications are completely free - no subscription feenor built-in purchases in applications. But Media Browser has no support for PlayStation or Xbox even for an additional fee. We will have to choose what is more important - saving or multifunctionality. And even better try both to determine the choice.

Put the server, applications - and start using
The installation takes a few minutes, regardless of the selected solution. Install Plex or Media Browser to the future server and specify the address of the folder with multimedia files in the settings. If desired, you can start account (Such an opportunity is in Plex, and in Media Browser) - then it will be easier to enter client applications and connect to the server remotely via the Internet.
After setting up the server, install the application on the TV shows, the smartphone, the tablet - and connect to your media collecting. Everything is very easy here. And if you have Chromecast, you do not even need to install a special Plex or Media Browser application on a TV - it is enough to install the application on your smartphone and with it to translate multimedia directly to Chromecast.

Of course, to use all these opportunities, you need the server itself on which the file collection will be stored. If the collection is not required 24-hour availability, you can put the server program to your regular computer or laptop and use media files only when it is enabled.
And you can highlight a separate server to this, which will work constantly and will even connect to the collection remotely via the Internet. Not necessarily use for this full powerful computer - the weak compact NAS-drive with great hard disk For storing media files.
| Materials |
The media server DLNA opens up wide possibilities for broadcasting video and other media files from one device to another on WiFi. Since this cross-platform technology, it can be used to send a picture from a laptop or PC to Windows on a TV or a console under android management. Previous article on caused such interest from readers that I decided to develop this topic and talk more about the possibilities of home media UPNP server on Windows, as well as how to organize work with hOME programs Media Server and Smartshare.
What is DLNA and UPNP?
The integrated digital network consortium (DLNA) is a group of companies that have merged with the goal of creating a common, open standard for connecting devices. All devices that have support for DLNA can automatically be on the same network, configure reception from each other and view content.
What types of devices have support for DLNA?
DLNA-compatible devices are televisions, cell phones, PCs and laptops, music players, game consoles, such as Sony Playstation 3, homemade media players, personal computers, android phones, Blu-ray players, tablets, wireless printers, camcorders, flat-screen TVs, routers and HiFi systems. First of all, make sure your device has such support. All devices with the DLNA certificate have an appropriate logo or sticker, which means that the product has been tested for compliance with the DLNA requirements and is able to connect to other certified devices. Next, the device must have a description of the type of supported digital content (for example, audio, video, photographs), as well as the type of destination (for example, server, printer, player, and so on.). More detailed description Accepted designations at the end of the article.
IN currently The list of members of the organization The Digital Living Network Alliance combines most of the major players in the market, such as Intel, HP, Motorola, HTC, Microsoft, Samsung, LG and Panasonic. These companies create products that successfully interact with each other. Only Apple remained aside, which developed its standard - Airplay. So if you have a device from an apple family, turn it on to your media, consisting of devices from other manufacturers, will not work.
How to use the media server DLNA on Windows?
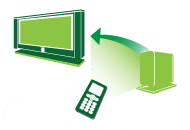
DLNA devices are intended for mutual connection. Each device is assigned its class depending on its purpose. For example, any cumulative device belongs to the Digital Media Server class. These are mobile phones stored in their memory photos, music and video. Any device capable of receiving and playing digital content from another DLNA device will be a digital media player (Digital Media Player). This is your TV, which is able to play video, music and photos from other devices.
In order to create a homemade media server and start using it, you will need at least one DLNA server for storing content (for example, a laptop or mobile phone) and one DLNA device for playback, for example, such as TV.
DLNA devices are connected and switch to each other by means of a customized home network. The diagram of this network is probably similar to the device of your home Internet. In fact, the router is the central point of communication in the network and is used to connect devices to each other.
Here is a brief list of what you need:
- tV with support for DLNA
- at least one DLNA digital media server, such as a file server, laptop or phone
- router
- one of the three for connecting the receiver with a transmitter: PowerLine adapters (for distribution of the Internet through an electrical circuit), Ethernet cables or wireless adapter To connect to your network.
Configuring a DLNA home media server on a Windows computer or laptop?
We came close to the topic of setting up home media server by DLNA. First of all, you need to connect a laptop and a TV with support for this technology (for example, Samsung with smart TV) to the router. There are several ways to execute this. This is stated in detail in, but briefly they are listed below. Which one to choose to solve you depending on how removed the router from your TV and other connected DLNA devices.
Ethernet cable
If the router is located close to the TV, the Ethernet cable is the easiest way to connect them.
Just connect one end of the cable to the TV Ethernet port, and the other to the port of the router.
Wireless bridge
If you have a wireless router, or the TV is deleted enough, it is worth thinking about installing a wireless bridge to connect the TV to the router. The wireless bridge is connected to the TV through the Ethernet port, and to the router wireless communication. Either if your TV supports work with wifi through built-in or exterior adapter, then connect it to the router directly.
Some wireless routers, such as Buffalo Technology, have a DLNA certificate and are specifically designed for the DLNA home network.
By electrical network, without using cables
The network using a power grid is a great way to customize the network in the whole house. Installation using the electrical home network is simple and safe. Because the existing wiring is used, connected cables within the DLNA network will not be required. Connection adapters for a power outlet produce almost all network equipment manufacturers. They are called PowerLine devices. Next, you simply, as usual, connect the plug of the router, TV and other devices into the power outlet, but now all your devices will form a DLNA network
Before you can transmit files from a computer, you must install the corresponding software on it. Among the options - Windows Media Player 11 or 12 (included in the new windows version 7) or VAIO Media Server (for Sony TV), AllShare for Samsung, LG Smart Share, Home Media Server, etc. After installing the software, you can select files for sending a TV - Photo, video, music files, etc.. How the transmission takes place depends on the software used, but, as a rule, it comes down to specify the playlist, library or files, or add them to the appropriate folders.

Let's now look at the most popular programs that allow you to broadcast files from your computer to other devices.
Windows Media Player.
To configure Windows Media Player to transfer files from a laptop to a TV, follow these steps:
Run Windows Media Player, open the menu (right-click on the toolbar on which you are deactivated arrows), SERVICE\u003e Parameters 

Samsung Allshare Software.
You can download here. More advanced compared to the previous program, but again only for Samsung. It is based on the * DLNA standard, and with it, you can share multimedia content not only on a telephone, but also on many other devices that support standard * DLNA: computers, tablets, video cameras, digital cameras, mobile phones, etc.
The order of work is as follows:
We install the program, run, go to Tools\u003e Settings\u003e Sharing (Tools - Settings - Folder Settings) and select that folder, files from which will be open for shared access.

After that, go to the "Setup Rights" tab and open the access to our TV. In the main program window will appear all shared folders and files
Now for more clearly, look at the video demonstrating work with these programs from Samsung.
Home Media Server - Home Media Server
This is another cool free program for organizing from your computer full-featured media server from which files can be broadcast to other devices included in local network - Not only TV, but also tablet with Android OS, for example. Plus it is that it is suitable for any televisions with support for network connections, such as the same inexpensive LG. Download last version can .
Let's consider in more detail how to use home media server Home Media Server. After installing it, you will ask you several times asking the basic parameters - here we press the "Cancel" everywhere, but do not do anything, since everything will set everything.
We get into the main program window.

In addition to viewing files, this program Also allows you to broadcast streaming from the Internet to the TV. But let's talk about it separately.
I hope now all the blog readers have become clearer what is a media server DLNA (not to be confused with) and how to connect various devices to it. Well, after a thorough study of all this information and competent implementation, you can build something like this:
By the way, the phone can also work as a server - but about this in a separate article about DLNA on Android. About the same, you will learn by reference.
For a snack, there are still many all kinds of delicacies - the most popular questions with answers, a dictionary of terms and visual videos on DLNA. And do not forget to subscribe to the blog news through the form under the article so as not to skip the output of the next article from the series about DLNA. It will be devoted to the universal cross-platform media server Xbox Media Center (XBMC).
Frequently asked Questions
Are all TVs have a DLNA certificate?
No, not all TVs support DLNA. To make sure that yours supports the DLNA network, find the corresponding logo on it.
What should I do if my router is located from a TV at a big distance?
There are two options for action if your router is far from the TV and other devices
DLNA Connection using a wireless bridge or electrocabeel. So you can connect the TV and device to the router
- DLNA. wireless way. This article describes detailed installation actions.
Is it possible to connect other devices to the DLNA server via WiFi?
Some DLNA devices have built-in WiFi feature. The way to connect via WiFi will depend on the device itself. You may need to activate the WiFi or Network Sharing feature (sharing files within the network) in order to connect to the router (and to the DLNA network).
My TV does not connect to the media server. What should I do?
Check the cable and connections between the TV and the router, as well as between DLNA devices and router.
Check your network setting on the TV. In detail about connecting TV to the network, it is described in a separate article, the reference to which I gave above.
What devices have support for DLNA?
There are a number of devices with DLNA support. Look at the integrated digital network consortium site (DLNA)
My TV does not see some devices. What should I do?
If the TV does not find content on another device, the following reasons are possible:
Your TV or other DLNA device is not connected to the network.
The problem is related to the router or with the operation of the network.
Another device does not have support DLNA. Or is not a digital media server (Digital Media Server), in other words does not have the memory for storing files.
On your PC or laptop, the corresponding DLNA server is installed.
Depending on the network settings, on your laptop, you may need to turn off the function firewall. You must be aware of the risks associated with this action. They are entirely your personal responsibility. If you do not know how to do, consult professional help.
What method of setting the network is better - cable or wireless?
It all depends on the remoteness of the network components and on how despite the presence of visible cables in the house. The cable network, however, can work a little better than wireless. A few more advice:
Try to avoid complex schemes Network installations with numerous subnets and hubs, as this may affect the performance of your DLNA network.
If you want to be able to stream video files in HD format, we recommend using the network at least 200 Mbps for more sustainable work.
When choosing an Ethernet cable, give preference to Cat5e, not Cat 5, as this will allow your network to develop more high speed Work.
Can I rotate the image when the TV is connected to a PC?
No, it is impossible to rotate images on the screen. You should rotate the image on a laptop or other device before it appears on the TV screen.
Photos are displayed on the TV screen in a distorted form. Why?
With an increase in the photo, the image quality can become worse. In order for the quality to be optimal, displays photos in their own resolution, even if they won't take the entire screen.
My photos do not fill the entire TV screen
Images may not occupy the entire screen. It depends on their permission and format. In order for the quality of the images is optimal, do not change their own permission.
What types of file types are supported by DLNA devices?
It depends on the device itself. Check out the DLNA certificate specific device
Or look at the DLNA website. Depending on the network device, some files may be converted before
transmission.
Below is a list of files that are usually supported by DLNA devices:
Images: JPEG, BMP, PNG, GIF, TIFF
Audio: MP3, Wave, AAC, AC-3, Ogg Vorbis, LPCM, AMR, WMA
Video: AVI, FLV, MPEG2-PS, MPEG4, H.264 SD, WMV, WMA
Can I store files on the TV?
No, your TV is a DLNA media player. This means that it is capable of finding and playing files from DLNA mediarsers that contain content.
Does the installation required for your PC or laptop to transfer files? Where can I find it by?
Yes, in order for your PC or laptop to transmit files within the DLNA network, installation of software is required. In some cases, such as Windows Media Player, the required software is already installed.
Is it possible to access iTunes or sharing and playing DRM files within the network?
No, although it may also depend on codecs supported by various devices.
Why are files and folders with my photos not displayed?
Some folders or files may not be displayed on the TV screen if certain characters are used in their name. Try to change the name and repeat them to be transmitted to the TV. Please note that on many models in file names and folders with photos, the use of only the Latin alphabet is supported.
My server DLNA server is listed in the list on the TV screen, but the files are not available. Why?
Perhaps the link between the DLNA device and the router is lost. Check the cables and connections. To test the connection between the DLNA device and the TV, you can also carry out an automatic diagnostic check, which is performed on each model in its own way.
Sometimes the video quality during streaming wireless transmission is rather low. Why?
The quality of the wireless network connection may vary depending on the distance between the bridge and the router, from any interference in the room and the quality of the wireless router itself. In order to improve image quality, use a wireless router with support for streaming video with a frequency of 5 GHz and place the router as close as possible to the wireless bridge.
Legend in DLNA technology
When using DLNA connections, you can construct a link between any devices working with this standard, while each of them can act in different roles. For their accurate designations, a number of terms are used as described below.
The first group of device connections that are used mainly at home is called HND (Home Network Devices)

| DMS (Digital Media Server) - media server. These are devices that are the source, that is, which contain the files that we want to look at another device. This can be a computer with a special software installed above, a NAS device that has support for DLNA. |

| DMP (Digital Media Player) is a media player, or DLNA client. These are those devices that receive content from the media server and can either reproduce it or transfer to another device, acting as a mediaander. These are televisions, game consoles, independent monitors, home cinemas, etc. |

| DMR (Digital Media Renderer) is a mediaander. A device that can reproduce the content obtained through the media controller, which to its query transmits it from the media server. This is usually able to do the same as listed above in media players. |
| DMC (Digital Media Controller) - media controller. Allows you to find files on the mediaserver and transmit it to play on the mediariter. These are tablets, smartphs, digital cameras with WiFi compounds support |
| DMPR (Digital Media Printer - devices that provide a print service for the rest are printers. Transmit the printed information on them are capable of media players (DMP) and media controllers (DMC). Tablets | |

| M-DMU (Mobile Digital Media Uploader) - portable gadgets that can upload files to servers. For example, digital cameras, cameras or phone numbers. |

| M-DMD (Mobile Digital Media Downloader) - Portable devices that can find and download a media system from DMS and M-DMS servers (mobile phones and media players) |
| M-DMS (Mobile Digital Media Controller) - portable media controllers that have a property of finding content on media server and broadcast it to DMR media players - phones and PDAs. |
Thank you! Did not help


 in Photoshop How to make a grid in photoshop CS6")


")


