Eespecials - join the ranks of the Blinkers!
Today we will set up control of the ESP8266 from your smartphone (iOS or Android) in 5 minutes using the new Blink cloud service. Video and details under the cut.
Install the Blynk app on your smartphone


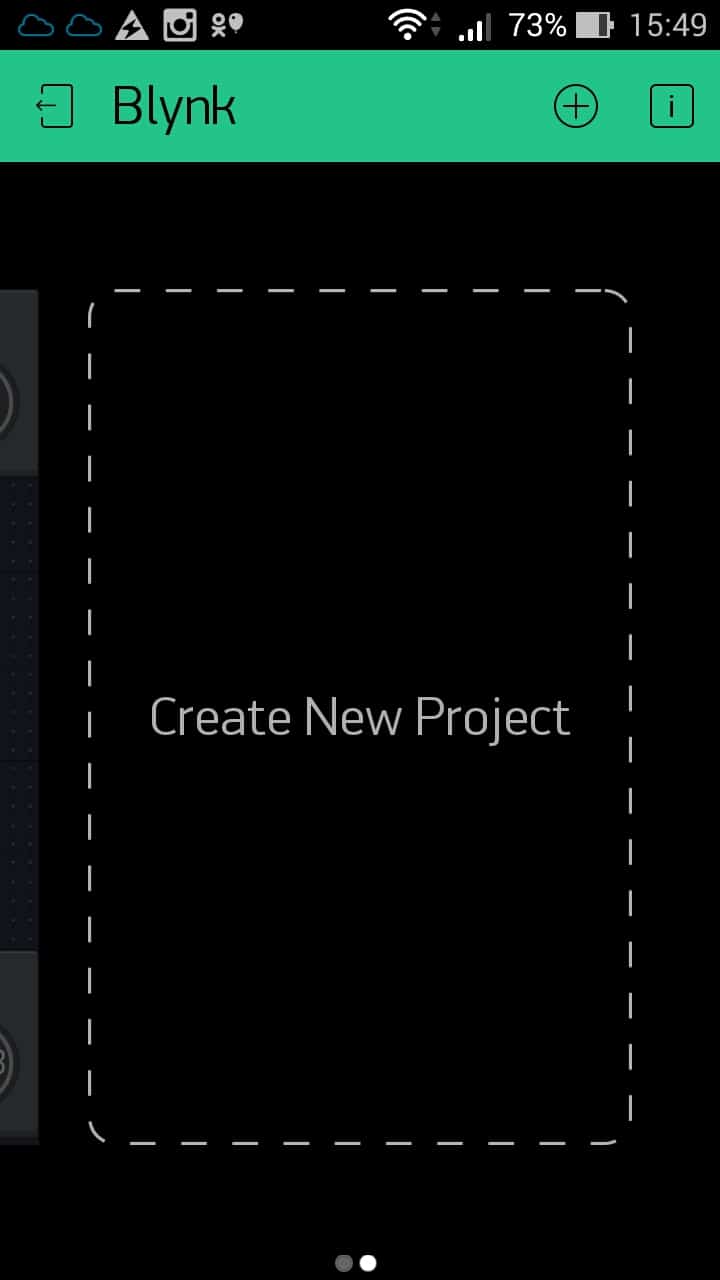
Register in the application and create a new project.
Enter the name of the project, for example ESP8266... In field Hardware Model choose ESP8266... (hope you notice an impressive list of supported hardware) Auto-generated Auth Token send to your mailbox.

After pressing the button Create you will be presented with an empty field for designing the UI of your ESP8266 control panel.
![]()
Click on the plus sign at the top right - the toolbar will appear Widget Box to add widgets to your dashboard. It should be noted that the list of widgets will continue to grow.
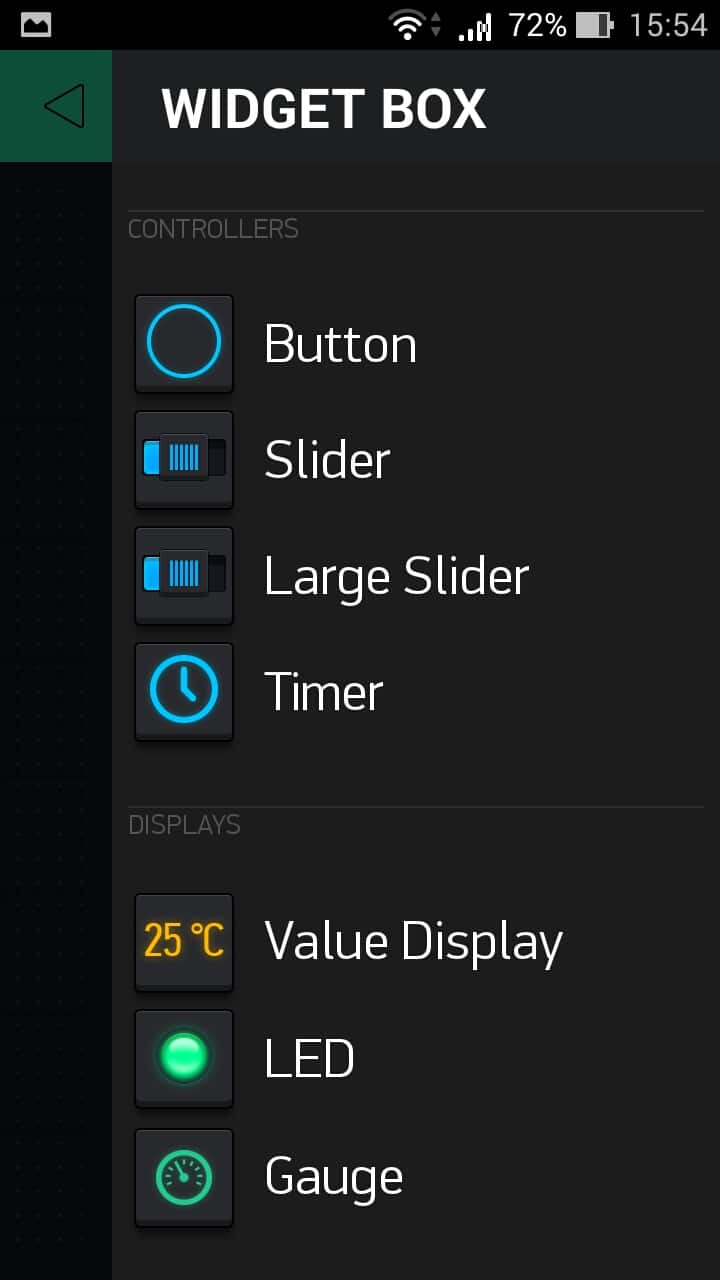
For trial, select the type of widget Button- this widget will be immediately added to your panel. Edit it with one touch. The name can be left blank, a little to the right you can choose the color of the indicator, in the field OUTPUT PIN select right Digital, and on the left is any free pin GPIO... Below switch the button type to Switch.

Next, install the Blynk library in the Arduino IDE. The official instructions will help you with this. You can also take the library the most latest version directly from the repository and install manually. Next, select an example ESP8266_Standalone and write in it Auth Token which we received in the mail, SSID and password your WiFi networks... Compile and upload the sketch to ESP8266.
The wonderful thing is the ESP8266. Quite a powerful processor, a lot of memory, built-in WiFi controller. ESP32, of course, is even better, but it also costs a lot more. But we are not talking about them now. More precisely, not exactly about them. It is very easy to build almost any home automation on ESP, and with remote control and control from a smartphone or computer. An example of such a device is on this site. One problem - to work with such a device, not only from home network, and from anywhere in the world (where there is access to the Internet, of course), you will need a certain server - an intermediary that will receive messages from the device and transmit them to you, and vice versa. Of course, there are options and direct communication, but I will not consider them here due to the complexity of implementation or high cost.
The list given in this article does not claim to be complete and even less unique, I just tried to analyze and structure the capabilities of certain free services. First of all for yourself, but if it turns out to be useful to someone else, use it to your health. When I was looking for a public MQTT server for myself, I searched through a lot of Internet resources. I was looking first of all at esp8266.ru, but alas, half of the services there are either no longer working, or they do not suit me personally for one reason or another. Everything that is written here is first of all mine personal experience, Your experience with these services may be very different. If you know any other similar services - write in the comments or by mail (mail and other contacts are in the upper right corner of the site header), and I will try to check and supplement the list.
MQTT brokers
The MQTT protocol is perhaps the very first thing that you come across in search engines when you are looking for a way remote control various "smart things". I cannot vouch that this is the simplest protocol (I just have nothing to compare with, I somehow stopped at it right away), but personally it did not cause any difficulties for me. There are a lot of examples. There is more than one ready-made library for the Arduino IDE, as they say, “choose the taste”. There are enough mobile applications to choose from for both a smartphone and a control panel made from an ancient tablet. So this is probably the most popular option for implementing remote control. There are also a lot of cloud servers, they are called MQTT brokers. I will not consider the principle of operation of the protocol and servers here, this information is quite enough on other sites.
CloudMQTT.com
I started with this service. Simply because almost all examples of working with the MQTT protocol are based on it. The service is quite convenient and simple, everything is intuitive. In 2018, the service allowed for free tariff plan connection of up to 10 devices, which was fine for me. However, by the end of 2018, the owners of the service revised their policy and now only 5 connections are available on the free tariff plan "Cute Cat". For me personally, this is very little. I can have three "control" devices connected at the same time - two smartphones and a tablet, and for the ESP itself, there are only two connections left. And I already have a lot of different “automation”, and more are planned. Of course, you can spawn several instances of brokers inside one account, although they have recently been subject to restrictions. But in this case, three control devices will still “devour” three connections for each instance, and you won't want the enemy to set up such an economy. The cheapest paid tariff plan "Humble Hedgehog" costs $ 5 per month at the time of this writing. No, one fairly well-known amphibian strangles me to pay that kind of money every month... And the possibilities are not so great - 25 connections. Therefore, I had to look for other options.
pros: convenient and simple
Minuses: only 5 connections on a free tariff plan
flespi.io
I have been using the mqtt.flespi.io broker for quite some time. He attracted me by the fact that at the time when I started working with him, he allowed as many as 100 competing connections at the same time and huge volumes of transmitted and stored messages. Gorgeous! However, the service is not as user-friendly as CloudMQTT. The control panel is not very convenient (although it is being improved), setting access rights is not clear at first glance, authorization of both devices and smartphones using tokens with a limited validity period. Some of the functions I need are missing, or I have not found how to use them. For example, I have not found how to remove retained messages from the database. Strictly speaking, this is far from only an MQTT broker, so maybe I just did not understand all of its capabilities. Sometimes on different smartphones information in some topics stops updating. A couple of times, due to errors in the firmware and constant requests of the device to the server, the service completely blocked the account for several hours. But all this could be forgiven for such opportunities. But alas, here, too, the desire to make money prevailed - from 2019 to free tariff a limit of 10 connections has been introduced. There is nothing reprehensible in this, but I am not yet ready to pay that kind of money for a hobby, and even for services of a rather dubious quality. In general, we will look for the same one, but with mother-of-pearl buttons ...
pros: before there were up to 100 connections
Minuses: not convenient, difficult to configure access, retained cannot be removed from the panel
HiveMQ Public Broker
Completely free public broker with no restrictions. At least for home page broker about them is not written. But there are big "BUT" - this broker does not have any authorization, that is, none at all. That is, all messages sent between the device and you can be read by anyone. This would not be a big tragedy, if it is only some indicator of temperature and humidity, they do not present a secret. But when it comes to remote control “ smart home”, Then such a broker is no longer suitable. After all, you would not want anyone to be able to turn on any device in the house, or turn off the alarm, for example.
pros
Minuses
Eclipse MQTT
Another public broker without authorization. As written on the site, this broker is primarily intended for testing and is not intended to be stored or transmitted confidential information... To connect to the server, you need to use the following parameters: iot.eclipse.org server, port 1883; for TLS v1.2, v1.1 or v1.0 - port 8883. Connection via WebSockets is also available. In general, the same as HiveMQ, only in lateral projection ...
pros: free, no connection restrictions
Minuses: only suitable for testing and weather stations without remote control
mosquitto.org
And one more public broker without authorization. You don't have to repeat, everything is the same as for HiveMQ and Eclipse MQTT. Please note - the fact that all these servers support TLS encryption does not mean that your data is protected. The transmission channel between the device and the server is protected, but the data itself is in the public domain.
pros: free, no connection restrictions
Minuses: only suitable for testing and weather stations without remote control
IBM Cloud (Bluemix)
This is not an mqtt broker, it is a whole "Internet of Things Platform" platform. But it also includes an mqtt broker. On the free “Lite” tariff plan, up to 500 registered devices are allowed, and 200 MB of information for each metric. Quite chic not only for home but also for commercial devices. But, as always, not without a “BUT”. Firstly, this platform is very difficult to understand. There is documentation, but there is a lot of it. No - a LOT! I spent more than one hour to more or less understand how to set up a connection. Secondly, the platform allows publishing topics in a strictly defined format: “iot-2 / evt / event_id / fmt / format_string“. Likewise with the commands: “iot-2 / cmd / command_id / fmt / format_string“. And that's all - no liberties - that is, only the message number and the message itself. But there are already more formats for transmitted messages - “json”, “xml”, “txt”, and “csv”. Perhaps this approach will seem very correct and convenient to someone, but it did not attract me. Yes, and everything is complicated - there are, apparently, a lot of opportunities, but everyone will have to deal with this first.
pros: very high connection limits
Minuses: very difficult for a beginner, topic restrictions
mqtt.dioty.co
This is a completely free broker. Bye. The connection settings page says: “This MQTT broker is currently in beta. At this stage of beta testing, we will not charge you if you exceed the limit of 50,000 messages per month. However, we reserve the right to temporarily suspend your account in the event that you interfere with the service to other users. In this case, we will always contact you by email to try to understand your specific needs and how we can meet them. ”. 50,000 messages per month is about 70 messages per hour, which is not that much, considering that one device can publish up to 50 messages per session of sending data from sensors. The broker supports authorization and TLS connection. Registration is linked to a Google account. There is a small limitation - all your topics must begin with an address Email, through which you registered in the service, for example: “/ [email protected]/… /… /… ”. But this problem is more or less significant only when setting up MQTT clients on a smartphone (typing more text), and even then not always. In my opinion, this service deserves attention. I did not check the work with him, I just registered.
pros: completely free
Minuses: requires a specific prefix for topics, the limit is about 70 messages per hour
Solace.Cloud (PubSub +)
It is not so much an MQTT broker as a whole IoT platform. The free tariff plan allows up to 50 connections, up to 1 GB of transmitted data per month, up to 4 GB of stored data (retianed messages). Not bad. But even in free version there are a lot of settings - it is difficult to figure it out "at a glance". That is why at one time I did not use it. Perhaps the time will come, I will figure it out and set the mood.
pros: up to 50 connections
Minuses: rather difficult to learn
myqtthub.com
Most likely an Estonian broker. On a free tariff plan, it allows: up to 100 users, but up to 50 connections; 10MB of stored data; up to 50 subscriptions per connection, maximum 250 subscriptions (and it is not clear whether the “home / #” subscription is one subscription or many?); 300 messages per minute, but no more than 800 per hour and no more than 10,000 per day. Based on regular (every five minutes) publications, we get no more than 34 messages at a time. There are also limitations - for more details, see the main page of the service. The restrictions, however, look quite real for home use... Have not tried ...
pros: up to 50 connections
Minuses: limit on the number of messages
mqtt.by
An easy-to-use Belarusian broker. Nothing is said about the restrictions. Supports authorization, but it is possible to make some topics public, that is, open to all other users of the service. But there is no support for secure connection (TLS), this can be critical for some applications. Each published topic must begin with the prefix “/ user / username”, which somewhat complicates the configuration of mobile mqtt clients, but not essential. On the plus side, the server has publicly available topics with date and time, which is very convenient for a tablet-based control panel that works 24 hours a day - at the same time, there is one more clock (one hundred and twelve 🙂). In general, it is quite a normal broker, if only it works stably.
pros: without any restrictions, there are public topics, you can publish your topics
Minuses: no SSL / TLS encrypted connections
mqtt.4api.ru
Russian free broker - "we provide access to a free mqtt server for everyone." Authorization and registration on the service via social networks... Appeared, apparently, not very long ago. Although the site itself has an SSL certificate, the connection parameters contain data only for “No SSL”, apparently SSL connection not available for devices. The connection page also says the following: “We do not recommend using this server for vital projects ”. The control panel has very modest functionality, so you need to use third-party software
pros: without any restrictions
Minuses: no SSL / TLS encryption of connections, poor functionality of the control panel
Other services
You won't be full of MQTT alone. MQTT is simple and convenient, but it allows you to view information “here and now”, without a history of changes over time. There are other services to view the charts, which are also easy to set up. Some of them are presented below.
ThingSpeak
ThingSpeak is available as free service for non-commercial small projects (<3 миллиона сообщений в год или ~ 8 200 сообщений в день). Сервис позволяет накапливать получаемые данные в своих хранилищах, после чего их можно удобно просматривать в виде графиков. В том числе и на сторонних сайтах, .
Of the features of the service - it has integration with MatLab Analytics, but how many times I tried to configure MatLab scripts, nothing came of it. Well, I didn't really want to. In a free account, the service allows you to create up to four channels, each channel can store up to 8 fields with different data. There is another limitation in the free account - you cannot publish data more than once every 15 seconds (a pause of 20 seconds is recommended), this is a kind of “protection” against exceeding the limit of 8,200 messages per day. In principle, all my “publishers” easily fit into this limit, that's enough for me. I have been using the service for a long time, it is quite convenient and simple, except for MatLab. There are several client programs for android, but much less than for MQTT.
pros: easy use on ESP, user-friendly site
Minuses: many restrictions on the free account
open-monitoring.online
This service is somewhat similar to ThingSpeak - you can send data to it in the same way and then view it in the form of tables, graphs and histograms. The interface is simpler than ThingSpeak, but it is also much easier to customize.

Initially, this service was created, as I understand it, to monitor the parameters of personal solar power plants, but it is quite suitable for other purposes. The service is available to everyone and free of charge, without significant restrictions at the moment. The only limitation that I have found so far is that sending a group of values for one controller to the server cannot be more than once a minute. But there seems to be no limitation on the number of values for each controller and on the number of controllers. Sending data to the server is carried out by a simple get-request, the implementation on ArduinoIDE took me no more than an hour. Unlike ThingSpeak, the saved data can be viewed on a single graph (overlaid), and a dashboard can be configured to display the latest values. You can also view the stored values in a simple table.
pros: easy use on ESP, user-friendly interface, almost no restrictions
Minuses: there is no way to display charts on third-party sites (unlike ThingSpeak), well, or I haven't found how to do it yet
beebotte
The main page of this service says: “Connect everything and everyone in real time using a rich API that supports REST, WebSockets and MQTT”. Personally, I have not used this service yet. Judging from what I understood from the description, this is a wild mixture of mqtt broker and thingspeak.com. In free mode, the number of channels and resources is not limited, but the number of messages is limited: 0.05 Million per day | 1.5 Million per month. For stored messages, the limits are even lower: 5,000 per day | 150,000 per month. In addition, messages are only retained for a maximum of three months, after which they are deleted. That is, you cannot see the weather for the whole year. I don't know anything about a mobile client for a smartphone yet. Registered. I will try. It is too early to draw conclusions.
Blynk
An actively promoted service for remote control of “smart devices”. I would even say aggressively - they write to all forums where necessary and where not. In general, in my personal opinion, this platform is not for hobbyists, but rather for business. In "free mode" very few resources are given, except perhaps to blink an LED or turn on one relay. In general, I tried it once - and abandoned it, I immediately ran out of resources. Too greedy.
pros: not found
Minuses: greedy, there is only one mobile client
That's all for now. If you know other ways to control ESP remotely (necessarily from a "mobile") - please write to me. We will discuss and, possibly, supplement the article.
Connection via a cloud server RemoteXY allows you to control the device from anywhere in the world where there is Internet.
The ESP8266 will be configured as a client to connect to the WiFi hotspot. The access point must have Internet access. The RemoteXY library will provide registration of the device to the cloud server.
The mobile app will connect to the cloud server and not directly to the device. Thus, the device will be accessible from anywhere on the Internet.
Note: V this moment connection via a cloud server is undergoing a testing phase. Therefore, server interruptions are possible.
Step 1. Create a GUI project
Step 5. Configure ESP8266
The ESP8266 module needs to be configured. Your module may already have the required default settings, but it's best to check it out.
What you need to check:
- The module has a firmware with support for AT commands of the version not lower than v0.40;
- The module is configured for a speed of 115200.
Step 6.Connect ESP8266 to Arduino Uno
Connect ESP8266 to Arduino Uno as shown below. Note that the RX-TX pins are cross-connected.
Since the signal levels of the ESP8266 are 3.3V and the Arduino is 5V, you need to use a resistive voltage divider to convert the signal level.

Step 7. Upload the sketch to the Arduino.
The sketch is uploaded to the Arduino in the usual way. However, due to the fact that the ESP8266 module is connected to pins 0 and 1, programming becomes impossible. The compiler will show an error.
Before programming, disconnect the wires going to the ESP8266 from pins 0 and 1. Perform programming. Then put the contacts back in place. Press the Arduino reset button.
Note: The first sign that the programming was successful is the blinking of the blue LED on the ESP8266 module immediately after the reset. Blinking blue LED means data exchange between Arduino and ESP8266. In these half seconds, the Arduino configures the ESP8266 to connect to the access point. After a while, the LED will blink again, which means an attempt to register on the RemoteXY cloud server.
Step 8. Connect from the mobile application.
Check ESP8266 power supply
It is also possible that your ESP8266 does not have enough power from the power supply. Some Arduino boards have a weak 3.3V voltage regulator that is not capable of delivering 200-300mA in peak conditions. In this case, you will also see a break in the command sequence in the Serial Monitor.
Vadim Kolesnik, Tiraspol
Exciting, easy and fast development of full-featured IoT devices on Arduino using the cloud service
General information
myDevices develops software and applications for the Internet of Things (IoT) and is a division of Avanquest. myDevices Cayenne is the first drag-and-drop application and cloud service for simplified development of IoT projects on the Raspberry Pi.
On the Radiolotsman portal I recently published, in which I tried to reveal the main advantages and capabilities of the system when working on a single-board computer Raspberry Pi (RPi). But the Cayenne project is constantly evolving, the developers, relying on the wishes of users, are gradually adding new functions, eliminating shortcomings and errors.
The development of IoT devices on Arduino and Raspberry Pi is fundamentally different when working with the Cayenne. With regard to the Raspberry Pi, the Cayenne platform can be considered a visual development environment: we physically connect various peripherals to the Raspberry Pi board and then work only in the Cayenne online environment (setting up widgets, data processing, writing automation algorithms).
With regard to Arduino, the Cayenne dashboard (dashboard) is just a set of widgets and controls that visualize received data from sensors and transmit user data to control one or another actuator. Directly working with sensors, actuators, additional peripherals (for example, a display, a second keyboard), processing of the automation conditions is assigned to the microcontroller. In other words, it all comes down to standard Arduino device development; the user writes the program code himself, but with the integration of the flexible IoT functions of the Cayenne into the project. This is, in my opinion, the main advantage of the Cayenne: you can connect any sensors and actuators to the system, not limited to the list of supported peripherals.
User interface and preparation for work
As for the system user interface, its settings, control methods and widgets on the dashboard, all this remains similar to the system on the Raspberry Pi, of course, with the exception of certain unique elements inherent in the latter (for example, remote desktop, memory status, processor load). Therefore, to understand the basics of working with the system, I recommend reading the articles. All information in the article is relevant both for the web interface of the system and for the interface of the mobile application. The article also contains a list of supported peripherals.
To develop an IoT device or application, we need:
- Have your own account on the Cayenne service (you can use an existing one);
- Install the Arduino IDE;
- Add Cayenne Function Library to Arduino IDE;
- Configure Arduino IDE: select the board and COM port to which it is connected;
- Connect an Ethernet Shield or Wi-Fi Shield expansion board to the Arduino (or use an Arduino board with an integrated network interface).
I think the process of installing the Arduino IDE, as well as the choice of board and port, is self-explanatory, and we will move on to the main one.
The Cayenne library for Arduino can be easily and quickly installed using the library manager (Figure 2).
After installing the library, we can use it in our applications, and a new folder named Cayenne will appear in the sketch examples section. In my opinion, these examples do not fully understand how to work with the system, but, nevertheless, they are worth studying, and also, let me remind you that there is a huge section of documentation on the Cayenne system. In general, this library is a set of sketches that simplify the connection and data exchange between sensors / actuators and the cloud service.
After completing the preparatory operations, setting up the development environment and connecting the Ethernet Shield expansion board, you can start developing the IoT device.
We connect the Arduino board to the computer via USB, connect the LAN cable to the Ethernet Shield. In the Internet browser, we log into the Cayenne account, and in the control panel we add a new device - the Arduino. Next, we select the type of board, the method of connecting to the Internet (there are quite a few options), pay attention to the unique authorization key for our device and wait for the Arduino board to be connected to the Cayenne (Figure 3).
A new unique key is generated for each new device; later on it can be found in the device (board) settings.
As soon as you choose the method of connecting to the network, a window will appear with the source code of the microcontroller program. This is the minimum required to connect the device to the cloud service. Please note that your authorization key is already indicated in the program text and a library is connected that corresponds to the selected method of connecting to the network (Figure 4). Copy this code into the Arduino IDE, compile and upload to the board. If everything has been configured correctly, a new active device and dashboard will appear in the Cayenne's control panel, where you can now add widgets and controls. Moreover, already at this stage, you can remotely control the available digital and analog ports of the Arduino without writing a single line of code - add a widget button on the dashboard, specify the port type (digital), its name on the board and save the widget. Now, by clicking on the button in the browser, you will change the logical state of the port. It is also simple, by adding the appropriate widgets, you can control the PWM outputs, receive "raw" data from the analog inputs of the Arduino, and monitor the status of the digital inputs.
Development of a device using a specific example
Now I will talk about additional features and functions of the system. As an example, I put together a simple system that included:
- Arduino Uno board;
- Expansion board Ethernet Shield on the WIZnet W5100 controller;
- DS18B20 temperature sensor;
- Photoresistor;
- Thermistor;
- Several LEDs;
- OLED display on SSD1306 controller.
The schematic diagram of connecting sensors and LEDs to the Arduino is shown in Figure 5.
Let me remind you that most of the questions related to connecting various sensors and actuators can be found in the documentation section.
I think that there will be no questions about connecting LEDs, a digital temperature sensor and an OLED display. The analog light and temperature sensors are connected to the analog inputs according to the resistive divider circuit. In this case, for the thermistor circuit, it is necessary to know the exact resistance of the resistor R6, this value will be used in the source code in the calculations.
After connecting the elements indicated in the diagram, we will write an Arduino sketch, and then install the necessary widgets on the Cayenne dashboard. At the moment, a minimal sketch has already been loaded into the Arduino board and the board is defined in the Cayenne dashboard. As I said above, at this stage we can add widgets to control the LEDs D1, D2, as well as receive "raw" data from the analog inputs, to which the thermistor and photoresistor are connected (Figures 6, 7).
Without writing a single line of Arduino code, we already have a simple remote control and monitoring system (Figure 8).
To use digital temperature sensors, thermistor, PWM, for example, to control the D2 LED, you will need to add a minimum sketch. First, let's define the required libraries.
#include< CayenneEthernet.h>// use the Ethernet Shield expansion board
#include< CayenneTemperature.h>// functions for converting data from a thermistor
#include< OneWire.h>// functions for working with the 1-Wire bus
#include< DallasTemperature.h>// functions for working with digital temperature sensors
#include< Arduino.h>// standard constants and language variables Arduino
#include< U8x8lib.h>// library for working with OLED display in text mode
#include< Wire.h>// support for hardware interface I 2 C
#define VIRTUAL_PIN_1 V0 // virtual channel for the DS18B20 sensor
#define VIRTUAL_PIN_2 V1 // - for thermistor
#define VIRTUAL_PIN_3 V2 // - for LED D2, we will receive data on the PWM value through this channel
#define LED2_PWM 6 // real Arduino port to which LED D2 is connected
Virtual circuits are not digital or analog I / O ports. When reading the analog inputs directly, the user receives data from the 10-bit ADC of the microcontroller. The values returned by the ADC are in the range 0 ... 1023 and are proportional to the voltage at this input. In other words, if you connect a temperature sensor to the analog input of the Arduino, you will not get a temperature value, additional conversions and mathematical calculations are required to convert the voltage - temperature.
Virtual channels are designed to simplify data conversion, formatting and processing. It is a fairly powerful tool that is used to communicate between Arduino and Cayenne, and to easily format data so that it can be easily visualized on the dashboard. Remember, virtual links have no physical parameters.
Cayenne.virtualWrite (V1, 123) // transfer of integer value over virtual link V1
Cayenne.virtualWrite (V2, 12.34) // transmit floating point values over virtual channel V2
For example, after reading an analog temperature sensor, we can convert the value to degrees Celsius with one line of code and transfer this value to the dashboard. In addition, virtual channels allow you to control any peripherals connected to the analog or digital ports of the Arduino, without the need to write any additional code. Currently, two types of data are supported, with which virtual channels work: integer (integer) and floating point (float). In the future, support for character types and arrays is planned. On the dashboard, via a virtual channel, you can connect and configure a custom widget for visualization according to the type of received data.
// Digital port to which DS18B20 sensors will be connected. Do not use Arduino ports 0 and 1 (Rx / Tx).
const int ds18b20_Pin = 2;
// Analog port to which the thermistor is connected.
const int thermistorPin = 0;
// Resistance of a fixed resistor (9 kOhm), connected in series with the thermistor to ground.
const float resistance = 9000;
// Cayenne authorization key. You can find it in the Cayenne web interface under the device settings tab.
char token = "640c9oedi4";
OneWire oneWire (ds18b20_Pin);
DallasTemperature sensors (& oneWire);
Thermistor thermistor (thermistorPin, resistance);
At your discretion, at almost any stage, you can add debug output via the serial port to the source code.
In the initialization section, we will specify the following functions:
void setup ()
{
Cayenne.begin (token); // connect to the Cayenne with the specified authorization key
sensors.begin (); // initialization of digital temperature sensors
u8x8.begin (); // initialization and output of text information to the OLED display
u8x8.setPowerSave (0);
u8x8.setFont (u8x8_font_torussansbold8_r);
u8x8.drawString (2.0, "Cayenne Test");
u8x8.drawString (1,2, "System Running");
}
In the main loop of the program, we will have only one function:
void loop ()
{
Cayenne.run ();
}
All communication with the Cayenne dashboard is carried out using several functions:
CAYENNE_IN (Virtual_Pin) - defines a function that is called when the device receives updated data over the virtual link from the Cayenne server.
CAYENNE_OUT (Virtual_Pin) - defines a function that is called when it is required to send updated data from the device to the Cayenne server.
CAYENNE_CONNECTED () - the function is executed every time the device connects to the Cayenne server. In general, this function is used for synchronization.
Cayenne.syncAll () - a function that generates a request to the Cayenne server to synchronize all widgets. The analog and digital ports of the Arduino will be restored and each virtual channel will generate a CAYENNE_IN event.
Cayenne.syncVirtual (Virtual_Pin) - synchronization on the specified virtual channel. As a result of execution, the corresponding CAYENNE_IN handler is called.
In my circuit LED D2 is connected to digital port D6 of Arduino. This port has an alternative function, PWM output. To implement remote control of these LEDs in PWM mode, we need to receive data from the dashboard. To do this, we will write a function that will be executed when updating data via the V2 virtual channel:
CAYENNE_IN (V2)
{
// get data about the PWM value from the dashboard (slider)
int PWMValue = getValue.asInt (); // value in the range 0 - 1023
analogWrite (LED2_PWM, PWMValue / 4); // for PWM, the value must be in the range 0 - 255
}
Now on the dashboard, add the "Slider" widget with the name LED_2 PWM (PWM), and in its settings we will indicate that it works through virtual channel 2 (Figure 9).
Once you've uploaded the sketch to the board, you can use the slider on the Cayenne dashboard to control the brightness of the D2 LED. Everything is very fast and simple ...
CAYENNE_OUT (V0)
{
sensors.requestTemperatures (); // get data from digital temperature sensors.
// transform the data from the thermistor, format it and send it to the server via the virtual channel V1
Cayenne.celsiusWrite (V1, thermistor.getCelsius ());
// format the data from the digital temperature sensor and send it to the server via the virtual channel V0
Cayenne.celsiusWrite (V0, sensors.getTempCByIndex (0));
}
Due to the use of virtual channels, the entire function code for transferring completely different data consists of two lines. On the dashboard, add widgets for the DS18B20 temperature sensor and thermistor (they are ready-made in the control panel). We set up the widgets, load the sketch into the board, and ... you're done (Figures 10a, 10b)!
|
||||
| Figure 10. | Cayenne dashboard view for Arduino control (temperature sensors, illumination, LED control D1, PWM control LED D2): |
|||


Remember that these same control and monitoring functions are available in mobile application... All widgets installed in the web interface can be seen in the mobile application (Figure 10b).
Appearance device with connected peripherals is shown in Figure 11.
The ability to develop wireless IoT devices
You may have noticed that in some screenshots you can see my control panel, where, in addition to the Arduino Uno and Raspberry Pi, there is a device named ESP8266-1. That's right, it's additional device on the well-known ESP-12 module (ESP8266), which is connected to the Cayenne server via Wi-Fi and has its own separate dashboard (Figures 12a, 12b). Such a device is a wireless monitoring and control unit. The module is connected to two LEDs (one is connected to the PWM output of the ESP8266) and a DS18B20 digital temperature sensor.
|
||||
| Figure 12. | Dashboard for wireless device on ESP-12 module: a) web interface, b) mobile application. |
|||


With the support of the ESP8266 core in the Arduino IDE, the implementation of wireless IoT devices with the Cayenne is no different from developing with the Arduino. In other words, any module on the ESP8266 chip is an Arduino board with a Wi-Fi interface. For this Wi-Fi module, we write a similar sketch, use the same libraries to work with sensors, digital and analog input / output ports are available to us. This module has accumulated a huge amount of information, various documentation and developments.
The connection diagram of the peripherals to the ESP8266 module is shown in Figure 13. I used a separate ESP-12 module without a riser with an integrated power circuit and a programming interface, which greatly complicated the work at the stage of downloading the sketch. The best option will use a ready-made module like nodeMCU v3, which is made in the Arduino form factor and has an interface matching circuit. (Highly important point when programming the module). The external view of the module with connected LEDs and a temperature sensor is shown in Figure 14.
As for connecting to the Cayenne server and exchanging data, everything here is like for Arduino. All concepts of virtual circuits are preserved, the same functions are used, and a unique authorization key is also used. The only difference is at the stage of connecting the module to the Internet.
To connect the device on the ESP8266 module, we proceed in the same way as adding any Arduino board and reach the stage of waiting for the device to be connected to the Cayenne, where a minimal sketch will be generated.
We need to change this sketch. We include the following libraries:
#include "CayenneDefines.h" // Cayenne constants and variables
#include "BlynkSimpleEsp8266.h" // functions for working with ESP8266
#include "CayenneWiFiClient.h" // functions for implementing a Wi-Fi client
char token = "3yj62u9ogi";
char ssid = "Network_SSID"; // SSID and password for your Wi-Fi network.
char password = "Network_Password";
In the initialization section, add the line:
Cayenne.begin (token, ssid, password);
We compile, upload to the module (takes longer than uploading to the Arduino board), wait for the connection and activation of the new device in the Cayenne dashboard. Next, everything is like for Arduino: we add functions for working with sensors and I / O ports, add widgets to the dashboard. Simply amazing, isn't it ?!
Conclusion
Based on the results of working with the Cayenne on the Raspberry Pi and Arduino, I can definitely say that the Raspberry Pi should not be used for developing IoT devices, even with the Cayenne. The same can not be said about the Arduino - despite the limited resources, lack of multitasking, low processing power (although this is a controversial point, given the characteristics of the new Arduino boards on ARM processors), it is ideal for developing simple IoT devices and home automation systems.
In addition, in this context, the main advantage of the Arduino, as I noted above, is the ability to independently develop a device, study circuitry, write code, develop programming skills, despite the arguments of professional programmers that you cannot learn to program with Arduino. Perhaps, but ... In relation to the Arduino, the Cayenne platform only provides a graphical user interface and some simplifications in data processing. You must develop everything else yourself, including the primary processing of data from sensors, an event processing subsystem, as well as conditions and automation algorithms. Now add to Arduino the simplicity of developing wireless IoT devices on the ESP8266 Wi-Fi module and already official support (albeit not complete) of the newest ESP32 chip, which has rich peripherals on board, and you have great opportunities for developing fundamentally new devices and attracting this process is not only for amateurs, but also for professionals.
At the time of writing, Cayenne did not announce official support for modules based on the ESP8266 chip. Initially, this is the merit of the community - amateurs and engineers who work or use the Arduino IDE and know about the support for the ESP8266, using the Cayenne libraries were able to connect and use the ESP8266. But even at that time, it was already possible to get acquainted with the Cayenne community forums. big amount various projects of wireless IoT devices.
After a long time testing my devices on Arduino and ESP8266, I can say that the latter works very stable. The somewhat low reliability of the Arduino with Ethernet Shield is due to known problem freezing of the W5100 controller, however, there are several ways to solve it, both hardware and software. I can assume this does not apply to Arduino boards with integrated Ethernet or Wi-Fi.
It hasn't been a long time since the Raspberry Pi and Cayenne article was written, but there are a lot more new features and supported peripherals. In addition to having a huge selection of various expansion boards, sensors and actuators, corresponding libraries, projects and examples for Arduino, now Cayenne users have access to LoRa devices, networks and services, support libraries network protocol MQTT for Arduino, C, C ++, mBed, libraries for working with the mosquito MQTT broker. Definitely, for the development of IoT devices and home automation systems on Arduino, I would recommend the Cayenne services.
Previously invented a wheel to build monitoring Arduino devices.
It was interesting.
/ * - New project - This source code of graphical user interface has been generated automatically by RemoteXY editor. To compile this code using RemoteXY library 2.3.5 or later version download by link http://remotexy.com/en/library/ To connect using RemoteXY mobile app by link http://remotexy.com/en/download/ - for ANDROID 4.3.1 or later version; - for iOS 1.3.5 or later version; This source code is free software; you can redistribute it and / or modify it under the terms of the GNU Lesser General Public License as published by the Free Software Foundation; either version 2.1 of the License, or (at your option) any later version. * / //////////////////////////////////////////// // RemoteXY include library // /////////////////////////////////////////// / // determining the connection mode and connecting the RemoteXY library #define REMOTEXY_MODE__ESP8266_HARDSERIAL_CLOUD #include
We use a sandwich from boards.
Suddenly, everything worked right away:

An hour passed from the moment the RemoteXY cloud service was discovered to the photo above.
Features of working with RemoteXY.
1. Everything is very simple. It's good in its own way. Blynk and Cayenne, for example, are unlikely to be figured out from scratch in an hour. To use, for example, "KaScada Cloud" you need to buy a special one.
2. There is no processing and storage of data on the server side: there is no connection with the board - the application hangs "No connection".
3. Only 5 design elements are free, but PRO app costs no more than half a day of spent time.
4. It is possible from one application to communicate with the board both through the cloud server and directly. The truth is not at the same time, of course. And it is impossible to switch quickly - you need to change the sketch in the board. It is also possible to communicate between the smartphone and the board via Bluetooth and USB.


 switch")


 If you change the processor, what will change in the computer")


 Cobra")


