Editor's Choice
How to install Windows 10 from a flash drive - step-by-step instruction+ a few tips
The way to install Windows 10 from a flash drive is not difficult for an experienced user of Microsoft operating systems.
Those who install such a platform for the first time or have previously encountered distributions that are already ready and installed on disk should learn a few nuances - from creating bootable media to features.
Content:
Create bootable USB media
For creating bootable flash drive from the operating room Windows system 10 the user will need a drive with a capacity of at least 8 GB - the size of the recorded files, depending on the selected platform option, can reach 6.5 GB.
You should also provide for the presence on where Windows will be installed, at least 16 GB of space - although, taking into account updates and system programs, it is desirable to leave from 40 to 60 GB.
For fast system operation, it is best if it is installed on a solid-state SSD drive- this option will cost more, so most applications (including games) should be installed on.
Should know : For installation, they usually free or create an entire disk partition. Installation into an already existing and even filled volume is not prohibited, but it is not recommended either, as it can create unnecessary problems when reinstalling the system.
The next step in creating a flash drive with the system is to download the appropriate image from the official Microsoft website (for example, a 32-bit or 64-bit version of the system).
It is undesirable to install the system from extraneous resources- in addition to the fact that such platforms are unlicensed, you can also download malicious code along with them.
After that, you can download and install a disc burning program from an image - for example, (the utility is paid, but it will work during a trial period of 30 days).

The next steps to create a USB flash drive with Windows are as follows:
- A flash drive is connected to the computer to which the system image is downloaded;
- is running UltraISO software and the button is pressed "Trial Period";

- In the menu, the section "File" and the command "Open" are selected, after which the image with the system is located and opened;

- In the section, the command for recording a hard disk image is selected;
- In the window that opens, it is indicated on which media the files will be written (if the flash drive is installed alone, the determination occurs automatically);

- The "Record" button is pressed.
Before recording, the utility may request permission to format the flash drive.
The file transfer process takes several minutes.
After the recording is completed, the utility should be closed (if the installation will be performed on a different PC than the one on which the recording was made) and proceed to the next steps.
Installing boot from a USB flash drive in BIOS
Before installing the system, in most cases, you need to change the way the system boots - instead of the default hard drive (or solid state drive), you will need to specify a USB flash drive as a boot disk.
To do this, you need to go to the BIOS interface of a computer or laptop and change its settings.
To go to the BIOS, you need to press the button while the computer is booting up. certain key- most often it is indicated on the screen.
Each computer and, especially, a laptop has its own way to enter - in most cases it is F2 or DEL, but sometimes it happens F1, F8, F10 or Esc.

Should know : The key depends on the model motherboard. If the user was not able to determine what exactly to press for , several options should be checked. As a rule, this is a button from the top row of the keyboard.
After entering the interface menu, it is required do the following:
- Using the arrows and the Enter key, find the Boot tab;
- Find and open item Hard Disk Drives;

- Select the first line, where the hard drive is usually already indicated, press Enter and select the flash drive in the drop-down menu;
- Return to the previous window and find the item or Hard Disk Boot Priority;

- The USB flash drive is set as the primary drive on boot.
Now you can exit the menu, saving the changes made (key F10) and restart the computer.
From this moment the installation starts operating system.
Important : In some interfaces (especially if it is not BIOS, but UEFI), the names and arrangement of sections and menu items will differ. But, in general, the steps to change the boot disk will be about the same.

OS installation start
If all the previous steps (burning a flash drive and changing the boot method) were performed correctly, the operating system starts automatically installing on the rebooted computer.
The evidence of the start of the download is the Windows 10 logo on the screen.
First stages
The installation of the operating system begins with a prompt for choosing a language, time format, and a method for entering information from the keyboard. In Russian-language versions of the operating system, all three items are set to Russian by default.

Next installation steps should be like this:
- The "Install" button is pressed and the system restore item is selected;
- Enter activation key operating system (it is not necessary to do it right away - sometimes the item can be skipped after installation);
- Select the edition of the operating system (at the discretion of the user, if there is no license yet - or the one for which the key was purchased);

- Read the license agreement, agree to its terms and click "Next";

- Select installation type operating system.

There are several options for installing Windows.
The user can update the software by restoring system files and retaining all parameters, programs and settings - while the old platform remains in the Windows.old folder.
The advantage of this method is that there is no need to reconfigure web browsers and other useful applications, reinstall utilities and games.
Another way- a custom installation of the system, which allows you to get a "clean" Windows on your computer, without the remaining system files.
In this case, the user can perform partitioning again or use already created disks.
The result of this process is the appearance on the desktop screen of a “clean” operating system that requires some more time to configure.
Version 1703
For version 1703, which was released less than a year ago, there are some differences in the final steps of Windows Setup.
The setup is done in a few steps:
- The region is selected from the proposed list - the functionality of the system as a whole depends on this, and individual applications. If desired, the settings can be changed later.
- Select the primary and secondary (optional) keyboard layouts and select the key combination to switch between them. By default, English is selected as the primary language.

- Choose a setup method (for most users, the "Personal use" option is fine).
- Configure the settings for the main account - in this case, in the same way as for the 1607th version, you must either connect to the network and log into your account, or enter temporary data offline, which can be changed later.
- Enter a custom password (or select Next to set it later).
- Adjust privacy settings by selecting the necessary items.
After that, the user just needs to wait until the system is installed and complete all the necessary settings.
The same steps are required for the final step of installing build 1709.
System Setup
After the system is installed, you should configure it - including downloading the drivers for all connected and built-in devices (including sound, network and,).
Some of these control programs are automatically installed by the system, the rest are installed manually.
It is advisable to do it in the following way:
- for laptops- from the websites of the manufacturer of the model in the support section;
- for desktop PCs- from the resources of the manufacturer of the motherboard installed on it;
- for video cards– from the web pages of AMD or Nvidia.
Drivers should not be installed from third-party resources or using programs like .
At the same time, control programs often turn out to be outdated, and sometimes viruses are downloaded along with them.
Important : After all control programs are installed and the operating system is activated, it is recommended to create a system recovery image. This will help the next time you install the system not quite from scratch.
Now you can install antivirus program and the minimum package of applications required by the user.
Possible installation problems
When installing an operating system from a USB drive, the user may encounter a number of problems.
Sometimes a flash drive is simply not perceived by a computer or laptop, and the reason is an incorrectly selected recording format.
In order to guarantee the compatibility of the drive with the BIOS of the computer, when using the UltraISO utility, you should not select USB-HDD +, but USB-HDD + v2.
The flash drive may not be readable for other reasons. For example, due to a malfunction USB port or problems with the drive itself. In the first case, the issue is solved by using a different connector, in the second - by writing to a new flash drive.
Faced with the inability to complete the installation of the operating system, sometimes owners of optical drives connected. The problem is stopping the loading of operating system files at a level of 25-84% - while the error message 0xC1900101-0x20004 appears on the screen. The problem is solved simply - just disconnect the cable from the drive, returning it to its place after installation.

In the list of installation problems, you can find error C1900101-20017.
It occurs only when you try to install the system on a computer with overclocked Pentium processor G3258. the error is eliminated by disabling overclocking or one of the CPU cores.
Often an error appears on PCs or laptops with UEFI boot enabled. To solve the problem, it is recommended to change the BIOS settings. This is easy to do - just go to the BIOS interface when the system boots, find the parameter with the name and change its value to "Disabled".
Summarizing
Installing from a flash drive is the fastest, and sometimes the only (many modern PCs and laptops no longer come with a disk drive) way to get a modern operating system.
This does not require much time and knowledge.
Depending on the performance of the computer, all steps will take no more than 3 hours, and a novice user will receive some experience during installation. software Microsoft.
We present to your attention detailed instructions for installing clean Windows 10,. We downloaded the ISO image of the system and burned it to the installation USB flash drive. Read how to do it. Burning to a CD is similar.
Preparing for installation
- Insert a USB flash drive or disk with the system into the USB input.
- Reboot your computer (it's better to reboot, not turn it off/on).
- During startup, enter the BIOS by repeatedly pressing the Del or F2 button (on different devices there may be different login buttons, usually they are indicated when starting a PC or laptop). Now you need to select the drive from which the computer will start. Or use the more convenient boot menu. This menu is also called special button at system startup.
Now that you have booted from the drive containing the Windows 10 distribution, it will say "Press any key to boot from CD ort DVD (USB)". Press any key and the installation of the new OS will begin.
Step-by-step instructions for installing clean Windows 10 from a USB flash drive:
- The first window that opens after the installation starts is the choice of language options.

2. Click "Install".

3. You can activate Windows 10 after installation.

4. Choose the version: "Pro" or "Home". You have chosen the first one.


6. Select the installation type "Custom".

7. We need to break HDD into two sections. First, we will install the system. To do this, click "Create".

8. Select the size of the first disk (by default, disk "C"). We recommend setting at least 50 GB. Click "Apply".

9. The first partition (disk "C") is created. In parallel, the system will reserve an additional 500 MB for its needs.

10. Select "Unallocated disk space" and click "Create". After that, a second partition will be created (disk "E"), the volume of which will be all the remaining space on the disk.

11. Click "Apply".

12. Now select the first drive (drive "C"), on which Windows 10 will be installed. Click "Next".

13. The installation process begins.

14. When completed, the parameter setting window will appear.

15. We put all the sliders in the "Disabled" position, click "Next".

16. Another window for setting parameters. We do the same as in the previous one, click "Next".

17. Third window with settings.

18. We are waiting a little ...

19. Choose who owns the computer.

20. The next step is an account. You can enter data from an existing one or create a new one. You can skip this step. We'll show you how to create a new Microsoft account.

21. Create a mailbox.


22. Remove unnecessary ticks.

23. You can set a "PIN code" or skip this step.


25. Welcome window.

26. The system is installed!

Now it remains to configure your Windows 10, disable all unnecessary features, optimize, install antivirus, browsers, etc. Read about all this in the "Optimization and cleaning" section.
Hello!
Despite the fact that many users criticize Windows 10, nevertheless, it is gaining popularity. New computers and laptops - everything is so often with Windows 10 (and drivers for old equipment are no longer produced, which means that over time, we will all be on the new OS 👌). For example, I have already switched to this OS ...
In principle, by and large, installing Windows 10 is not much different from installing previous Windows 7, 8 (and even XP). The algorithm of actions is the same: create bootable media, configure the BIOS (UEFI) accordingly, run the installer and act according to its recommendations ...
In this article, I will consider step by step how and what to do, what to create in what order to install new Windows 10 to your PC/laptop. The instruction, first of all, is aimed at novice users, so that after reading it, anyone can install an OS for themselves.
STEP 1: create bootable media
The first and most important thing you need for installation is bootable media (in our case, it will be a USB flash drive). In general, you can take a regular DVD instead. But, firstly, not all PCs / laptops have a DVD drive. (compared to USB port), secondly, installation is faster from a flash drive, well, and thirdly, a flash drive is simpler and easier to carry with you.
The choice is obvious!
What flash drive do you need? the most common, at least 4 GB in size (preferably 8 GB). By the way, you can use flash drives that support USB 3.0, with them the installation will be much faster (they are marked in blue).

The easiest way to prepare bootable media is to use the special. tool from Microsoft (on the official website). After downloading and running this utility, it will quickly and easily prepare a bootable USB flash drive. (automatically downloads the system you need from the Microsoft server and writes it to a USB flash drive). See screenshot below.

Download ISO or Prepare Flash Drive Directly / Tool by Microsoft
In order not to describe each step in detail here (on how to create such media), I recommend that you read my recent article (link to it below).
Create a bootable USB flash drive with Windows 10 -
STEP 2: Keep a copy of your drivers and important documents
This advice applies to those users who already have Windows installed (and who want to replace / reinstall it).
Many instructions on this topic do not contain this council, but I still recommend that you save all your drivers in a backup (so that in which case you can restore all your files and drivers).
By the way, in addition to the drivers, be sure to save all your important documents to a flash drive / external hard drive / to the cloud. When installing the OS - anything can happen ...
To help!
1) OneDrive: what is it? Automatic backup of my documents in the cloud! -
2) How to create a backup (backup copy) of drivers -
STEP 3: BIOS setup (UEFI) to boot from a flash drive or use the Boot Menu
In order to boot from the installation flash drive, you can go in two ways: use the Boot Menu (approx. : boot menu) – i.e. selection of bootable media from special. list, without changing the BIOS settings; or configure the BIOS - i.e. change the boot queue in which to add the flash drive (usually, this line in the BIOS is called as USB-HDD).
Important! Before BIOS setup(and entering the Boot Menu) - the installation flash drive must be connected to the USB port.

STEP 4: start installation
If the flash drive was written correctly and the BIOS (UEFI) is configured correctly - after rebooting the PC / laptop, you should see the first welcome window - language selection (installation start). We select "Russian" (usually, it is indicated automatically) and press the "Next" button.

In the next step, the Windows 10 installer will ask you to choose one of the actions: either restore the system or install it. In our case, we click on the button "Install" .


In the next step, I recommend choosing "Custom Install" and manually set all parameters. Despite Windows warnings that this is only recommended advanced users- I can say that there is nothing complicated there ✌...

STEP 5: partitioning the disk!
Perhaps this is one of the most important and crucial steps when installing the OS. (so I took it to separate part articles).
In this step, you need to specify where you want to install Windows 10 - i.e. choose the right one hard section disk (or generally SSD).
Important! When formatting, creating and deleting partitions, all information on the hard drive will be deleted. That is why the second step after creating a flash drive - I recommended to make a backup copy of important data (or install the OS on the disk on which there are no necessary documents).

Advice!
- one partition: make it 50÷100 GB in size and install Windows OS there;
- second partition: all the remaining disk space, and use it for files: music, documents, movies, etc.
If you suddenly have to reinstall Windows, then you simply format the first partition on the disk and install a new OS on it, and all your files on the second partition will remain intact.
Generally, to start installation: create a partition on your hard drive (Create button), then select it to install and click the "Next" button. Basically nothing complicated...
When all the files are copied to your disk, unpacked, etc., the installer will start rebooting the computer. So that after rebooting the PC does not start the installation again, after rebooting, it is better to remove the USB flash drive from the USB port - it will not be needed further, because. installation will come from your disk.

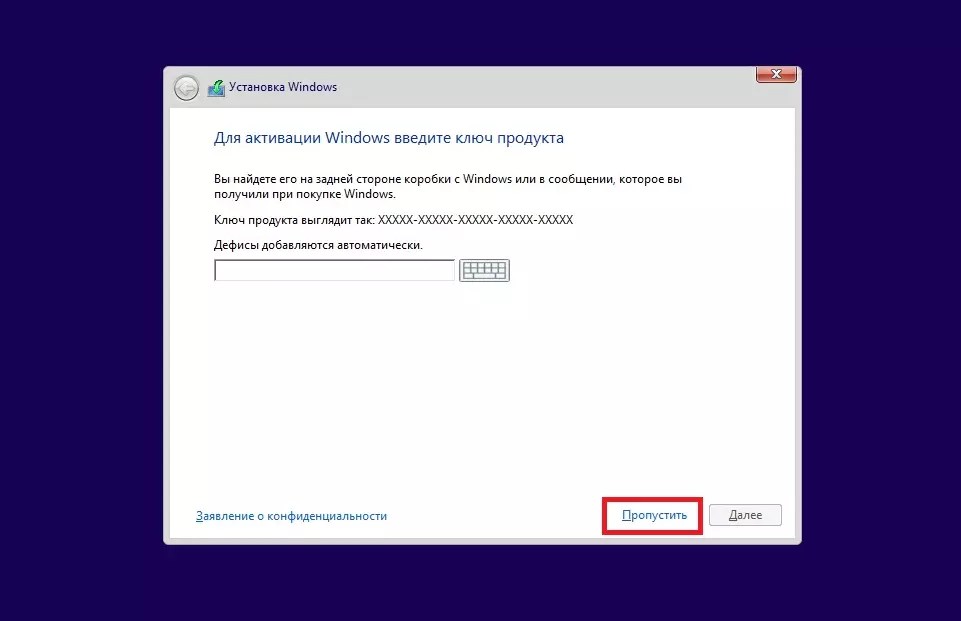
The next step in the installation is the introduction of the product key. If there is, enter it; if not, you can do it later - just click the button "Do Later" (see arrow on the screenshot below).

In the next step, Windows will prompt you to configure your voice input, keyboard input, your PC's location, protection from malicious web content, and more.
In my opinion, it is convenient to configure all this in the OS itself by going to the panel Windows controls. Therefore, I recommend pressing the button "Use default settings" .

Use default settings
Login account I recommend that you set it in Latin (the fact is that this will save you from various errors in programs and games that do not always work correctly with Russian characters found in the paths to your documents).
The password is at your discretion (if there are children in the house, I recommend setting it).

The last step in installing Windows is to wait for the final system configuration. Usually, at this time, the OS displays a window: (in fact, it can hang for 5 minutes, or all 25!). This is especially true for old computers on which they decided to install a new OS.
By the way, many users at this moment mistakenly believe that the installation is frozen and restart the PC - this is not necessary.

Completing the installation
STEP 7: installation is complete, but there are still 2 important steps left!
Actually, this instruction is completed. Then you can proceed with your usual activities, and I will allow myself to give a couple more recommendations in the last step...

Windows 10 installed! The first icons appeared on the desktop...
Here is such a provocative headline ✌. The first thing to advise is to install and update drivers for all your hardware (you can from backup, which I advised you to do in one of the steps of this instruction), or you can use the programs from the article, the link to which is given below.
Note!
Many do not update drivers after installing Windows 10 - after all, it still works (this was earlier, about 15 years ago, after installing Windows 2000/XP, there was no video driver in the system, and the image that the eyes instantly got tired - so everyone immediately installed the driver (without reminders)).
Now the OS has "wised up" and install drivers automatically for most equipment. However, selected Windows drivers- leave much to be desired. Later, you often have to deal with problems in games, with Wi-Fi setup, Bluetooth, in audio and video programs, etc.
Microsoft has done everything to ensure that as many users as possible switch to Windows 10: sent free update, made the most simple creation bootable flash drive - how to burn it, .
It remains to simplify the installation of the system from this very flash drive, although even now the installation does not cause any special problems. But certain underwater rocks there are, and since you got here, it means that you want to avoid them and put the "ten" correctly and beautifully.
Preparing your computer
In fact, no special preparation is required. At first, experts recommended that you first upgrade to Windows 10 from the previous system, and then perform a clean installation. Now there is no such need: you can immediately put the "top ten". The main thing is to know the license key - we all use official versions, truth?
Typically, user data is stored on a separate partition of the drive and remains intact when you reinstall the system on drive C. If you are not sure that important files will remain safe, transfer them to removable media or another volume hard drive, which will definitely not participate in Windows installations. To make it clear, the disk that has the “Windows” folder will be overwritten. Be sure to remember its size - during the installation process, this information will be useful to determine the desired partition.
After saving the files, the last step remains before installing the system - installing a boot from a USB flash drive. You can do this while restarting your computer in two ways:
- Go into the BIOS and set USB to the first place in the boot priority section. After completing the installation of Windows, do not forget to return the original configuration, with boot priority from the hard disk.
- Call the Boot Menu and select the USB flash drive with the recorded Windows distribution as the boot source.
The second way is faster and more convenient. You simply run the installation from a USB flash drive, and then work calmly with the system, without worrying about whether the correct configuration is set in the BIOS. There is nothing wrong with the BIOS, but if you can do without entering it, you should use this option.
After booting from a flash drive, a black screen will appear with the phrase "Press any key ...". Well, let's follow the advice and press any button on the keyboard to launch the installation program.
System installation
The installation starts with a prompt to select the language, currency and time format, keyboard layout. Put "Russian" everywhere and click "Next". Naturally, no one forbids choosing any other parameters - the system is preinstalled a large number of language packs.
The next window shows a large "Install" button and a small link to the system recovery tools. Now you need to click "Install", but the restore may come in handy in the future, so remember where this link is.
The installation wizard will then prompt you to activate Windows. If you bought a ten, the license key will be written inside the box or in a message on email sent after purchasing a digital copy. If you are reinstalling the system (switching from a licensed "seven" or "eight") or performing a clean installation after a preliminary upgrade to the "ten", then you do not need to enter any key: Windows will be activated automatically based on the existing license.
You can not enter the key at all and use the non-activated version. While this does not bring any special problems, except that some functions do not work: cannot be personalized appearance, system updates do not come.
The next step is to choose an edition. This question may not appear if the installer automatically detected the edition by license key. If he failed to do this, help and select the version of the system that was on the computer earlier, that is, there is a license for it. If there was no license, or you are ready to refuse it, you can choose any option. Then the text will appear license agreement. Read the terms and check the box that you accept them. Only after that you can continue to install Windows 10 from a USB flash drive.
- Update. Files, parameters, installed software are saved, and former system is packed into the Windows.old folder.
- Custom installation. Clean installation with saving (or without saving) files. You can select a partition for the system, format the disk to completely remove the previous version of Windows, if any.
We are not interested in a regular update, because it could be done without creating a bootable USB flash drive. Since we have started installing the "top ten", we will not do half measures, and we will carry out a clean installation with formatting or erasing and creating volumes on the media.
After clicking on the “Custom” option, a page with disk partitions will open. On previously used drives, you will see more volumes than were displayed in the explorer - get acquainted, this system partitions. If a old version Windows was preinstalled by the manufacturer (often found on laptops), then in addition to three system partitions there will be another one, from 10 to 20 GB. It is highly undesirable to touch it, since it contains a system recovery image.
The system partitions themselves cannot be touched either. The only exception is full formatting drive. If you want to delete all information and repartition the disk, then you can demolish all partitions and not worry about anything.
At this stage, there are a lot of conditions in general. Consider all possible options:
- If you want to install Windows on the same partition as the previous version, format it or delete it and then let the installer automatically create the necessary sectors.
- If you skip deleting or formatting the partition, the previous version of the system will be saved in the Windows.old folder. Plus - you can quickly roll back to it if necessary. Minus - the loss of a huge amount of free space (up to 20 GB).
- If you choose to install another volume, then the computer will have two working systems - the previous version and the "ten".
- If the hard drive does not have important information, you can delete all partitions and repartition the drive. If the disk is new, then just create two volumes - for the system and user files. The rest of the partitions will be generated automatically by the installer.
There is no one right way - all methods work, it's just a matter of what you want. But if we talk about the very, very correct way to clean install, then it will consist in complete removal section with previous version. Then you need to select the unallocated area that appears and continue the installation. The installation wizard will create new section.
Fuh, the most difficult place is over, now you can rest. The installer will start copying and preparing files, installing components and updates. When this step is completed, the computer will restart. Further preparation and configuration will continue, during which the screen will turn black, freeze, the computer will restart several more times. Do nothing until the wizard prompts you to connect to the network.
If such an offer does not appear, it's okay - the installer simply did not find the necessary equipment on the computer. This is fraught with the need to look for drivers network card to establish an Internet connection, but the installation of Windows 10 is not affected in any way.
presetting
When all these preparations and reboots are completed, the installer will prompt you to configure the basic system settings.

The final step is setting the privacy settings. You can turn off all the switches, but it's better to carefully read each item and consider whether you need the "ten" to determine your location, recognize speech and do a bunch of other strange things.
First start
Installation is complete, pre-configuration too, before my eyes a beautiful clean working Windows table 10. What to do next:

There are many features in Windows 10 that can be disabled or enabled, but this does not apply to initial setup systems. "Ten" is modern enough to work "out of the box", without unnecessary movements on the part of the user. Different settings only allow you to make the system convenient for a particular person, but are not decisive for the operation of Windows.


