Hi friends! In today's article we are with you update the BIOS motherboard ASUS. It's a serious matter and refer to it, respectively. The process of updating the bios of any motherboard, although very simple, but any error in it will cost you expensive - to return the motherboard to life will have to be in the service center, since you probably do not have a special programmer. At the beginning of the article in a nutshell I will remind you what BIOS is.
How to update BIOS on the motherboard asus
Bios is the most important element of the computer - a firmware recorded on the chip, which in turn is on motherboard.
BIOS - provides basic OS access to computer hardware capabilities.. Simple words, Bios explains the operating system how to use a particular component of the computer.
Immediately after inclusion system Block, Bios.checks all devices (POST procedure) and if any component is faulty, thenthrough a special speaker, a signal is distributed through which you can identify a faulty device. E.if everything is fine,BIOS will start searching the OS bootloader on connected drives and finding it transmits the relay wand operating system.
Now about not very good. The BIOS update process itself lasts a couple of minutes, but if at this time, electricity will be disconnected in your house, and your computer is not connected to the source. uninterrupted power (UPS), that firmware will be broken and you just do not turn on the computer. For recovery will have to seek a special programmer (BIOS recovery is a separate article).
I must say that manufacturers have provided full seriousness of the question and at the dawn of the production of motherboards completely excluded the possibility of updating or re bIOS firmware, Only quite recently, Bios became equipped with a special program for its update. But still,the renewal of the bios of any motherboard is usually once in her life, and sometimes never.
The most important rule, if the work of the computer or laptop youit is quite suitable, I don't need to update anything, butif you still decidedupdate BIOS, then there must be weighty reasons. Here is some of them.
In your bios there are no new features. For example, no technology AHCI, and there is only outdated IDE, but you bought a new hard disk interfaceSATA III (6 Gb / s) or generally solid drive SSD.. Technology AHCI will allow your drive to use modern features and operating system on a new hard disk will work faster than in IDE. Wanted to the site of the manufacturer of your motherboard, you saw that a new update on the BIOS was published, you also learned that after updating your motherboard will supportAHCI! So, in this case, you can upgrade the BIOS without inflatable.
One of my friend disappeared on the computer sound, re installing Windows and drivers did not help, he decided that the built-in sound card And I bought a discrete, so the systemwork worked for 7 years, then on this computer I had to replace the processor, it required the BIOS update, after the update the built-in sound card earned.
Another case. The client constantly rebooted the computer and reinstalling operating system It did not help, they were replaced in the system, everything that could have changed only the motherboard and the processor. Decided to eventually establish new firmware On the BIOS and helped!
In the window that opens, I see the BIOS version - 2003
Now go to the official website of the manufacturer of our motherboard ASUSP8Z77-V Pro and choose "Drivers and utilities"
Select any operating system and reveal the "BIOS" item. We see that there is a update 2104 (a newer version than we have).
Click on the "Global" button And download the firmware.


Fresh firmware on BIOS (P8Z77-V-PRO-ASUS-2104.cap) downloaded in the archive. Remove it from the archive and copy toUSB-F. leshka. The firmware weighs 12 MB.

USB-F Leshka must be formatted in file System FAT32 and except for updating on the BIOS should not contain anything.

We reboot and enter BIOS.
In the initial BIOS window we see old version Firmware 2003.
Click "Additionally" And in more details of the BIOS.
(Click on the screenshot of the left mouse to increase)

We enter the "Service" tab

Choose the BIOS firmware utility - ASUS EZ FLASH 2 Or you may have ASUS EZ Flash 3.

In the ASUS EZ Flash 2 window we see our USB flash drive with firmware P8Z77-V-PRO-ASUS-2104.CAP.

Close on the file with the firmware with the left mouse button.

Click "OK"

Refresh BIOS?
Q.
QUESTION:
... such a problem - after not completed update, the BIOS does not light up the monitor, the systemist turns on, but the monitor does not show anything [...], no signals and squeaks [...], the battery removal does not help, tell me what to do ...
i this topic was born from additional questionspecified in the comments to the article in which a lot useful Soviets How to restore computer performance
A.
ANSWER:
To learn more in more detail how you updated the BIOS.
If incorrectly, with a failure of nutrition during the process, then it is probably damaged, which led to the complete inoperability of the motherboard.
However, on some motherboards there are so-called Dualbios.
or CrashFree BIOS. - This is exactly the options for protection against such failures.
In the first case, the damaged Bios is replaced by its duplicate, in the second - the manufacturer of the mat. Boards offer tool automatic recovery A damaged BIOS from a CD or flash drive.
All this can be found on the website of the manufacturer of the motherboard, the model of which you did not indicate.
If there is no such protection on your motherboard, then the only way out is to carry it in service center For flashing using a programmer (special device)
Q.
QUESTION:
The update conducted a program from the offsite asus, it seems asus utility, the new version of the BIOS is taken from there, the failure occurred during the update, I was mistaken that bugged fileBut everything is in order with him, I pumped it several times, and then after rebooting, this is such a problem. The model of my motherboard ASUS M5A 78L-M LX
A.
ANSWER:
Anyway, much is not clear ...
For some reason you do not specify the program name from the site asus,
and there is at least Two To update the BIOS.
If you used the one that applies under wiundowsand called ASUS Update. Such a version (what about you?), then for the firmware it was necessary to read the instructions in which it says (though, in English) that without having to flash BIOS should notand you also warn you that with incorrect firmware the motherboard may lose performance.
And it is necessary to put this firmware file to the folder with a meaningful and correct name (without Cyrillic and spaces) and not deep in the folder structure, that is, not in the "Download" folder lying in the depth of the subfolders of your profile, and best of all the disk root .
Well, others there are small subtleties ...
Tell me, can I sit behind the car's wheel without knowing it?
So why do you think that you can flash a BIOS without at least read, how is it done?
However, if it seems to you that the loss is small (the cost of the motherboard, of course, is less than the repair of the car with imperative driving), then you can continue
not knowing the broth, cross in the water!
I looked at the ASUS website - in principle, your motherboard can be saved, because It is equipped with a utility ASUS CrashFree BIOS.
See page 2.1.3 Manual (User Instructions), which you can download from here
http://www.asus.com/ru/motherboards/m5a78lm_lx/helpdesk_manual/
Here the instructions (though in English).
Q.
QUESTION:
thank you for your help, I had rendered, I used to update the BIOS through Windows, and everything went fine, but this time fail. Thanks again thanks for the help and could you transfer the article, and then with English is not so good and it's hard with my phone to translate
A.
ANSWER:
As I understand, you are forced to read my answers on the phone due to the inoperability of the computer ...
Sorry…
And you need a computer (some other), because It is necessary to start the fresh firmware from the ASUS website to start and copy it to the USB flash drive.
But everything in order ... first I translate the text of the instruction
[I add my useful comments in square brackets in blue text]
ASUS CrashFree BIOS 3 is a tool that allows you to restore automatic mode The BIOS file, if it is inoperable or damaged during the unsuccessful update. You can recover this file using a motherboard support DVD or a USB flash drive with a new BIOS file written on it.
ATTENTION [depicted index finger]
Before using the utility, rename the BIOS file on your USB flash drive:
Ma78lmlx.rom.
Download the latest BIOS file from ASUS website
[It would be necessary to write the first item, and not the second]
Restoration BIOS.
1.
Turn on your computer
[I think that it is first better to fulfill the second item]
2.
Insert the support mat into the DVD drive drive. Board or USB flash drive with a new BIOS file recorded on it, or a floppy disk with it if supported ...
3. The utility will automatically check the device for the BIOS file. [With the right name!] And in case of detection, it will start reading and rewriting a damaged file.
4. Turn off the system after completing flashing and then turn it on again.
ATTENTION [depicted exclamation mark]
- Do not turn off the power and do not press the reboot button. During the flashing process. These actions can lead to the impossibility of running in the future!
ATTENTION [depicted Pyryshko]
- Check out [After successful download]that you have default bIOS settings [Default] to ensure stable operation and compatibility ... This must be done in the menu section EXITgiving a team Load Setup Defaults.
In principle, everything is clear here [taking into account my comments in square brackets]…
I wish you success!
If you want to leave a comment,
scroll down the page below!
At the time of updating BIOS, absolutely any and even the most insignificant error may fail and undermine the stability of your motherboard. For example, if when updating the BIOS, I downloaded not the same version of the firmware or at the most inopportune moment, there was de-energized power supply, the motherboard may stop fully operational. Even happens when when updating the BIOS, you installed the latest firmware version, it can simply be in it damaged files Or mistakes and they will undoubtedly lead to not stable performance. That is why the so-called BIOS recovery is often required to return your system to a full-fledged life.
A little about the principle of operation BIOS BIOS or otherwise "Basic Input / Output System", works as a regular driver-wagon. He knows how to bind with each other hardware and software parts personal computerBy providing the operating system a full-fledged connection with all parts and components of the system unit. Also, BIOS is used to initialize, checking the full PC connection configuration configuration.
The motherboard has a specific chip with Flash memory, which is awarded to the authority to store BIOS, that's it, it is stitched. All the manufacturers of motherboards are in constant manner lay out on their official sites, updated BIOS firmware that each user can download so that they are free. You just need to know the motherboard model, the manufacturer and the type of BIOS itself. When firmware BIOS motherboard, you can improve compatibility with the work of the new equipment and to reduce the work and functionality of the board itself. However, it is not necessary to engage in frequent refressing motherboard if the old version of the BIOS does not give any failures. To this action, you should contact only in those moments when you reinstalled new processor Or noticed any non-stability in the operation of the system, which often arises the "screen of death". Next, I will give a few utilities with which you can restore the BIOS yourself.
What if the computer turns off for a long time?
BIOS Restoration through ASUS CrashFree BIOS
The famous ASUS company offers its users the restoration of BIOS, through the built-in utility, called - ASUS CrashFree BIOS. Which will allow the user, roll back the BIOS version, if any problems arise when installing a new one. This utility, easily read the firmware file, which can be recorded on the laser medium, flash drive or flash, and then, in automatic mode, installs it instead of an inoperable version. In order for you to fully utilize this utility and restore the BIOS, you need to download, and then cut into the carrier it is your old firmware version.
See also: How to reset the BIOS to the factory settings on the laptop
Also before installing new version, You can copy the old version or if you do not have such an opportunity, you can make a copy with an annalogical motherboard. After you found the version of your firmware, copy it together with the program to one medium. After that, insert our disk into the drive that does not work PC and when loading the system, the BIOS recovery starts immediately.
BIOS restore via ASUS BIOS UPDATER
In order to protect yourself from problems that may arise in the future, you can use another utility - ASUS BIOS UPDATER, which will help you back up the current version of the BIOS before the update operation. Format the USB Flash disk into the FAT 32 or FAT 16 file system, then download and save the latest BIOS firmware on it and utility asus BIOS UPDATER.
 Connect the USB flash drive to the free port of the computer and turn on the computer. While downloading a computer, click on the "F8" button to call the download menu in which you select "CD-ROM". Before these you need to install in the drive boot disk with Freedos operating system. After downloading the OS on the command prompt, select the drive letter, which is assigned a flash drive, for example "D:" and press "ENTER". After that, you can execute a command to create a file in which the old BIOS will be saved, - type and run "BUPDATER / O FILENAME.ROM", where the correct name of the firmware file must be specified. Here are not tricky ways and certain utilities, we were able to restore the BIOS independently. As they say - the eyes are afraid, and the hands do. If you have any questions or wishes for this article, leave them in our comments. In one of our articles, you can also learn about the BIOS, as well as how to go to the BIOS on Windows 10.
How to go to the BIOS in Windows 10?
Was the material for you useful? Leave your feedback or share in Soc. Networks:
Restoration BIOS ASUS K52D
BIOS recovery on Asus K52D laptops after unsuccessful firmwareas it turned out very not difficult task. It will take for this flash drive to 1-2GB (this is rare, yes), a laptop with a corrupted BIOS (and alive other), the Internet, patience.
Actually the preparatory stage is: 1) Flash format in FAT16 or just FAT 2) I download from office the latest available firmware (although ASUS and loves the last time to spread something dilapidated) 3) write the firmware on the flash drive in several copies with different names (I am I also did not understand what option did worked): amiboot.rom, amiboot.bin, k22d.bin, k22d.rom 4) Turn off the laptop from the outlet, pull out the battery, insert the flash drive, turn on the power and turn on the laptop by clicking before it Ctrl + S or Ctrl + Home or Win + B. Although again it reacted on all external features to all buttons equally - the inclusion of the diode on the flash drive.
5) If the indicators are burning, the flash drive is also active, then we try to wait. Nout must come around after a while. If it did not come to life, then try again the same thing, but with another key combination
100Reads.net
Entrance to the BIOS and the restoration of the OS on Lenovo laptops
Lenovo manufacturer laptops are gaining great popularity. As with any computer equipment Messages can periodically emerge. In this article, we will tell how to independently cope with such operations as installation of Windows, entrance to special parameters Computer and install WiFi driver.
Entrance to BIOS.
To enable the BIOS input, it is necessary to enable the device, and until the operating system starts uploading simultaneously to press the Fn and F2 keys. If the input is made correctly, we will see the BIOS interface in front of them, which contains information about version, devices, slim hardware settings.
Update
The first thing to do is make sure the laptop really needs to update the BIOS. To do this, you can enter the BIOS and see the current version. If so, then the easiest way to update BIOS is to download it. last version On the manufacturer's website of your device. As a rule, this is an ordinary installation file that needs to be launched before it closes all applications and turning off the antivirus. The program itself will perform the necessary actions, after which the computer will restart automatically.
Resuscitation
If you need to restore the system of your device, then help you will be able to special programcalled ONEKEY RESCUE SYSTEM. The fact is that the manufacturer Lenovo disturbed in advance that you can restore the system with minimal efforts.
Program providing fast recovery The default systems are installed almost on all laptops of this well-known manufacturer. Its action is that it is invisible to do a part of the disk space for the user and keeps there a copy of the OS in its factory version.
To recover, you must first turn off the computer, and then turn it on special buttonLocated on the panel. This KNOP is called Onekey Rescue and a curved arrow is drawn on it. The computer will automatically perform the required actions.
Installation of OS.
How to install operational windows system 7 on Lenovo? In order for installing Windows 7 to be successful, you must first log in and make some changes to the BIOS. It is necessary to install the system so that it is loaded from the CD or flash drive, depending on where they are setup files Windows 7. To do this, in the settings are looking for an item called First Boot Device. In this meaning, we need to select a CD ROM if the installation is carried out from a CD or USB if the flash drive is performed. If everything is done correctly, then installing Windows 7 after rebooting.
Configure Internet
In installing WiFi driver on Lenovo laptops there is nothing complicated. First you need to download the driver for your computer. To do this visit the official website and find the menu that allows you to install WiFi Driver. Drive the model number of your laptop in order to get the required driver. Download and run it. The installation program will install the distribution independently.
xreco.ru.
How to reflash the BIOS laptop
The BIOS update is very useful, but at the same time an extremely dangerous procedure. Useful in that after the release of its products, manufacturers continue to improve it based on reviews of service centers, their research. Over time, error data appear as well as their corrections. So, it is precisely solutions to the problems of hardware level, additional options in the settings appear in the new versions of the BIOS control firmware. There is a completeness of this procedure in complete inability after unsuccessful flashing BIOS. In most such cases, the motherboard or laptop is restored only in the service center. And sometimes such a recovery procedure is impossible or related to the dismantling of chips from the motherboard, and its further firmware in a special programmer. And all this costs money.Attention! BIOS flashing is associated with risk losing equipment performance. Reflash it only as a last resort, and with sufficient experience! If you decide to reflash your BIOS for the sake of a fashion show - give up this!
So, you decided to reflash the BIOS on your laptop. In this article, we will try to help you. Associate safe and reliable is the way of flashing from under DOS with using USB. Flashki. The BIOS overlash principle from under the DOS is as follows. You must copy the file of the new BIOS version, as well as special utility Flashing (Flasher) on the boot USB device. Reload the laptop, boot from the flash drive. Using the command line, run the flash drive program and act further instructions. What you need to know before firmware BIOS laptop:
1. Download the latest BIOS version follows only from the official website of the laptop manufacturer. Do not download Beta version. Download follows the last proven and working version.
2. The laptop must be turned on through the power supply, and not work from the battery. Best option There will be an inclusion of a laptop to a power grid through an uninterruptible power supply (UPS).
3. Used USB flash drive must be reliable and verified in operation. If you noticed in work USB media Any errors related to data loss, in no way use it.
4. Never disconnect the power from the laptop during the BIOS update process. Also never press any keys and laptop buttons at this time.
Consider the BIOS update process on the example laptop dell. Inspirion 1525.
1. Create blood USB USB flash drive. Read the guide on how quickly and reliably do it. If there is no standard USB USB flash drive, but your laptop supports download from the built-in card reader, then use it. To do this, you need to make a memory card with a camera or phone, after saving data from it.
2. Download a fresh version of the BIOS from the official laptop site. It is best to use a serial number from stickers on the bottom of the laptop housing. Many manufacturers provide on their website a service to search for the necessary files to download serial number. Our laptop has a service tag. Entering it on the manufacturer's website, we find the BIOS file. At the time of writing this article, this version A17 dated December 2, 2009. Moreover, all that we need is already enclosed in one file with the extension * .exe. So, from the official site Dell download the file 1525_a17.exe and copy it to our blood flash drive. Be sure to remember or better write the name of the downloaded file!
3. Loading from USB flash drives. To do this, set the download from USB devices In the bios laptop itself. Or use special keys while turning on the laptop to call the download device selection menu. In the DELL laptops, this is the F12 function key. After downloading, we will see the command line DOS
4. Enter the command to start the BIOS flashing program (File Name):
5. Run the programmer shell from Dell

The program itself will check the BIOS file on errors and on the correspondence of its laptop model. If the verification procedure has passed successfully, then to continue, press any button on the keyboard.
If you are ready to start the BIOS flashing process, press the "Y" key

A laptop BIOS update process starts

and checking the result of updating BIOS

Wait for the update process to end! Do not turn off the laptop and do not press any keys at this time! After completing the BIOS flashing and successful, its laptop will be overloaded

When a laptop goes into a reboot, it can turn off and within a few seconds not to be turned on. This is normal! Just wait for the laptop independent inclusion. After the firmware of the new version of the BIOS, go to it and set all the settings you need. Transfers on different models of laptops and from other manufacturers, of course, may differ. Usually, with BIOS files, the instructions for flashing it comes. Be sure to read it. And in general, all actions are very similar to each other. The main thing is not in a hurry and everything is thoughtful! If after updating the BIOS you have a laptop stopped turning on, or displays an error - do not panic. Save the USB flash drive with the BIOS file, which was used for flashing. In many modern laptops There is an emergency recovery system original version BIOS. This is just for such cases. Just run this process of rollback firmware. If you do not know what to do in this case - contact your nearest service center. Bring a bios file that you have been used. Payable, but you will help you there. The fact of flashing itself is not considered a violation of the manufacturer's warranty. But in the event of an unsuccessful result, you can lose guarantees! The administration of our resource and the author himself is not responsible for any damage resulting from the unsuccessful BIOS update produced by you independently! This is only a description of the update process, and not an unambiguous guide to action!
About Three of the riddle: worth the hive buzzing. But smoke from the pipe does not go, because it is not a native factory, but the computer on which the BIOS is damaged. And he bursts because only it is now capable. Without bios, he is just a bunch of lifeless iron. Is it worth worrying because of this? Of course not. After all, now you have a great bedside table!
System block as a bedside table? Well, I do not! We know how to make it work. Today we will talk how to restore the BIOS if he flew.
What leads to the BIOS firmware
B iOS and his "descendant" UEFI, which are stitched with modern motherboards, are special computer programs necessary for initial setting and managing the PC devices until the operating system starts. They are stored in special flash memory chips on the motherboard, one of which is shown in the picture above. It seems to be a good place of storage, reliable, but sometimes Bios becomes uncomfortable there and he runs away. More precisely, it is damaged and ceases to fulfill its tasks.
The reasons for the damage of the BIOS is not too much, in some cases they are obvious, in others - no. Here is the list of the most common:
- During the power supply of the computer, the power supply was shutdown.
- The firmware program (flash drive) incorrectly interacts with the firmware or flash memory microcircuit.
- The BIOS version is stitched, not suitable for this motherboard. Yes, .
- If the update is carried out from under the operating system - a system failure or program interference, for example, an antivirus blocking.
- Incorrect user actions, such as a reboot of the computer until the update is completed.
- Flash memory microcircuit failures.
- Hidden BIOS firmware errors. Sometimes spontaneous "towers", occurring without visible causes.
- Electrical problems of motherboard.
How do BIOS damage manifest
In most cases, the BIOS firmware is partially damaged, so the symptoms of the failure can be different:- When you press the PC power, only the cooler is turned on, which immediately begins to rotate at maximum speed. Sometimes the LED indicators on the housing and keyboard light up.
- After one or a few seconds after switching on, a cyclic reboot begins. Externally, this is manifested by a cycle of promotion and stops of a cooler, which are repeated while power is supplied.
- When you turn on the power indicator lights up, the cooler does not spin.
- The computer does not submit any signs of life. This happens when damaged BOOT BLOCK - BIOS initial loader. This is the hardest case.
The image on the screen is absent. Even the manufacturer's screensaver does not appear.

There are other forms of BIOS damage, more precisely, its area that stores the configuration of the ME controller (part of the chipset) on boards operating with Intel processors - the so-called ME region. In case of failures in this area, a computer or laptop can:
- It is incorrectly loaded or not included at all.
- Turn off or restart at equal intervals.
- It is incorrect to adjust the speed of rotation of the cooler, for example, to turn it on high revs regardless of the load.
The elimination of such failures is to read the BIOS dump, replacing the ME region to clean and re-firmware using the programmer. Since the repairmen usually do this, and not the owners of computers, we will not stop at this. It is better to deal with what can be done at home without special equipment and risk to finally send your Iron Pet in the kingdom of eternity.
BIOS recovery without a programmer is possible only when the initial bootloader is saved. It is possible to determine whether it has been preserved or not, sometimes it is possible for indirect features: flashing the screen illumination, sound signals from the system speaker, the motherboard reaction to switching on without RAM (sound or flashing indicators), etc. When the initial boot loader is safe, the first time of work Computer pass normally, failure manifests itself a little later.
How to return the performance of the motherboard with the flying BIOS
ASUS.
M Feet Desktop Motherboard Made ASUS Support Technology USB FlashBackwhich is designed to quickly update and restore the BIOS in case of failure. For this, nothing needs to be required, except for a USB flash drive to a capacity of up to 4-16 GB and the BIOS file itself, which you need to download from the manufacturer's site from the section about your Mama model.After downloading, the firmware needs to be renamed. For example, the file "SABERTOOTH X79" (model name) is renamed to "saberx79.rom", the file "SABERTOOTH Z77" - in "z77st.cap". Information should be called the firmware file for your model, most likely there is on the ASUS website, but if you do not find it, check on the forums or in support.
Next, save the renamed BIOS on the flash drive formatted in FAT32, and connect it to uSB port with notice " FlashBack" or " Rog Connect." The computer before it is desirable to turn off, it will increase the chance of successful recovery.

After connecting the flash drive, turn on the PC and click on the rear panel button " Bios." Hold it down for about 3 seconds until the light indicator flashes on the board. The flashing indicates that the file was successfully considered and stitched into memory. When the firmware process is completed, the indicator goes out.
If your fee from the budget segment is not too new, that is, does not support the USB Flashback, most likely you can restore it with another way. If the computer is equipped with a floppy drive or optical drive, write down the renamed bios file in the root directory of the pure floppy disk or CD, place it in the drive, turn off, and then turn on the PC again. The firmware will be completed when the actuator indicator goes out. If there is no drive, use the USB flash drive.
Gigabyte
Gigabyte cards with Dual (double) Bios fails rarely occur, since in case of damage to the firmware in the main microcircuit ( M.aIN_ Bios.) Dump from the backup is copied to it ( B.ackup_ Bios.). While the main flash memory is good and contains a firmware, even damaged, the fee retains performance.
Problems with the launch of the board with Dual_BIOS are possible in the following cases:
- The main microcircuit is absent or failed.
- Microcode in the main microcircuit completely erased.
- The contents of both microcircuits are damaged.
Some "moms" Gigabyte are able to boot from backup flash memory and use it as the main one. Another group of boards of this manufacturer uses a dedicated area on the hard disk as a BIOS backup. It is a less reliable option, but also better than nothing.
BIOS GIGABYTE recovery from backup is usually automatically executed, but if this does not happen, try turning off the computer from the outlet, wait a bit and turn it on.
MSI and others
Moother Micro Star Motherboards is used by the firmware restoration technology, very similar to Asus'ovskaya - using a flash drive, floppy disk or a CD. Copy the BIOS on a clean media, connect it to the PC, click the off button 4 seconds, clamp a combination on the keyboard leftCtrl +.HOME. (or Alt +.Ctrl +.HOME.) And, without releasing the keys, turn on the computer. On the beginning of the firmware process, you can judge the flash drive indicator or drive. BIOS on MSI card. Right JSPI1 port for firmware on programmer
 On maternal mSI boards And some other brands, which are more than 8-10 years old, BIOS flashing is made from the floppy disk. Instructions for Award and Ami Bios differ slightly.
To restore AMI BIOS, do the following:
- Rename the BIOS file downloaded from the manufacturer's website to amiboot.rom.
- Transfer it to the root of a clean floppy disk. Install the floppy disk to the PC turned off.
- Press the left Ctrl + Home keyboard and turn on the computer.
For recovery AWARD BIOS:
- Place the Firmware and BIOS files on the diskette (usually downloaded in one archive).
- Create a text document on a diskette, which indicates the name of the bios file with the BIN extension. Rename the document in AUTOEXEC.BAT.
- Further actions are similar to the above.
By the way, some manufacturers of the motherboard are postponed on their BIOS sites only in EXE format - in the "one bottle" with a firmware program for updating from under Windows. Sometimes such a file can be unpaved as an archive, but users are often unclear that it is from its contents that is firmware. For such problems there is no universal solution. In order not to exacerbate the problem, it is better to consult on profile forums or in the technical support of the manufacturer.

On some boards before the restoration of the BIOS, you also need to extract the real-time clock battery (RTC) or rearrange (remove) the CMOS cleaning jumper. These moments are important to find out before the procedure.
BIOS recovery features on laptops
N and laptops, as well as on Gigabyte boards, BIOS is also often stored in two flash memory chips. But this is not Dual and there is no backup copies. Both chips contain different parts of the firmware or in one is the main BIOS, and in the other - the program of the multi-protroller. So that the device does not turn on, it is enough to damage the microcode at least in one of them.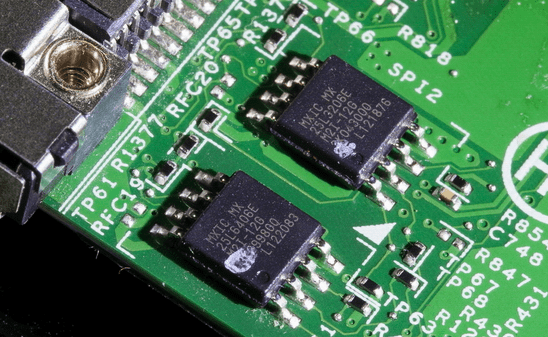
The method of restoring the flying BIOS on laptops is about the same as on desktops. The firmware file downloaded from the manufacturer and the firmware program (the latter is not always needed) is placed on a clean, formatted in FAT32 / 16 USB flash drive, connect it to a de-energized machine (just turn off the laptop is sometimes not enough, you need to disconnect the power supply and remove the battery), insert the charged The battery in place includes the machine and clamp the key combination. On different laptops, various keyboard combinations are used for this, for example:
- Ctrl (left or both) + Home
- Windows + B (this and other letters are given in Latin layout)
- Windows + F.
- Windows + M.
- Windows + ESC
- Fn + B.
- Fn + F.
- Fn + M.
- Fn + ESC.
The main work consists in unpacking and renaming bios files. One rule here, again, no. In most cases, get the firmware comes from EXE-Shnikov, but! Many manufacturers include the BIOS programs for different revisions of one platform or a whole series of platforms, and choose from them the only the desired file. It happens very difficult. To not be mistaken, read the instructions for the firmware of your model and revision of the platform on profile forums. And do not hesitate to ask questions.
I intentionally do not at the article by the instructions for restoring the BIOS by firmware on the programmer with feeding and without, closing various contacts, hot replacement of removable flash memory, etc., since all these methods are unsafe and require certain knowledge. However, among readers, you will probably have Those who did something similar on their PC and received good results. It will be great if you describe your actions in the comments in detail. Stories about negative experience are also welcome to other readers thanks to you able to avoid mistakes. In the comments, be sure to give the name of the model and the revision of your motherboard, as well as the BIOS version with which you worked.The BIOS was created in 1975, its abbreviation is decrypted as the basic I / O system, and the main function is the launch of the operating system and the hardware components of the PC. It also loads power management and temperature functions. The firmware performs identification, testing and launching the main components of the system, such as hDD, video card and keyboard.
Most modern computers Store BIOS at the Motherboard ROM chip. If he flew, then restore the BIOS, as a rule, will help the definition of the model of the motherboard. From this will depend on the restart of the firmware.
BIOS recovery is a simple process that can be done on a PC if a serious problem arises with it and you need to return the parameters in factory condition. Before restoring the BIOS, perform the act of zeroing the motherboard, the process is called Clear CMOS. It provides such actions:
- cleaning the parameters stored in the BIOS ROM;
- returning PC to the neutral state from which it starts;
- elimination of failures when you first start the PC after the assembly or after the update in the BIOS.
The main reasons for performing the firmware recovery:
- The motherboard does not start after setting the parameters specific to the BIOS.
- One of the most frequent reasons - manual setting RAM on motherboard. If a set of settings from a plurality of settings are erroneously entered, the fee will fail, and the PC will not start.
- Another of the most frequent reasons - overclocking. If the user enhances the frequency, with an insufficient VCore for the processor, it is very likely that the motherboard will not boot.
In order to reboot, you need the key to be dialing on the keyboard. It is different for different models Computer and usually specified on the screen when starting a PC, for a short period of time. Before restoring the BIOS, which flew, you need to know the key keys.
They can be: F1, F2, F10, F11, F12, ESC or any other combination of "Control + Alt + Escape". If the user does not know the recovery key and does not see the display on the screen, then the request on the phrase "Computer Brand + Log in BIOS" should suggest a solution. The same answer is in the PC manual. After the correct set of keys, the user will see the BIOS setup screen.

If bios flew, and how to restore on PC it, the user does not know, experts recommend to execute Clear CMOS. To do this, the first thing to find on the surface of the motherboard is three grouped contacts whose closeness are the phrases Clear CMOS or CLR_CMOS. It will be easier for the user to find the mode if he first familiarize himself with the motherboard manual. At these conclusions there will be a jumper, closing contact between them. It should also be taken into account that there are those that have only two contacts, without any jumper.
The mode of execution algorithm is as follows:
- Turn off the computer.
- Find the battery on the motherboard. This is a round battery similar to an element from wrist electronic hours located on the surface of the board.
- Carefully remove it from the outlet, where it is.
- Before restoring the BIOS, which flew, change the position of the jumper, which closes the chain between two contacts. If the contacts 1 and 2 are initially closed, then the position is set so that contacts 2 and 3 are closed.
- Find conductive metal surface And manually closed the chain between two contacts. Flat head screwdriver is an excellent choice for these purposes.
- After completing this step, the chain is closed at least 30 seconds.
- After this time, the same actions are performed, but in reverse order.
- If everything passed correctly, the system will start with the default BIOS settings.

If bios flew to a PC, and how to restore, the user does not know and cannot guarantee the safety of the machine, then it is better to perform full reset Firmware on a laptop.
The algorithm of operations is as follows:
- Include the computer and study the BIOS screensaver, which will appear at the very beginning and tell what function key (F2 / F8) You need to click to access the configuration.
- Press and hold this key until the setup screen appears.
- If the possibility of timely pressing is missing, the PC will continue to boot from Win in normal mode, and it will be necessary to restart with repetition.
- After successfully logging into the BIOS settings, use the functions and scroll keys to move through the menu.
- Find the "Reset to the factory settings" option.
- If "Windows" flashed, restore the BIOS, as a rule, will help execute instructions on the screen to go to the original configuration.
- Confirm your choice and close the screen.
- Since the BIOS is in the ROM, it must have a permanent power source to store all the changes that are made to it each time the computer is disconnected from the network. alternating current.
- If there is no way to return to the factory settings, turn off the power from the BIOS, it returns to its initial configuration. The process consists of disconnecting a small motherboard battery. In many laptops, the BIOS battery is easily accessible and is located at the bottom of the device.
- It does not matter how the BIOS flew on the computer, to restore it correctly will help update the SMOS motherboard. To do this, you will need to remove the battery and, touching the metal item, ground it.
- Next, remove all the screws that hold the battery cover.
- Find the BIOS battery in the form of a small lithium design, similar to the battery from the clock, remove it, trying not to damage the neighboring chains. Expect for a minute so that it is discharged, and insert into place. Next repeat the startup procedure first.

The main problem when updating the BIOS in Windows 10 may occur when you try to reboot. Sometimes the user cannot perform the opening of the BIOS regardless of how much it clicks on the key. This is due to the fact that Windows does not restart the PC by default.
If "Windows 10" flew, how to restore the BIOS through the use of key keys, the following algorithm will prompt:
- In order to be able to enter the BIOS, the first thing to do is start loading a PC.
- To turn off the computer, click "Alt + F4" on the desktop or use the "Start" menu. It should be borne in mind if technology is used in the laptop " quickly launch"It is possible that the Normal Turning off the BIOS will not begin. You must perform a number of pre-steps.
- First click on the Start menu, and then select "Settings".
- IN windows configurations Transfer K. last section Using "Update and Security", where similar configurations of recovery and solving problems are located.
- Click on the Restore tab on the left pane, and then the Restart Now button in the "Advanced Start" section.
- A menu will appear with a blue background, which is used to solve problems with Windows, and one option is to enter the BIOS.
If you flew "Windows 10", how to restore an operating system through the BIOS, users will prompt special tabs to "solve problems" and " Extra options».

Maternal gigabyte boards include functionality called "double BIOS", which allows you in the event of a BIOS gigabyte update or power loss during the process to restore defective for reserve copy. It does not matter how the bios flew, to restore on the Gigabyte Dual work will be possible only using the update.
Updating BIOS gigabytes from Windows can be performed in two ways:
- after uploading the BIOS from the motherboard;
- refresh the BIOS from the Gigabyte server so that the program searches the latest version.
If necessary, using the previous one bios downloads, for example, when there is no Internet on a PC, load the aforementioned program and the BIOS version that is needed. Recommended last to hardware It worked with the highest possible productivity and stability.
You can make a backup that is on this momentTo do this, click the Save Current BIOS tab tab and indicate the route to save the file. Once the user has everything you need, it starts upgrading by clicking on the "Update BIOS from File" tab, the program will ask for a previously downloaded file.
Q-Flash application
You can update from your own bios gigabyte, with an application called Q-Flash built into it. Before starting, the USB format in FAT32 and unpack the BIOS inside. Insert into port USB, before entering the PC. The utility offers 3 options: the first one that sets the "update the BIOS from the disk", the second is to "save the BIOS on the disk", and the third is "Output Q-" to exit the application.
After the bios flew, to restore the step-by-step functionality of the operating system will help the use of a special utility.
The algorithm of action looks like this:
- Choose a USB that contains the BIOS file.
- Select the BIOS version for the input and start the update process.
- Check the new file within the USB.
- The assistant asks, to the version that is in USB, confirm "yes", and the process begins.
- Make sure that the process is fulfilled correctly.
- Perform a reboot, included in the BIOS and check that the version is changed.
This process allows you to update a gigabyte BIOS to a higher or lower version. In addition, with double bIOS system Gigabyte can be calm before possible failures, because they start the system from her backup.

You can restore the system without entering Windows 7. It often happens so that after WINDOVS 7, to restore the system through the BIOS - the only way to resume the performance of PCs. The procedure will depend on the specific equipment installed on the machine. If there is a CD / DVD player on the device, remove all the discs from it. Then turn off the computer and external USB drives.
Recovery Algorithm:
- Include PCs and quickly press the F8 key on the keyboard. Win logo should not be displayed. It is best to click F8 several times in a row, at the time of starting the PC.
- When the process goes well, a screen appears with a black background and white letters. Enable the advanced OS boot options using the arrow keys to select the one that sets the safe mode with command line, and confirm Enter on the keyboard to enter it.
- After downloading a series of files, the MS-DOS console window opens with a black background and white letters. We prescribe a command: rstrui.exe and press the Enter on the keyboard.
- A recovery assistant is launched, the user must fulfill all its instructions.

Surftec reinstalls all Lenovo systems to standard windows version 7 Professional, while new systems are usually installed with Windows 8 or 10.
Windows 8 supports a newer, faster BIOS - UEFI, which provides additional safety. For windows startup 7 This mode must be disconnected. For a situation where the BIOS flew on the Lenovo laptop, to restore its performance will help establish the causes of emergency situations.
If the user reset the BIOS and the default functions were included, then Windows 7 is most likely not to start automatically. There may be other problems in the system, for example, non-working wireless communication or old equipment drivers, which will also prevent the normal recovery process.
- Close the windows and make sure that the laptop is completely turned off, for this you enter the "Start" menu and choose "Completing work".
- Press the power button, and then the F1 key every two seconds until the BIOS welcome screen appears.
- BIOS navigation is performed using the arrow keys on the keyboard. The left and right keys move between the upper headers of the BIOS "MAIN", "CONFIG", "DATE \u200b\u200b/ TIME", "SECURITY", "STARTUP" and "RESTART".
- The up and down arrows allow you to move on the available parameters on each page.
- Input or return key will open the option with additional settings, Then use the "up" and "down" arrows to highlight the desired option, and the return key and input.
- Use the right key with the arrow on the keyboard to select the Restart screen.
- Using the down arrow key, select the OS OPTIMIZED DEFAULTS option.
- Press the return key or input, a pop-up window will appear.
- Use the up and down arrow keys "disabled". The selected parameter is selected in bold and white text.
- Using the up arrow once to select "Load Setup Defaults" and press the "Return" or "Enter" key.
- It is convinced that "yes" is selected using the arrow keys to the left and right, and then press the "Enter" key. The selected option is highlighted by a black background.
- Press the F10 key and with the arrow keys to the left and right are chosen "Yes".
- Press the return key or input to select "Yes", now the machine will save the new settings and reboots.
Booting by ami biostar
If bios flew, how to restore the bioster from the floppy diskette, can be clarified in the technical documentation for the motherboard. But since this scheme is used for old modifications of computers or PCs operating in server mode, perhaps the instruction is lost, then you have to search the topic on the Internet.
This setting is the standard AMIBIOS8 kernel function, is enabled by default and allows the user to restore the BIOS image using a floppy disk, without the need to use additional utilities. Before restoring the bios, if the bios flew, perform the following instructions. Instructions for manually starting the restoration of the boot unit from a floppy disk:
- Insert a floppy disk with a new BIOS file in the root directory into a drive A. In most cases, the file should be called amiboot.rom. However, this file name may differ from one product to another. The user can clarify this information in the technical documentation of the motherboard.
- Press and hold the keys when you turn on the power on until the flexible disc drive access indicator lights up, which may take a few seconds.
- The keys and AMIBIOS release a series of audio codes that indicate that the BIOS system ROM file is updated.
- After downloading the file, the execution stroke dialog box will be displayed on the screen.
- After successfully programming Flash ROM, the computer will reboot.
- The user should not interrupt the BIOS firmware process until it is completely complete.
- One of the functions of the AMI BIOS boot unit is a code for checking the integrity of the BIOS image in flash memory.
- If the BIOS image is detected in the boot block code, the restoration of the boot unit will automatically begin. This condition will be indicated using a series of audio codes.

BIOS Recovery Boot Block is a special boot unit BIOS, with minimal initialization. The function includes to restore the firmware to successfully complete after the BIOS reprogram failure failure. The system provides hot keys "FN + ESC", including the process of restoring the operating system during the BIOS POST. To use the function, use the AC adapter and the battery. When you turn on the BIOS function, makes you enter a special block called Boot Block.
Actions to restore with the use of a USB flash drive should be taken:
- Pre-prepare CRISIS USB key. It is created by running the CRISIS Disk in another system with Windows "WINDOVS".
- Connect a USB disk.
- Run the WinCris.exe program to create uSB disk Crisis.
- Press "Start" to start the process.
- Select the "Fast Formatting" option for the disk and press "Start".
- Follow the instructions on the screen to create a disc.
- Copy the BIOS kayf0x64.fd file in the root directory of the USB flash drive.
- Attach a USB drive to the USB port.
- Press the "FN + ESC" buttons, include power.
- The power button flashes orange once.
- Press the power button to start the "crisis" system mode.
- After completing CRISIS, the system restarts with a working BIOS.
Acer Reset Options
If the user has forgotten the BIOS password for laptop Acer.He will need to access BIOS to make some hardware changes to a computer that can be protected by a password. Reset it before entering Acer easily.
Procedure for resetting password through Acer Esettings such:
- Install on Acer Empowering Technology.
- Open the "Start" menu and choose "All Programs"\u003e "Empowering Technology"\u003e "Management with Esettings".
- Press " Passwords bios.»On the screen footer.
- Using the "Create" or "Delete" options restore control.
- Reset Password Acer Laptop.
Removing it using a CMOS battery is a common way. This method involves the use of computer equipment, so provided for users who know the PC device.
It does not matter how the bios flew on the Acer laptop, restore the laptop operation using the firmware method:
- Disconnect power cord from PC.
- Remove the computer housing with a screwdriver and find flat, round and metal CMOS battery.
- Learn how latches hold it to correctly remove the CMOS battery.
- After removal, 30-40 s is expected, battery insert into place and restart PCs.
- If everything went well, the password should no longer be.
Thus, the BIOS is the basic I / O system, the irreplaceable function of the operating system of hardware components, from the proper operation of which depends the reliability of the computer. He does not like frequent interference in his settings, but nevertheless the competent user needs to know how to work properly with the system for any extreme cases.


